

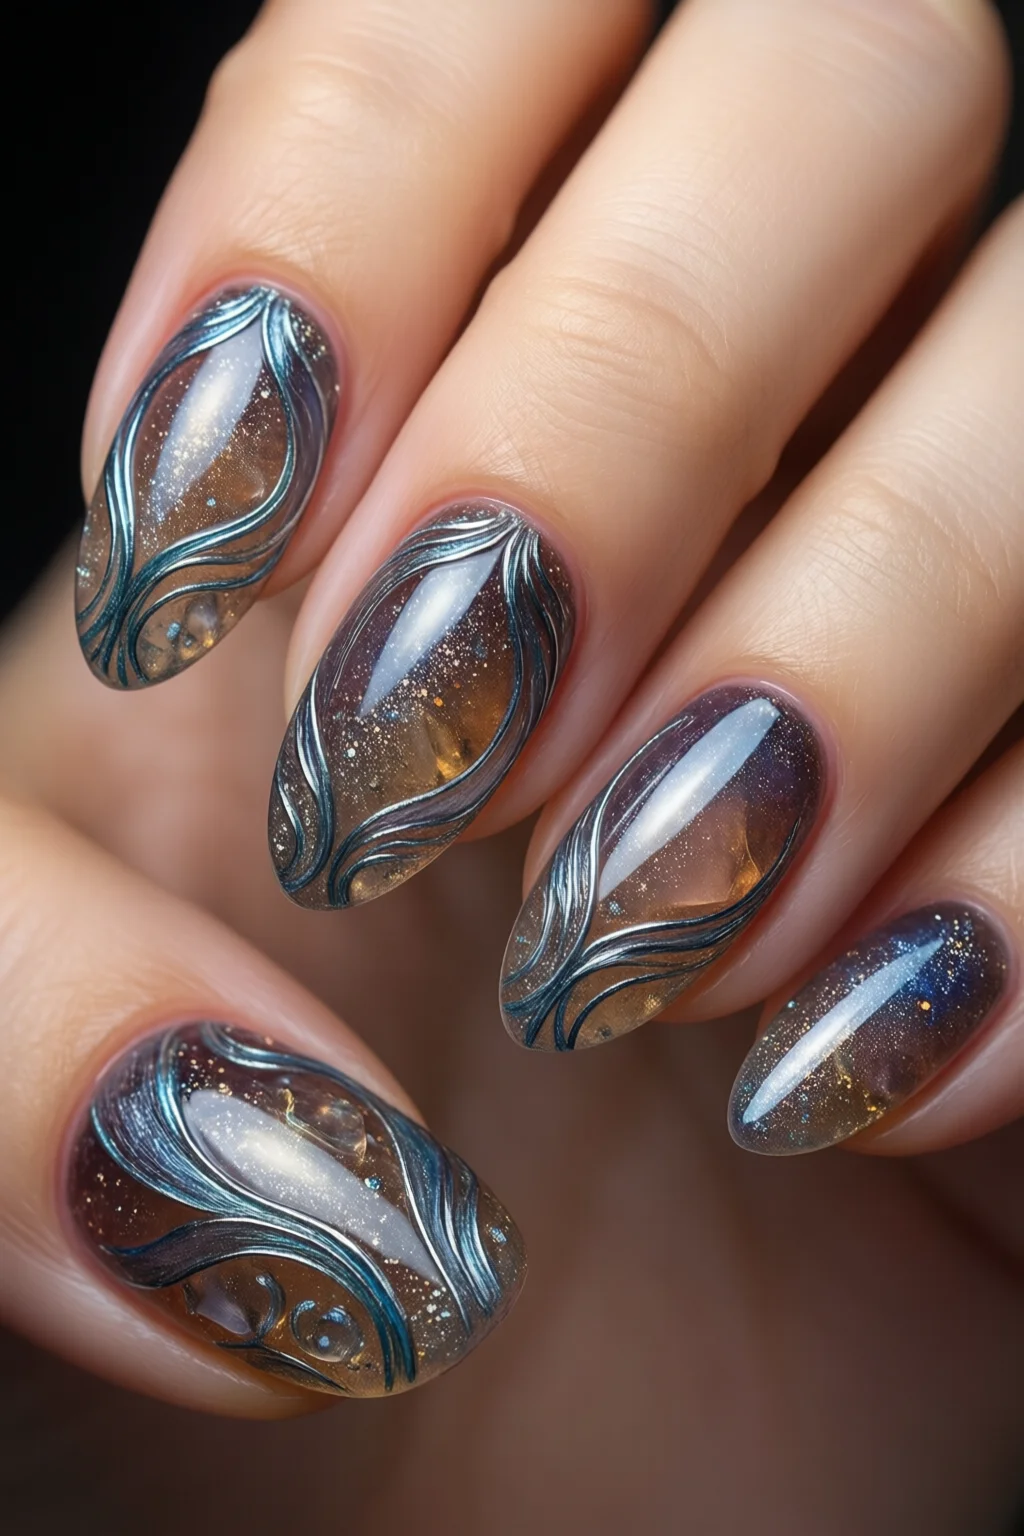
Ever wondered why some Instagram feeds sparkle with that almost liquid, candy‑colored shine while other jelly‑style manicures look flat or cloudy?
In This Article
What You Will Need (Before You Start)
- Base Gel – I swear by the CND Shellac Base Gel ($28 / 30 ml). It cures in 30 seconds on a 405 nm lamp.
- Translucent Jelly Gel Polish – Pick a brand that offers true translucency. My go‑to is Gelish Jelly Gel in “Crystal Pink” ($22 / 15 ml). For a budget option, Sally Hansen “Gel‑It” Jelly is $12 / 12 ml.
- Colored Gel Polish – Choose a hue that will show through the jelly. I like OPI GelColor “Mauve” ($19 / 15 ml).
- Gel Top Coat – A high‑gloss finish is essential. I use Modelones Top Gel “Glossy Finish” ($15 / 15 ml).
- Nail Buffer (100/180 grit) – $5 for a pack of 4.
- Lint‑free Wipes – $4 for a 100‑piece pack.
- Isopropyl Alcohol (70%) – 1 cup for cleaning the surface.
- UV/LED Lamp – 48 W LED lamp (≈$45) cures at 10 seconds for thin layers.
- Cuticle Oil – 10 ml bottle of Mia Secret Nail Oil ($9).
Step 1: Prep Your Natural Nails
Start with clean, dry nails. Push back cuticles with a wooden pusher, then file to your desired shape—typically a soft almond for a jelly look. Lightly buff the surface (100‑grit) to remove shine; this helps the base gel adhere. Wipe each nail with an isopropyl‑alcohol lint‑free wipe to eliminate dust. In my experience, skipping this step leads to premature lifting, especially when the jelly layer is thin.
Step 2: Create the Jelly Base
Apply a thin coat of the CND Shellac Base Gel. Cure for 30 seconds under the LED lamp. While the base is still tacky, dip a clean brush into the translucent jelly gel—don’t overload the brush; a “pea‑sized” amount per nail is enough. Sweep the gel across the nail in one smooth motion, creating a glossy, slightly viscous film. Cure for 10 seconds. If you want a deeper, more “syrupy” effect, repeat the jelly layer once more, curing each layer separately. The key is to keep each layer under 0.1 mm thick; otherwise you’ll end up with a bubble‑prone surface.
Step 3: Add Color and Depth
Now comes the fun part. Choose a colored gel that contrasts yet complements the jelly hue. Using a fine brush, draw a thin line or a subtle gradient on the tip of each nail—think of it as painting a sunrise through a glass. For a full‑coverage look, apply a translucent wash of color over the entire nail, then cure for another 10 seconds. I’ve found that layering a 30‑second “gloss” of the colored gel after the jelly gives the nail a three‑dimensional depth that mimics real candy.
Step 4: Seal with a High‑Gloss Top Coat
Seal the masterpiece with a generous coat of Modelones Top Gel. This top coat contains silicone polymers that lock in the jelly’s translucency while adding a mirror‑like shine. Cure for 30 seconds. After curing, wipe the nails with a lint‑free pad soaked in isopropyl alcohol to remove any tacky residue. The result should look like a droplet of liquid glass—smooth, reflective, and slightly “jelly‑like” when you tilt your hand.
Step 5: Finish and Care
Apply a drop of cuticle oil to each nail and massage it in. This step prevents the cuticles from drying out and adds a professional finish. Your jelly nails are now ready for a week of wear; I’ve seen them stay glossy for up to 14 days without chipping when I avoid harsh detergents. For extra durability, re‑apply a thin layer of top coat after 5‑7 days.
Common Mistakes to Avoid
- Over‑loading the brush. Too much jelly gel creates a thick layer that traps air, leading to bubbles. One mistake I see often is using a “pallet‑ful” of gel instead of a pea‑sized dab.
- Skipping the base gel. The base creates chemical adhesion; without it, jelly nails lift within 2‑3 days.
- Insufficient curing. Jelly gels need a full 10‑second cure per layer; cutting the time short results in a tacky surface that smudges.
- Using low‑quality translucent polish. Cheap “jelly” polishes often contain pigments that dull the effect. Stick with reputable brands like Gelish or OPI.
- Not cleaning the nail after top coat. The sticky layer left on the surface can attract dust and cause a dull finish.
Troubleshooting & Tips for Best Results
Cloudy or Milky Appearance: This usually means the jelly layer is too thick or the lamp’s wattage is insufficient. Thin the layer and increase cure time by 5 seconds.
Air Bubbles: Tap the nail gently after applying the jelly gel; bubbles rise to the surface and pop. If they remain, lightly rehearse the area with a warm tip and recure.
Peeling at the Cuticle: Ensure you’ve pushed back cuticles fully and that the nail surface is oil‑free before applying the base. A quick swipe with a 70% isopropyl wipe does the trick.
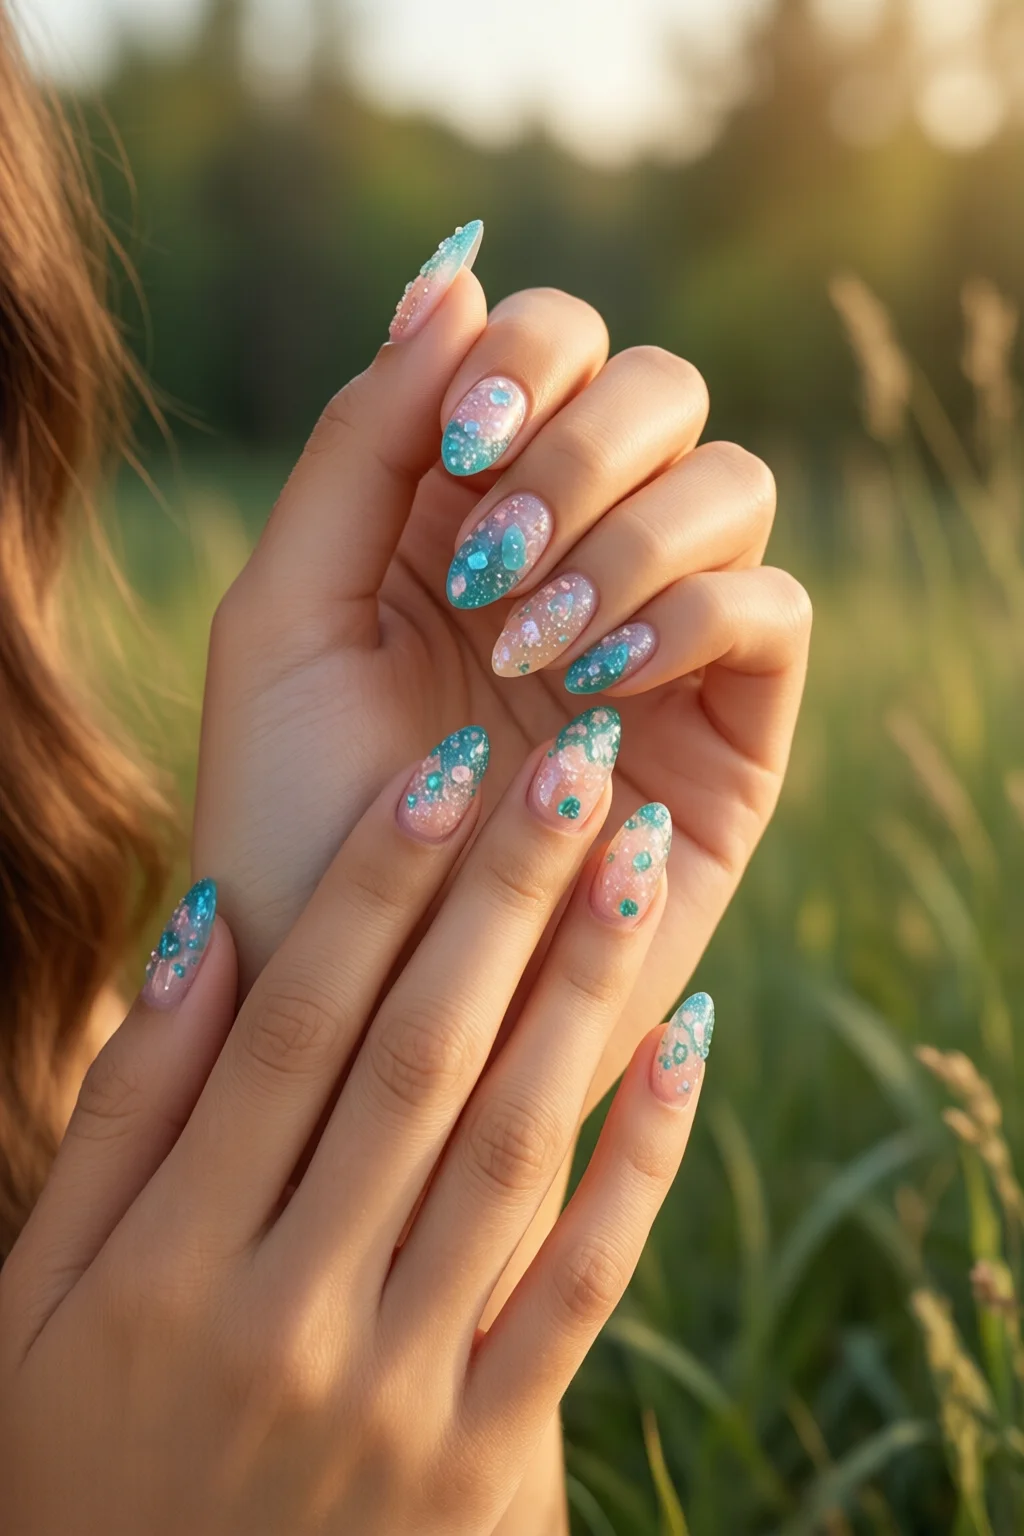
Want More Color Pop? After sealing, apply a thin layer of holographic gel (like holographic nails) over the jelly for a multidimensional sparkle.
Long‑Lasting Shine: Store your LED lamp in a cool, dry place; overheating the lamp can shorten the gel’s curing efficiency over time.
For those who love mixing trends, try pairing jelly nails with tortoise shell nails or adding a velvet magnetic finish (velvet magnetic nails) on the accent nail. The contrast between the translucent jelly and the metallic texture creates a runway‑ready look.
Summary
Jelly nails are all about that delicate balance between translucency and color depth. By starting with a clean canvas, using the right amount of high‑quality jelly gel, and sealing with a glossy top coat, you can achieve a candy‑glass finish that lasts up to two weeks. Remember the three golden rules: thin layers, full cure, and proper prep. With the tools and tips above, you’ll master the jelly effect without costly salon trips.
How long do jelly nails typically last?
When applied correctly with a proper base and top coat, jelly nails can stay glossy and chip‑free for 10‑14 days. Re‑applying a thin top coat after a week can extend wear even further.
Can I use regular nail polish instead of gel for the jelly effect?
Regular nail polish can create a translucent look, but it won’t have the same durability or high‑gloss finish. Gel provides the flexible, glass‑like surface that defines true jelly nails.
Is a UV lamp necessary for jelly nails?
Yes. Jelly gels are formulated to cure under UV/LED light. A 48‑watt LED lamp (≈$45) cures each thin layer in 10‑30 seconds, ensuring the nail stays tack‑free and chip‑resistant.
What colors work best for a jelly manicure?
Pastel pinks, lilacs, mint greens, and soft blues are classic choices. For a bold twist, pair a clear jelly base with a deep navy or metallic gold top layer to create a striking contrast.
Can I combine jelly nails with other nail art trends?
Absolutely. Jelly nails serve as an excellent canvas for holographic accents, velvet magnetic textures, or even tiny 3‑D stickers. Mixing trends adds depth and keeps your manicure fresh.