
Ever wondered how the ethereal “Aura Nails” look catches every eye on Instagram and why it’s dominating the 2025 beauty feeds?
In This Article
What You Will Need (Before You Start)
Gathering the right tools is half the battle. Below is my go‑to kit that has never let me down, even when I’m rushing between clients.
- Base & Top Coat: OPI Infinite Shine Base (10 ml, $9.99) and Top (10 ml, $9.99). The formula is chip‑resistant for up to 14 days.
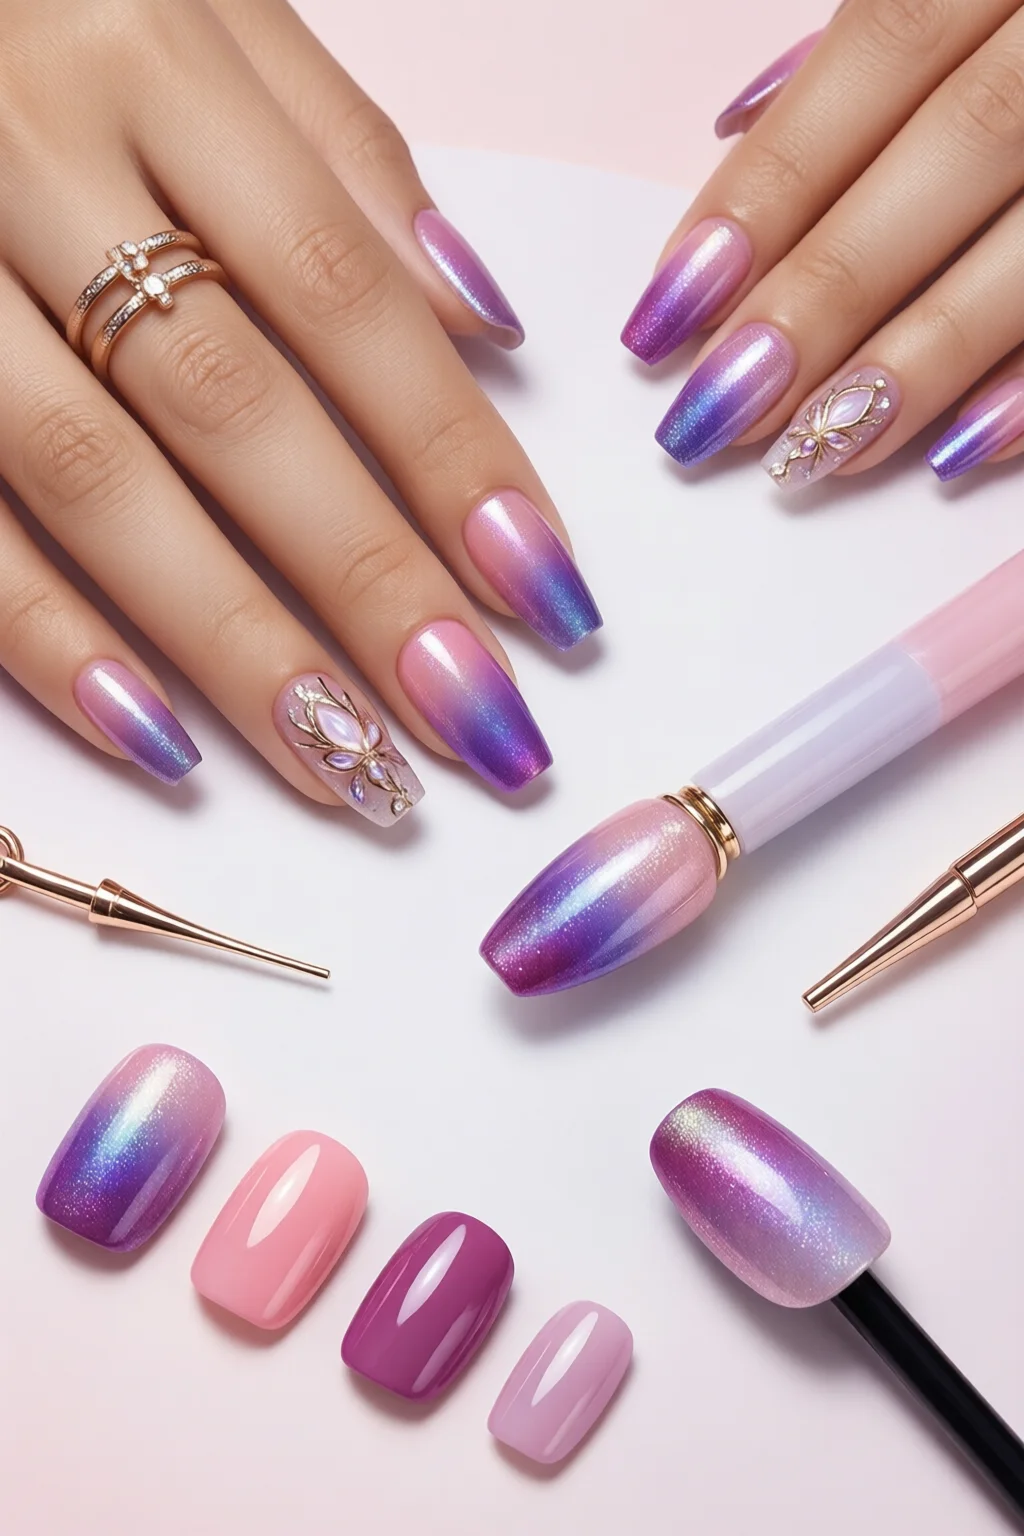
- Gradient Gel Polishes: Zoya “Starlight” (4.8 ml, $13) and “Moonlit Lavender” (4.8 ml, $13). Both are 5‑free and give a smooth transition.
- Holographic Glitters: ILNP “Prismatic Dust” – 0.5 g sachet, $5.00. This is the secret sauce for the glow.
- UV/LED Lamp: SUNUV 48W LED, 30 seconds cure, $39.99.
- Prep Tools: 100 grit nail buffer, cuticle pusher, and nail hydration oil (Sally Hansen Cuticle Care, 15 ml, $6.49).
- Application Aids: Fine‑tip brush (0.5 mm), silicone dotting tool, and a small silicone spatula for glitter.
- Optional: nail wraps for a flawless base if you have ridges.
Step‑by‑Step Guide to Aura Nails
Step 1 – Clean, Shape, and Hydrate
Start with a clean canvas. Remove any old polish with an acetone‑free remover (Zoya Remove+, 15 ml, $8). File to your desired shape; I prefer a soft square (2 mm width) because it shows the gradient without breaking the flow. Buff the surface lightly with a 100‑grit buffer—just enough to remove shine, not to thin the nail.
Finish with a drop of nail hydration oil, massaging it into the cuticle and nail plate. This step reduces lifting later and adds a subtle sheen that amplifies the glow.
Step 2 – Apply the Base Coat
Swipe a thin layer of OPI Infinite Shine Base. Cure under the LED lamp for 30 seconds. A flawless base prevents the gradient from looking blotchy and ensures the holographic glitter adheres evenly.
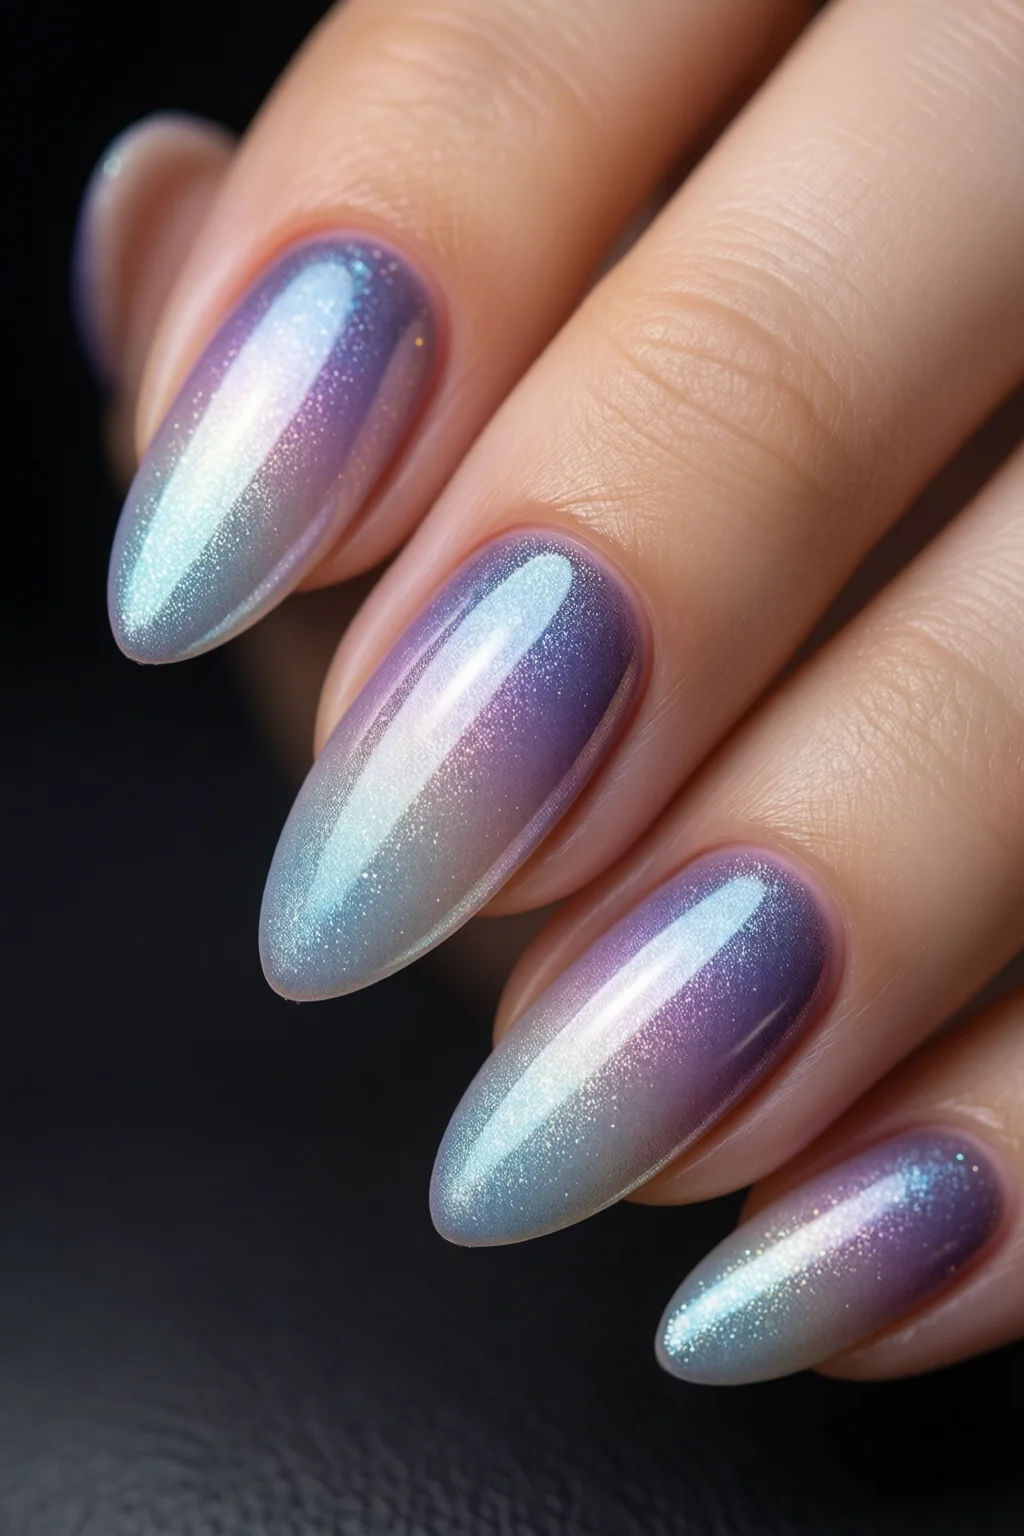
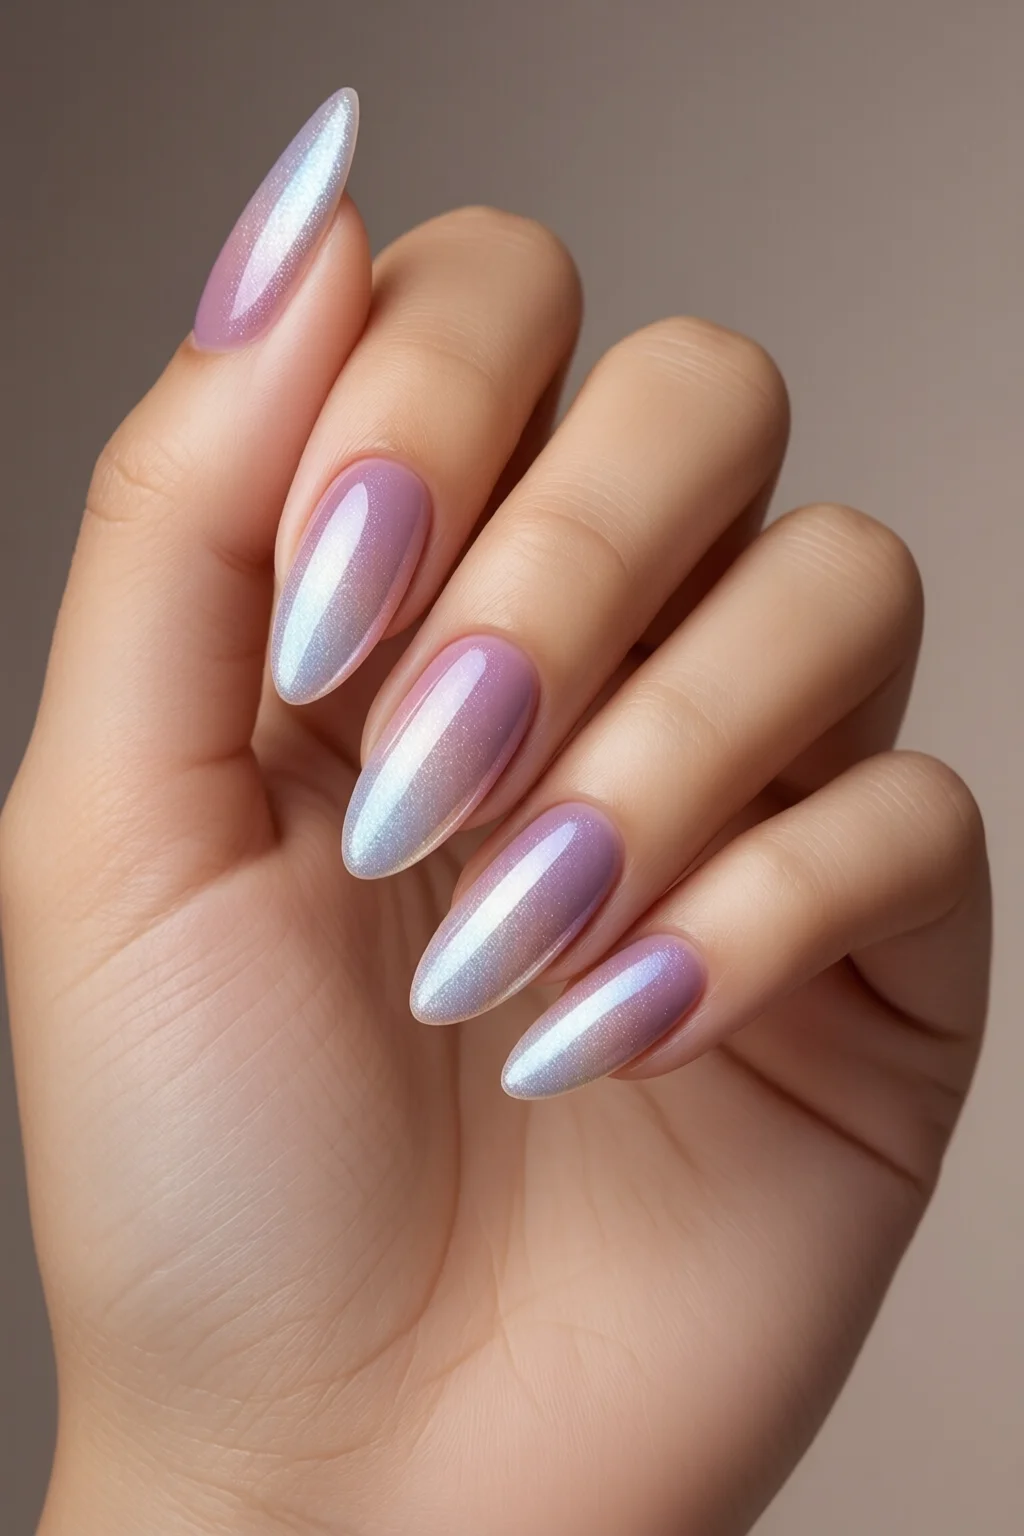
Step 3 – Create the Gradient Base Color
Using the Zoya “Starlight” polish, paint three thin strokes on the nail: one near the cuticle, one mid‑nail, and one at the tip. While the polish is still wet, take a clean brush dipped in a drop of “Moonlit Lavender” and blend the strokes together using a gentle sweeping motion. The goal is a seamless transition from a deeper shade at the base to a lighter hue at the tip.
Once blended, cure for 45 seconds. The color gradient is the foundation of the aura effect; spend extra time here if you’re a perfectionist.
Step 4 – Embed the Holographic Glitter
Shake the ILNP “Prismatic Dust” lightly to prevent clumping. Using the silicone spatula, place a tiny pinch of glitter onto the tip of the nail, then use the fine‑tip brush to drag it downward, following the gradient’s direction. The glitter will settle into the lighter areas, creating a luminous “glow” that mimics natural light refraction.
Repeat for each nail, ensuring the amount of glitter is consistent (≈0.02 g per nail). Too much glitter looks heavy; too little loses the aura effect.
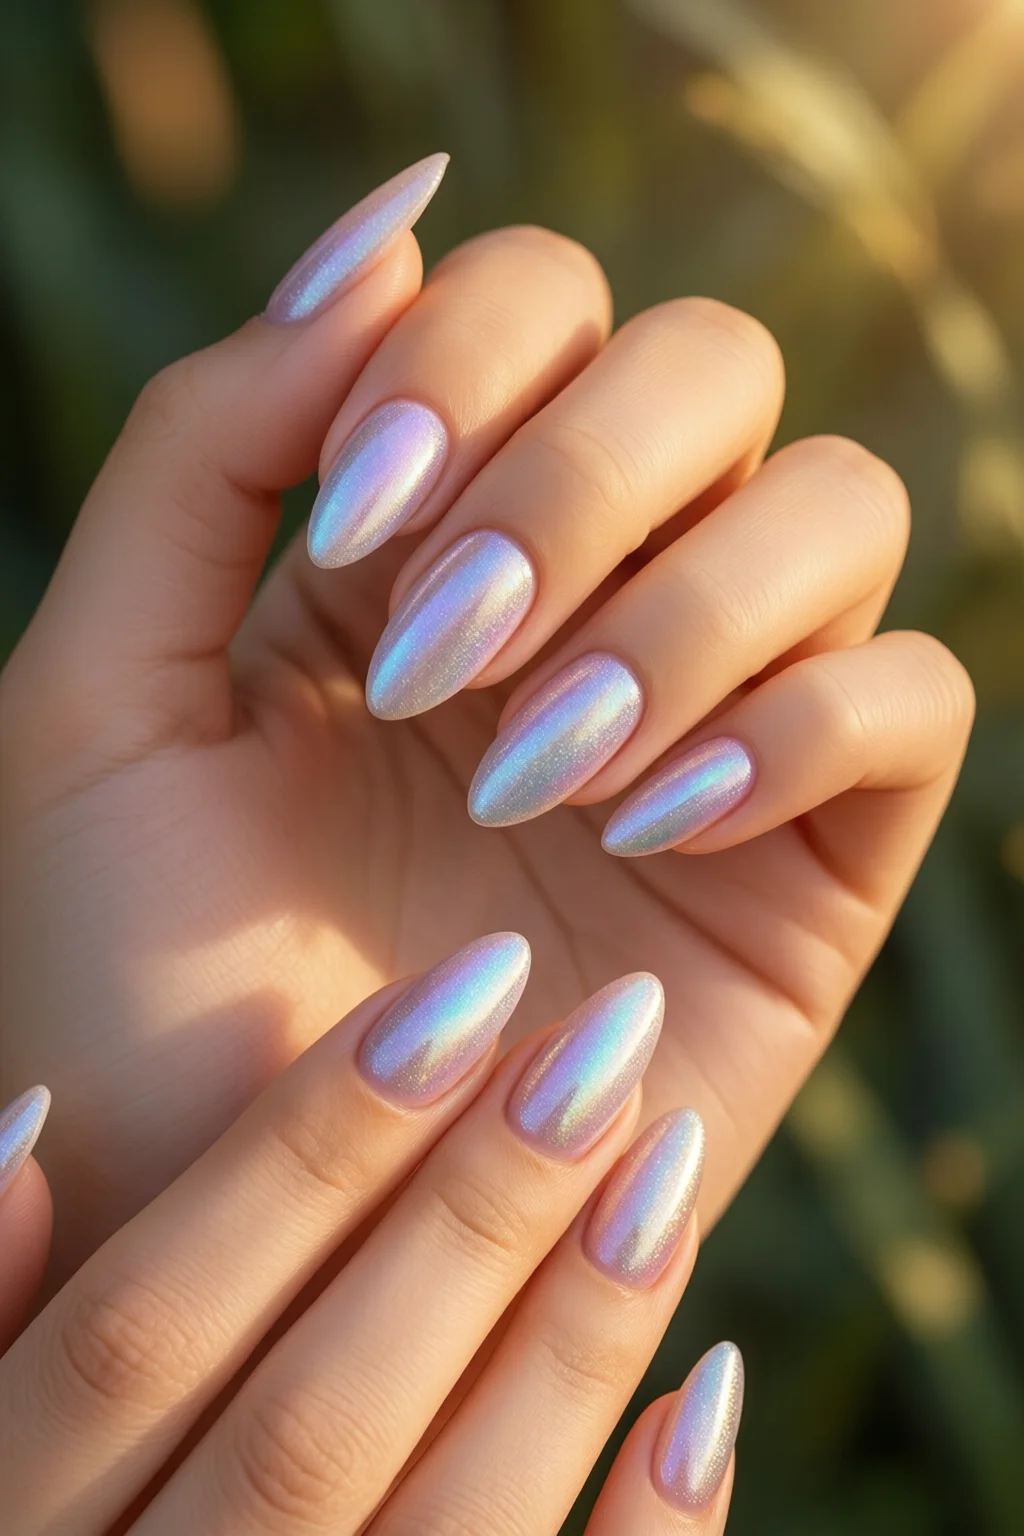
Step 5 – Seal with Top Coat
Apply two thin layers of OPI Infinite Shine Top. The first layer locks in the glitter, the second adds high‑shine. Cure each layer for 30 seconds. After the final cure, wipe the nails with a lint‑free pad soaked in 70% isopropyl alcohol to remove any tacky residue—this gives a glass‑like finish.
Step 6 – Finish with Care
Massage a drop of cuticle oil into each nail bed. This not only nourishes the skin but also enhances the reflective quality of the glitter, making the aura appear more three‑dimensional.
Common Mistakes to Avoid
- Over‑loading the glitter: One mistake I see often is piling a whole sachet onto the tip. The result is a clumpy, uneven surface that catches light poorly. Stick to a pinch per nail.
- Skipping the base coat: Skipping this step leads to premature chipping, especially on the gradient where colors can blend unintentionally.
- Using a brush that’s too thick: A 1 mm brush creates harsh lines. My 0.5 mm brush gives a smoother blend.
- Under‑curing the gel: If your lamp is under 30 W, increase cure time to 45 seconds per layer to avoid lifting.
- Applying glitter on wet polish: The glitter will sink too deep, losing its surface sparkle. Ensure the gradient is tacky but not wet.
Troubleshooting & Tips for Best Results
Glitter clumps mid‑application? Add a drop of clear gel (Essie Gel Couture Clear, 5 ml, $12) to the glitter on the spatula. This creates a semi‑fluid medium that spreads evenly.
Gradient looks banded? Use a micro‑fiber blending brush and work in a circular motion while the polish is still wet. A quick pass with a warm (but not hot) hair dryer for 10 seconds can also smooth out bands.
Top coat turning yellow over time? Switch to a UV‑resistant top coat like Seche Vite Dry Fast Top Coat (8 ml, $13). Store your finished nails away from direct sunlight to preserve the hue.
Need a faster solution for clients? Pre‑mix a 1:1 ratio of “Starlight” and “Moonlit Lavender” in a small 10 ml bottle, label it “Aura Blend,” and apply directly. This cuts the blending step in half without sacrificing quality.
Budget tip: Purchase glitter in bulk (10 g pack for $45) – it reduces the per‑nail cost to under $0.50, perfect for salon pricing.
Summary
Mastering Aura Nails in 2025 is all about precision, the right products, and a little sparkle. By following the six steps—prep, base, gradient, glitter, seal, and care—you’ll consistently deliver that luminous, gradient glow that keeps clients coming back. Remember to avoid over‑loading glitter, always cure fully, and finish with cuticle oil for that extra pop.
FAQ
How long does the Aura Nail gradient typically last?
With OPI Infinite Shine Base and Top, most clients see 10‑14 days of chip‑free wear. Proper nail hydration and avoiding harsh chemicals can extend longevity to 3 weeks.
Can I use regular polish instead of gel for the gradient?
Yes, but the glow will be less intense and the wear time drops to about 5‑7 days. Gel’s higher refraction index makes the holographic glitter pop.
Is the ILNP Prismatic Dust safe for sensitive skin?
ILNP glitter is 100% cosmetic‑grade, hypoallergenic, and free of nickel. I’ve used it on clients with sensitive skin without any irritation.
What’s the best way to store leftover glitter?
Keep it in an airtight silicone pouch or a small glass jar with a tight lid. Store in a cool, dry place to prevent clumping.
Can I combine Aura Nails with nail art decals?
Absolutely. Apply the decal after the gradient and before the glitter, then seal everything with a top coat. This creates a layered effect that’s Instagram‑ready.