
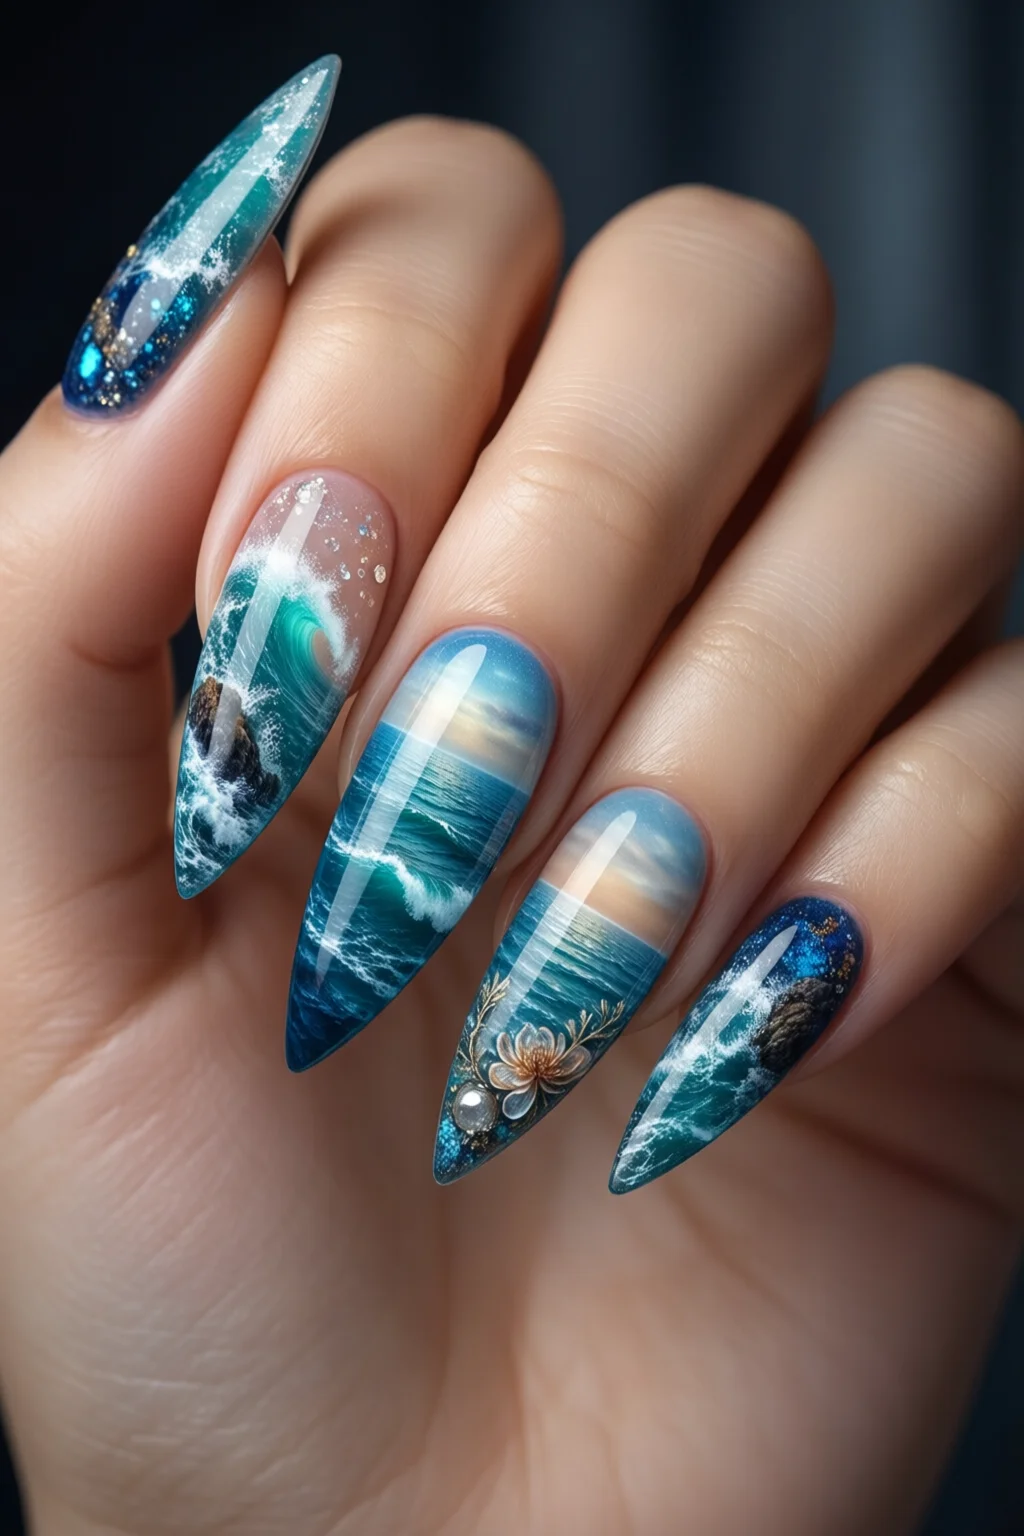
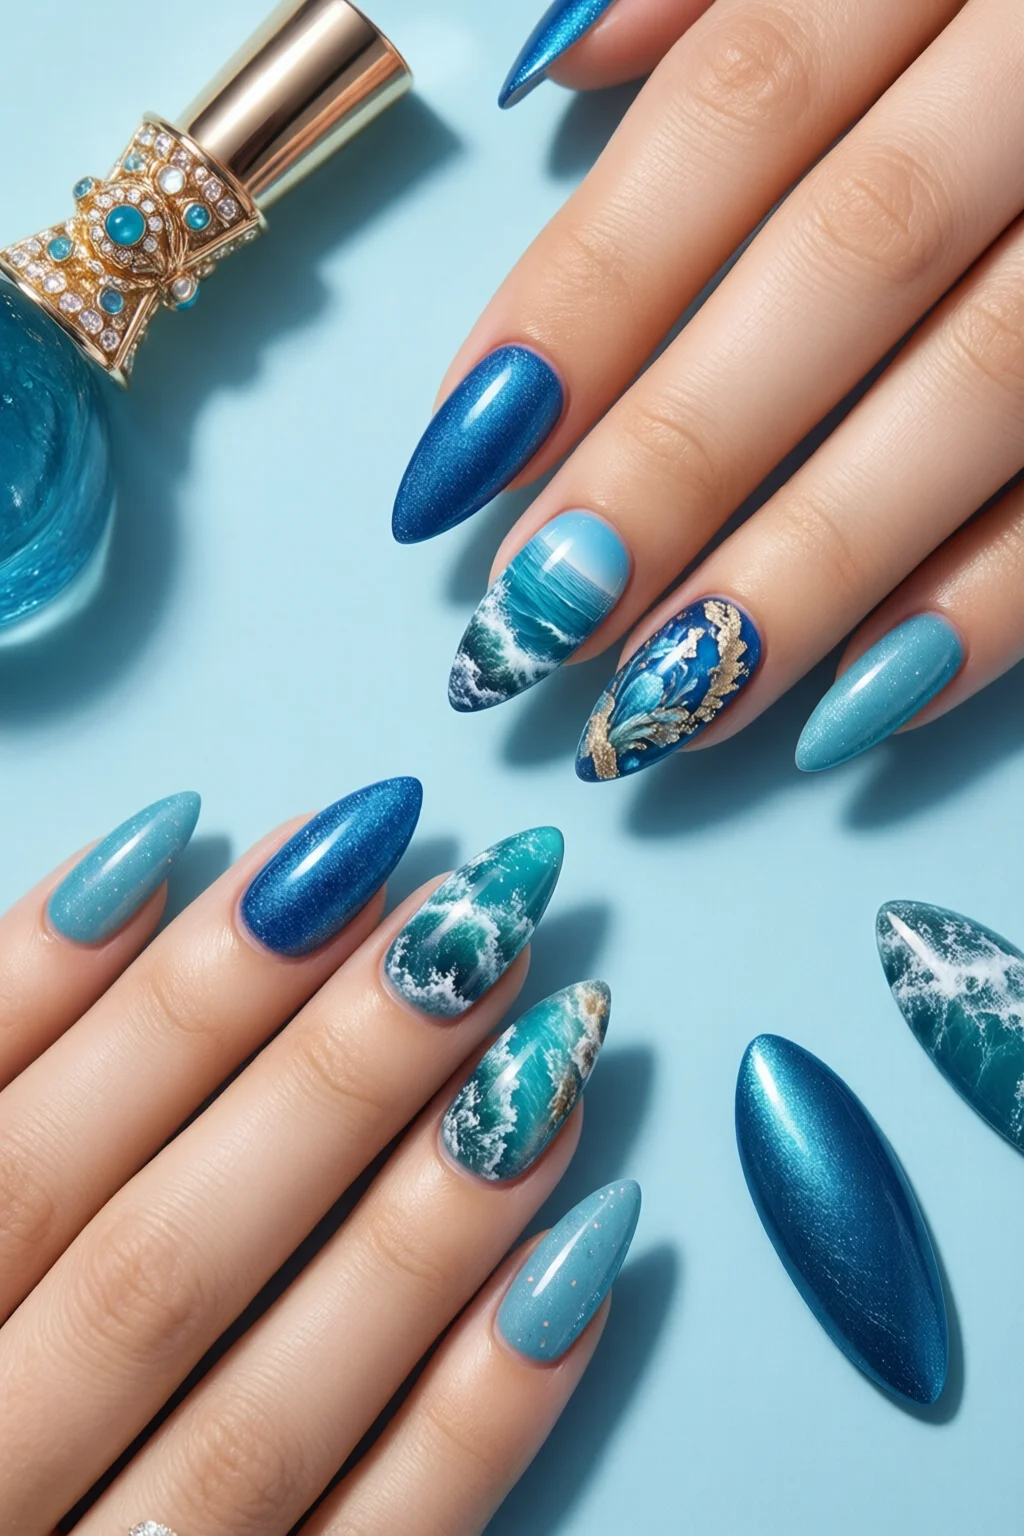
Ride the wave of color with ocean nails that look like they were painted by the sea itself.
In This Article
In this guide you’ll learn exactly how to create a salon‑ready, marine‑inspired manicure that lasts for up to two weeks without chipping. I’ll walk you through every product, tool, and timing detail so you can sit down with a cup of tea, press play on your favorite playlist, and finish the look in under 45 minutes. By the end, you’ll have a set of ocean nails that capture the depth of a midnight tide, the sparkle of sunrise on water, and the playful froth of surf.
What You Will Need (Before You Start)
- Base & Top Coat: OPI Nail Envy Base Coat ($9.99, 15 ml) and OPI Nail Envy Top Coat ($9.99, 15 ml). Both are quick‑drying and add up to 12 hours of extra wear.
- Color Palette:
- OPI “Deep Sea” – a dark navy with a subtle shimmer ($11.99, 15 ml).
- Sally Hansen “Seafoam Green” – a pastel teal matte ($7.49, 10 ml).
- Essie “Coral Reef” – a bright orange‑pink for accent tips ($8.99, 15 ml).
- ILNP “Pearl Dust” – fine iridescent glitter (5 g packet, $6.50).
- Tools: A set of 0.5 mm and 1 mm nail art brushes (Spectrum Brush Co., $12.95), a fine‑point nail art pen (KISS, $4.99), a makeup sponge (beautyblender, $13.00) for gradient blending, and a cuticle pusher (CND, $5.00).
- Top‑coat Enhancements: Seche Vita Gel‑Free Top Coat ($12.00, 15 ml) for extra gloss and UV protection.
- Optional Extras: Small rhinestones (0.3 mm, $3.20 per pack) for a tidal‑bubble effect, and a nail file with a 180‑grit side for shaping.
Step 1: Prep Your Canvas
Start with clean, trimmed nails. Push back cuticles with the CND cuticle pusher, then file each nail to a coffin nail shape if you want a modern silhouette; a square works just as well for a classic look. Buff the surface lightly (120‑grit) to remove shine—this ensures the base coat adheres without bubbles. Wash hands with a gentle soap, dry thoroughly, and wipe each nail with a lint‑free pad soaked in acetone. The goal is a squeaky‑clean surface; any residue will cause premature lifting.
Step 2: Base Coat & Color Foundations
Apply one thin layer of OPI Nail Envy Base Coat. It dries to a tacky finish in about 60 seconds, creating a perfect bonding layer. While the base is still slightly wet, brush on OPI “Deep Sea” on the half of each nail closest to the cuticle. Use a single stroke, then let it set for 30 seconds before moving on to avoid streaks.
Next, dip the makeup sponge into Sally Hansen “Seafoam Green” and tap off excess. Press the sponge onto the remaining half of the nail, then blend the two colors together by gently rolling the sponge back and forth. This creates a seamless gradient that mimics the transition from deep water to shallow surf. Allow the gradient to dry for 2 minutes; you’ll notice the colors meld into a natural ombre.
Step 3: Create the Wave Gradient
Now it’s time to add depth. Using a 0.5 mm brush, pick up a tiny amount of OPI “Deep Sea” mixed with a drop of clear nail polish to thin it slightly. Paint a thin, curving line from the nail tip toward the cuticle, following the natural curve of a wave. Immediately, before the line dries, take a clean brush dipped in the “Seafoam Green” and drag it across the line, pulling the dark shade outward to create a frothy edge. Repeat this process on each nail, varying the angle to avoid uniformity—real ocean waves never line up perfectly.
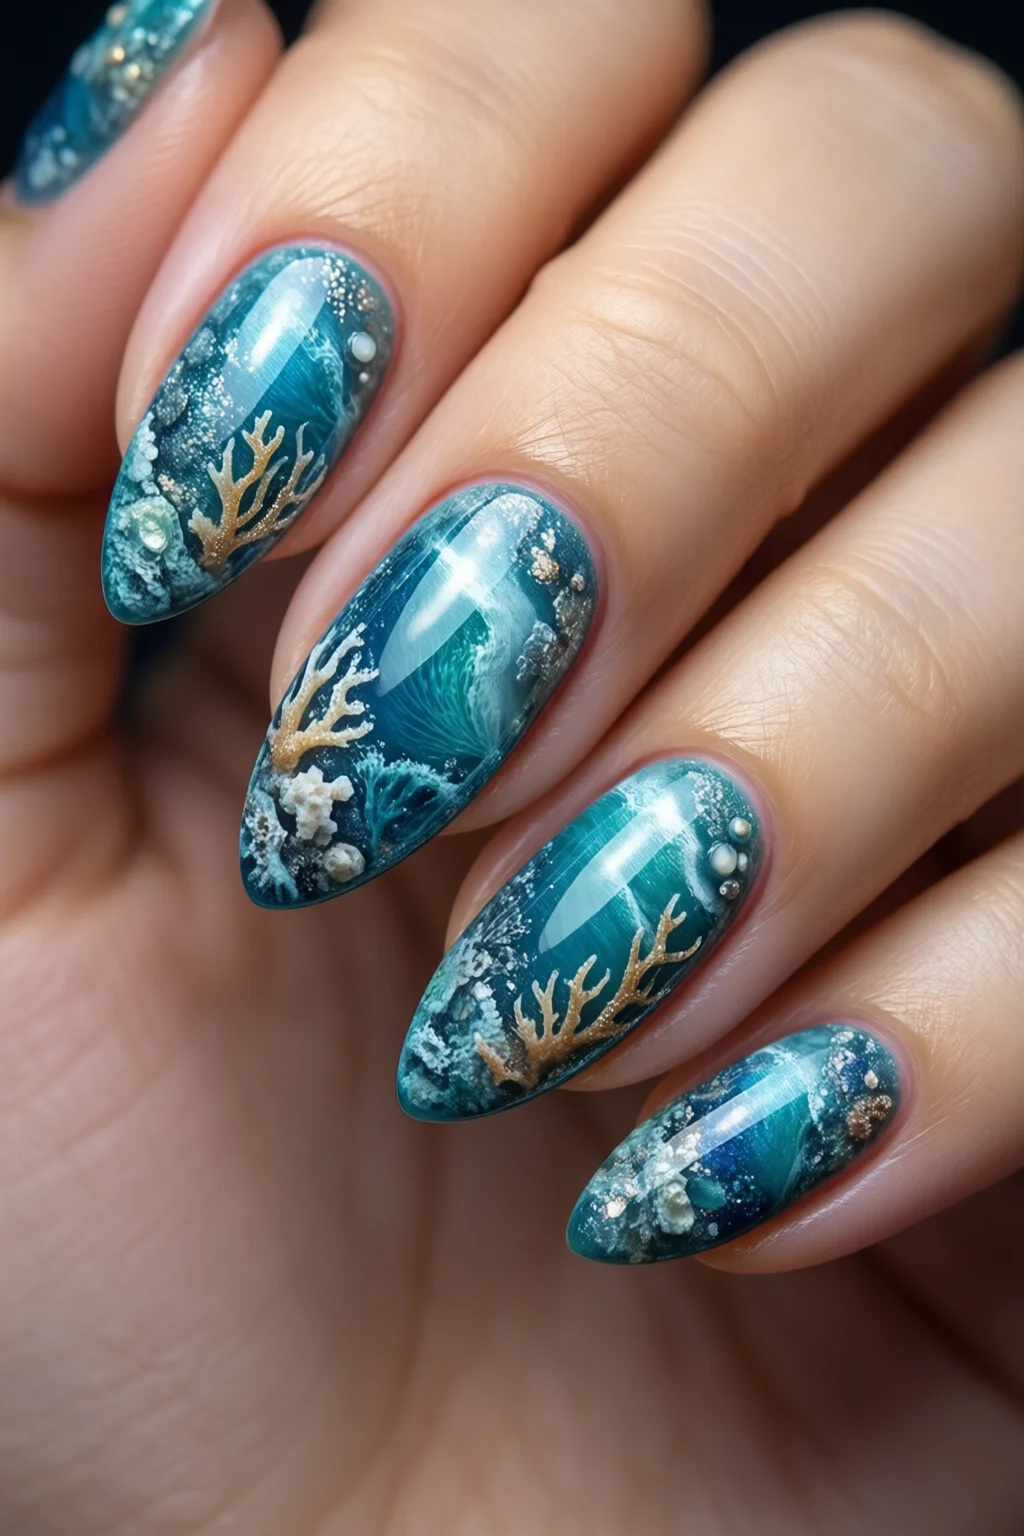
If you want a sparkle tide, apply a fine dusting of ILNP “Pearl Dust” over the wave using a small brush. The glitter catches light like sunlight on water, and because it’s mixed with clear polish, it won’t thicken the topcoat.
Step 4: Add Texture and Details
For a finishing touch, use the KISS nail art pen in metallic silver (approx. $4.99). Draw tiny, irregular dots along the wave line to emulate bubbles. Keep the dots sparse—about 5‑7 per nail—to maintain elegance. If you’re feeling adventurous, add a single accent nail on each hand using Essie “Coral Reef”. Apply the color across the whole nail, then top it with a small cluster of rhinestones placed at the base of the wave for a pop of coral‑reef contrast.
Step 5: Seal and Finish
Apply two thin coats of OPI Nail Envy Top Coat, allowing 60 seconds between coats. Finish with one layer of Seche Vita Gel‑Free Top Coat for an extra shield against chips and a glass‑like shine. Cure the final coat under a LED lamp for 30 seconds if you used the gel‑free formula; otherwise, let it air‑dry for 5 minutes.
Clean up any excess polish around the skin with a small brush dipped in nail polish remover. Apply a cuticle oil (Burt’s Bees, $6.99, 15 ml) to hydrate the nail bed, which also helps the manicure last longer.
Common Mistakes to Avoid
- Skipping the Base Coat: Without OPI’s base, the gradient can lift after 3–4 days. I see this error often in rushed home manicures.
- Using Too Much Product: A thick layer of glitter or polish creates uneven drying and can cause the top coat to peel.
- Rushing the Blend: If you wait more than 30 seconds before blending the two colors, you’ll get a harsh line instead of a soft ocean fade.
- Choosing the Wrong Brush Size: A 2 mm brush is too bulky for delicate wave lines; stick to 0.5 mm for precision.
- Neglecting Cuticle Care: Dry cuticles pull the polish away, leading to early chipping. A quick oil massage after each session makes a big difference.
Troubleshooting or Tips for Best Results
Problem: The gradient looks blotchy.
Solution: Lightly dampen the sponge with a mix of clear polish and a drop of “Seafoam Green.” This thins the pigment and creates a smoother transition. Work in a well‑ventilated area to avoid fumes.
Problem: Glitter clumps on the wave.
Solution: Sprinkle the ILNP “Pearl Dust” onto a piece of parchment paper, then use a soft brush to lift a fine layer onto the wet polish. This prevents clumping and ensures an even sparkle.
Problem: The top coat chips after 4 days.
Solution: Make sure each layer is fully dry before applying the next. A 30‑second LED cure after the final Seche Vita coat adds up to 20 % more durability, according to the brand’s data sheet.
Additional tip: For a more dramatic effect, apply a thin strip of mermaid nails foil under the top coat. The foil catches light and makes the ocean depth appear even deeper.
Summary Conclusion
Ocean nails aren’t just a color trend; they’re a technique that blends gradient blending, texture work, and strategic sparkle to evoke the sea on your fingertips. By gathering the right tools, following the step‑by‑step process, and avoiding the common pitfalls outlined above, you can achieve a professional‑grade look that holds up for up to 14 days. Remember to prep properly, work quickly with thin layers, and seal with a high‑quality top coat. Now you have the confidence to wear a piece of the ocean wherever you go.
How long should ocean nail designs last?
When you use a proper base coat, two thin layers of top coat, and seal with a gel‑free top coat, ocean nails can stay chip‑free for 10‑14 days. Proper after‑care, like applying cuticle oil daily, can extend wear time.
Can I do ocean nails on acrylic extensions?
Absolutely. Just ensure the acrylic surface is lightly buffed and cleaned with acetone before applying the base coat. The same gradient and glitter techniques work on extensions.
What nail shape works best for wave designs?
A coffin or almond shape provides a longer canvas for the wave effect, allowing the gradient to flow naturally. Square shapes can work but may look cramped.
Do I need a UV lamp for the final top coat?
If you use Seche Vita Gel‑Free Top Coat, a quick 30‑second LED cure adds extra hardness, but it’s optional. Regular air‑drying for 5 minutes works fine for most home users.
Can I incorporate nail vitamins for stronger ocean nails?
Yes. Daily intake of biotin‑rich nail vitamins supports nail growth and reduces breakage, giving you a smoother surface for intricate designs.