
Did you know that searches for “tortoise shell nails” spiked by 42% in the last year alone? The classic mottled pattern that once graced vintage handbags is now dominating nail salons and TikTok feeds, proving that this timeless look isn’t just a passing fad.
In This Article
- History & Inspiration Behind Tortoise Shell Nails
- Choosing the Right Materials for Tortoise Shell Nails
- Step‑by‑Step Application Guide
- Maintaining the Look: Care, Touch‑Ups, and Removal
- Comparison of Popular Products for Tortoise Shell Nails
- Pro Tips from Our Experience
- Frequently Asked Questions
- Conclusion: Your Next Steps to Perfect Tortoise Shell Nails
Whether you’re a nail‑tech pro or a DIY enthusiast, mastering the art of tortoise shell nails can set your style apart. Below is a step‑by‑step, expert‑approved guide that covers everything from the history behind the pattern to the exact products, tools, and techniques you’ll need to achieve a flawless, salon‑quality finish at home.
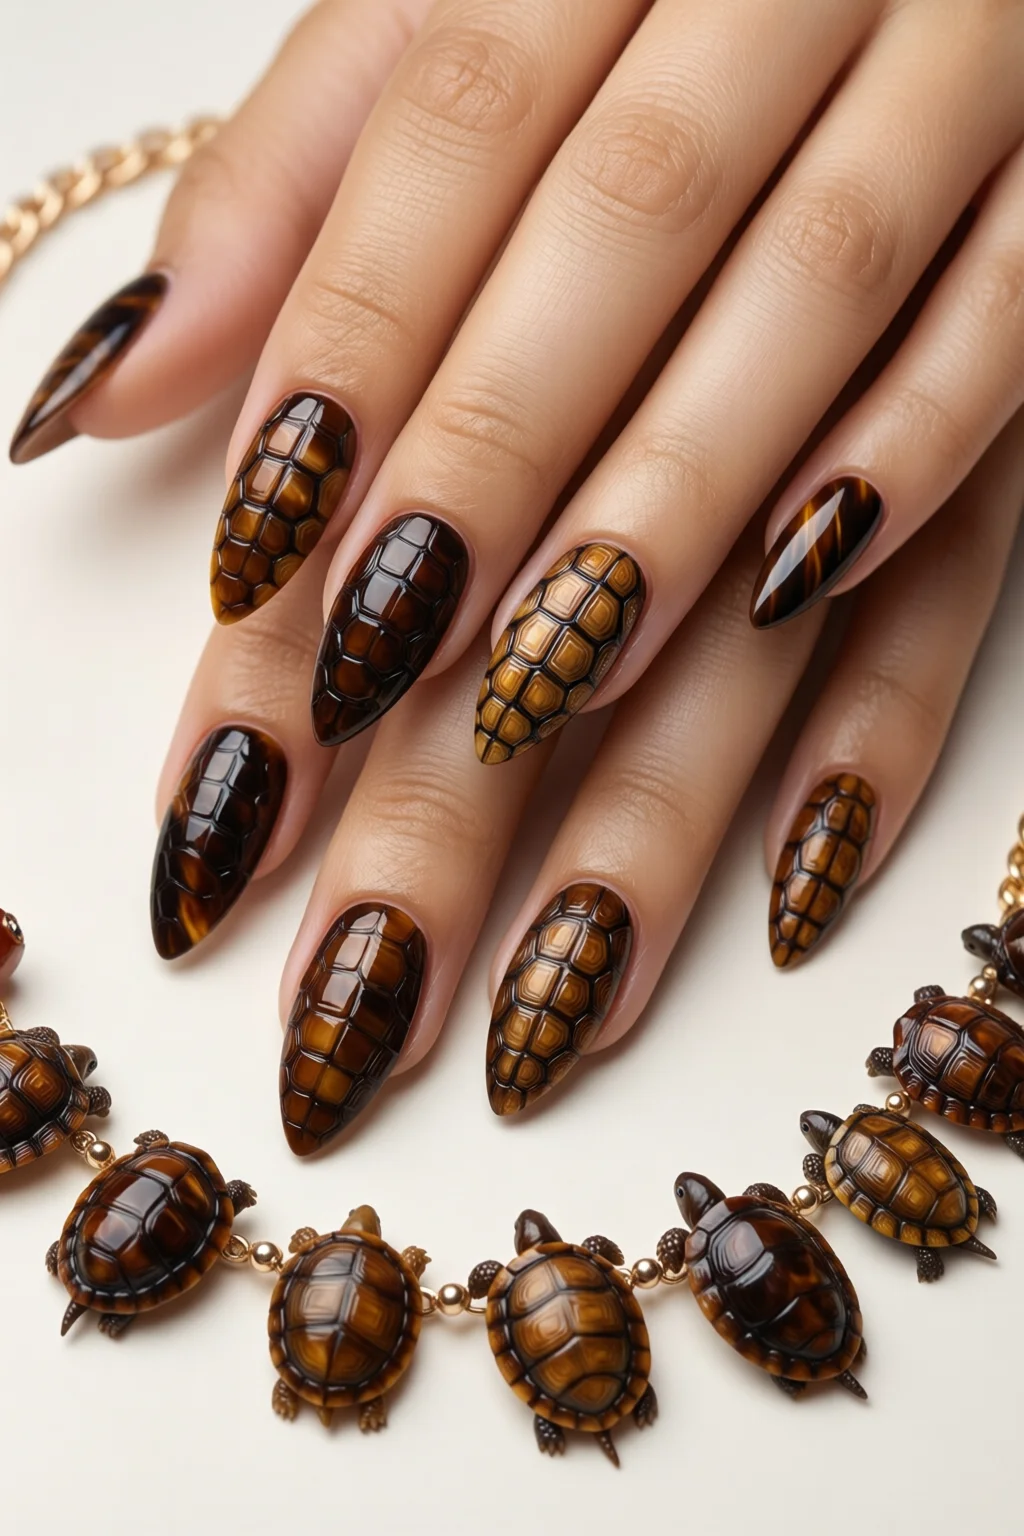
History & Inspiration Behind Tortoise Shell Nails
From Luxury Handbags to Nail Polish
The tortoise shell pattern first appeared in the early 1900s on accessories made from real turtle shell, a material prized for its warm amber tones and unique mottling. By the 1930s, designers began mimicking the look with synthetic materials, making it more accessible. Fast forward to the 1990s, and the pattern resurfaced on runway shoes and handbags, eventually catching the eye of nail artists seeking a sophisticated, earthy aesthetic.
Modern Resurgence in Nail Art
In 2022, Instagram and TikTok influencers began posting “DIY tortoise shell nails” videos, turning the look into a viral nail trend. The rise of gel polish and stamping plates gave artists the tools to replicate the intricate swirls with precision, leading to a surge in demand for specific products that can deliver that perfect blend of amber, brown, and ivory.
Cultural References and Symbolism
Beyond fashion, the pattern carries cultural weight. In many Asian cultures, the tortoise symbolizes longevity and wisdom, making tortoise shell nails a subtle nod to heritage. In Western contexts, the earthy palette often conveys a natural, grounded vibe—perfect for spring and fall collections.
Choosing the Right Materials for Tortoise Shell Nails
Polish Brands That Nail the Look
Not all nail polishes are created equal. For a true tortoise shell effect, you’ll need at least three complementary shades. Here are my go‑to picks:
- OPI “Tortuguese” – A warm amber base, $12.99 for 15 ml.
- Essie “Biscotti” – A soft brown accent, $9.95 for 15 ml.
- Sally Hansen “Ivory Lace” – A creamy off‑white for highlights, $7.99 for 15 ml.
These polishes have a high pigment concentration, which is crucial for the depth needed in a marbled design.
Gel vs. Regular Polish: Which Is Best?
Gel polish offers longer wear—up to three weeks without chipping—making it ideal for clients who need durability, such as nurses or busy moms. However, regular lacquer is easier to correct on the fly and costs less (average $10 per bottle vs. $25 for a gel kit). If you’re just starting, I recommend beginning with lacquer, then graduating to gel once you’ve mastered the technique.
Essential Tools for a Seamless Effect
Invest in quality tools to avoid streaks:
- Fine‑tipped nail art brush (0.5 mm) – $4.99 (e.g., KISS Nail Art Brush Set).
- Striping tape or nail stencils – $3.49 for a pack of 12.
- Gel UV/LED lamp – $39.99 (if using gel).
- Base and top coats – OPI Base Coat $8.99, OPI Top Coat $9.99.
Choosing the Right Nail Surface
For the most authentic look, start with a smooth, well‑prepped nail. Use a fine‑grit buffer (180‑200 grit) to create an even canvas, then wipe with acetone‑free remover to eliminate oils.
Step‑by‑Step Application Guide
1. Prep, Base Coat, and Cure
Begin with a clean nail surface. Apply a thin layer of your preferred base coat and cure under a UV/LED lamp for 30 seconds (gel) or let dry naturally (lacquer). This step prevents staining and ensures the colors adhere evenly.
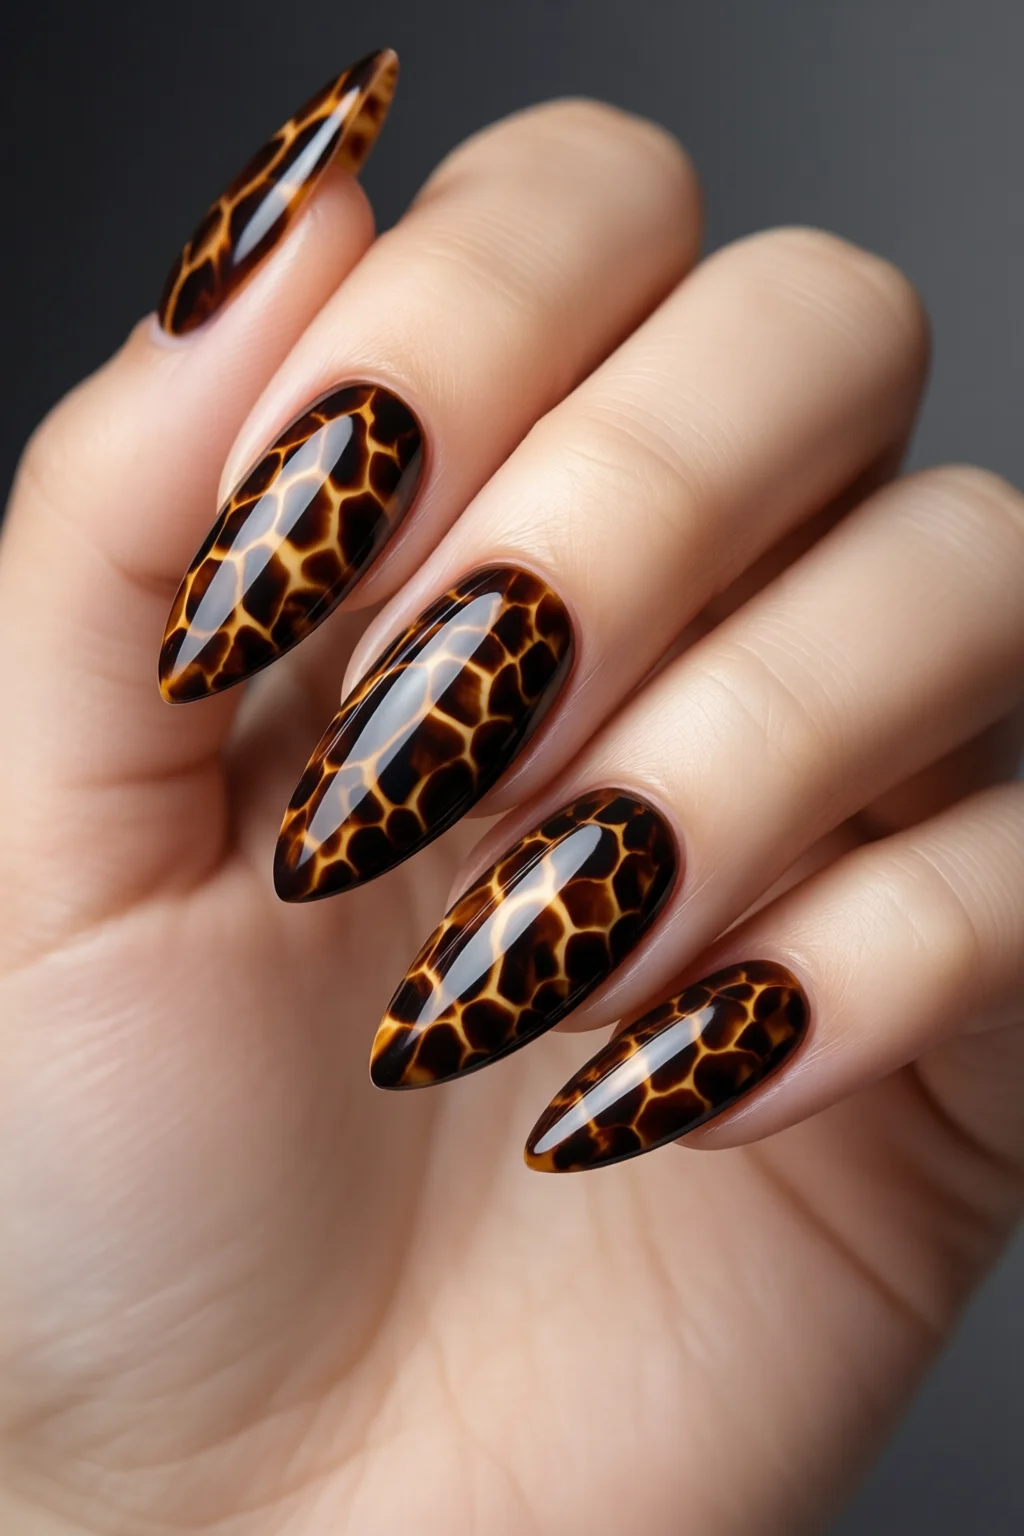
2. Creating the Marbled Tortoise Shell Effect
There are three reliable methods; pick the one that matches your comfort level.
Method A: Brush‑Swirl Technique (Best for Beginners)
- Apply a thin coat of the amber base (“Tortuguese”). While still tacky, dab a small amount of the brown (“Biscotti”) on the nail tip using a fine brush.
- Using a clean brush, lightly flick the brown pigment toward the center, creating a mottled pattern.
- Drop a dab of ivory (“Ivory Lace”) in the middle and use the brush to gently swirl the three colors together. Aim for irregular, natural‑looking patches rather than perfect circles.
- Repeat on each nail, allowing each layer to dry for 15‑20 seconds to avoid smudging.
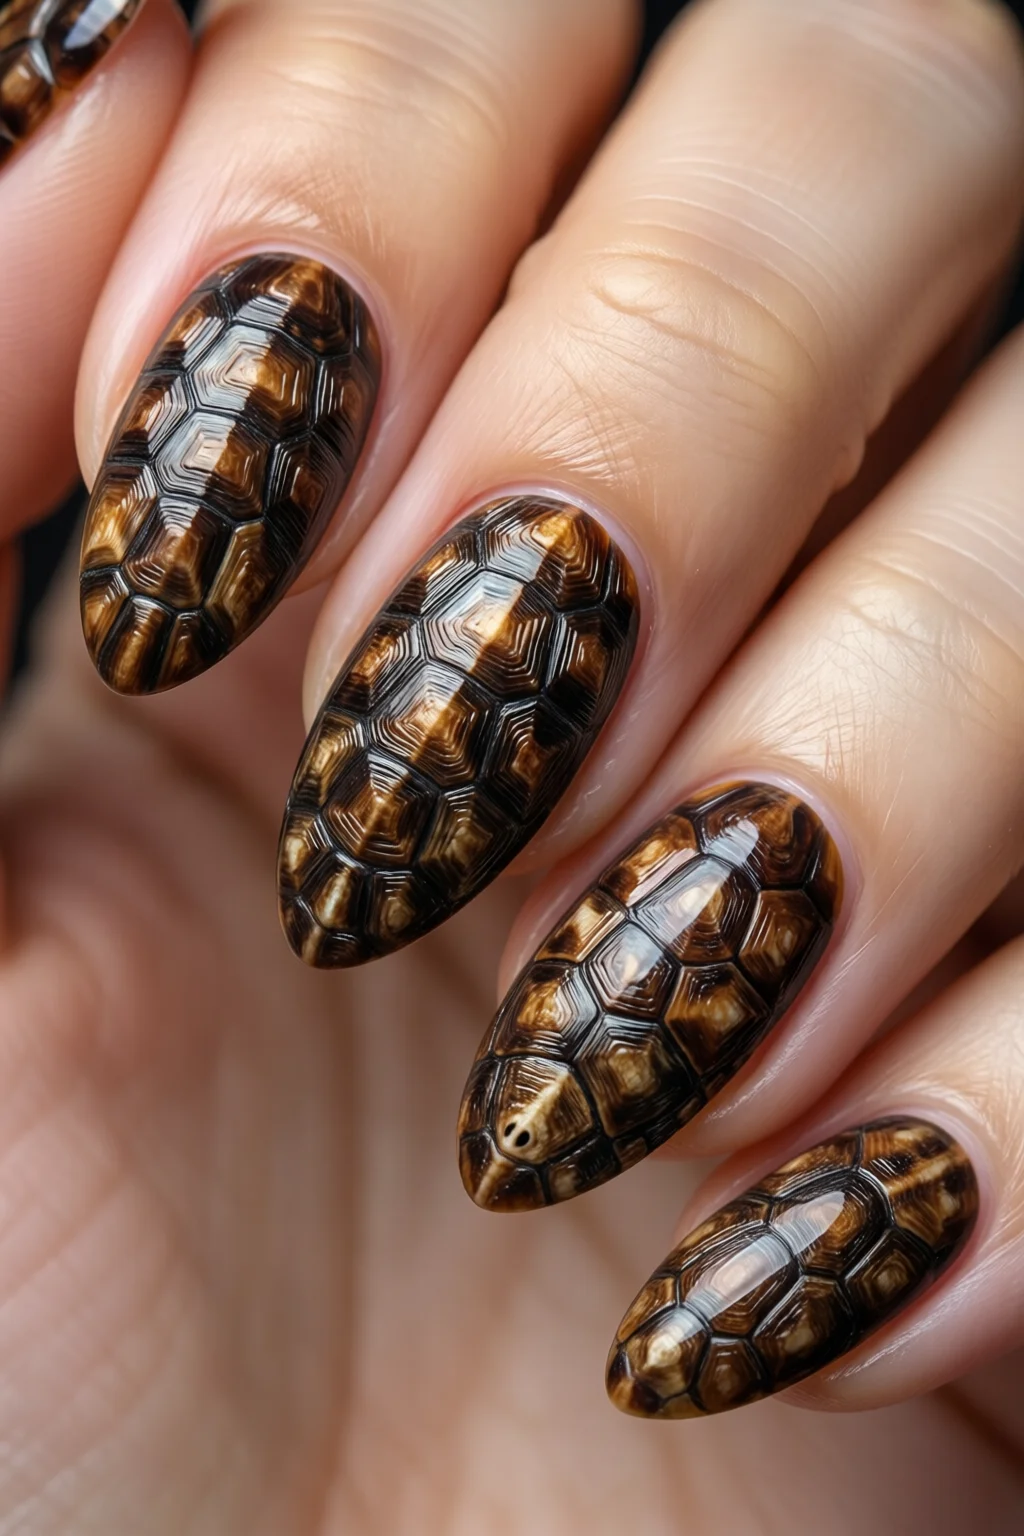
Method B: Stamp‑Plate Technique (For Precise, Consistent Results)
- Choose a stamping plate with a “marble” or “swirl” pattern. Press the plate onto a silicone mat, then apply each color to separate sections of the plate.
- Using a scraper, remove excess polish, leaving only the raised design.
- Press the plate onto the nail, applying gentle pressure for 5 seconds. Lift and wipe the plate with a clean brush to avoid transferring excess polish.
- Repeat for a layered effect, alternating colors to deepen the tortoise shell illusion.
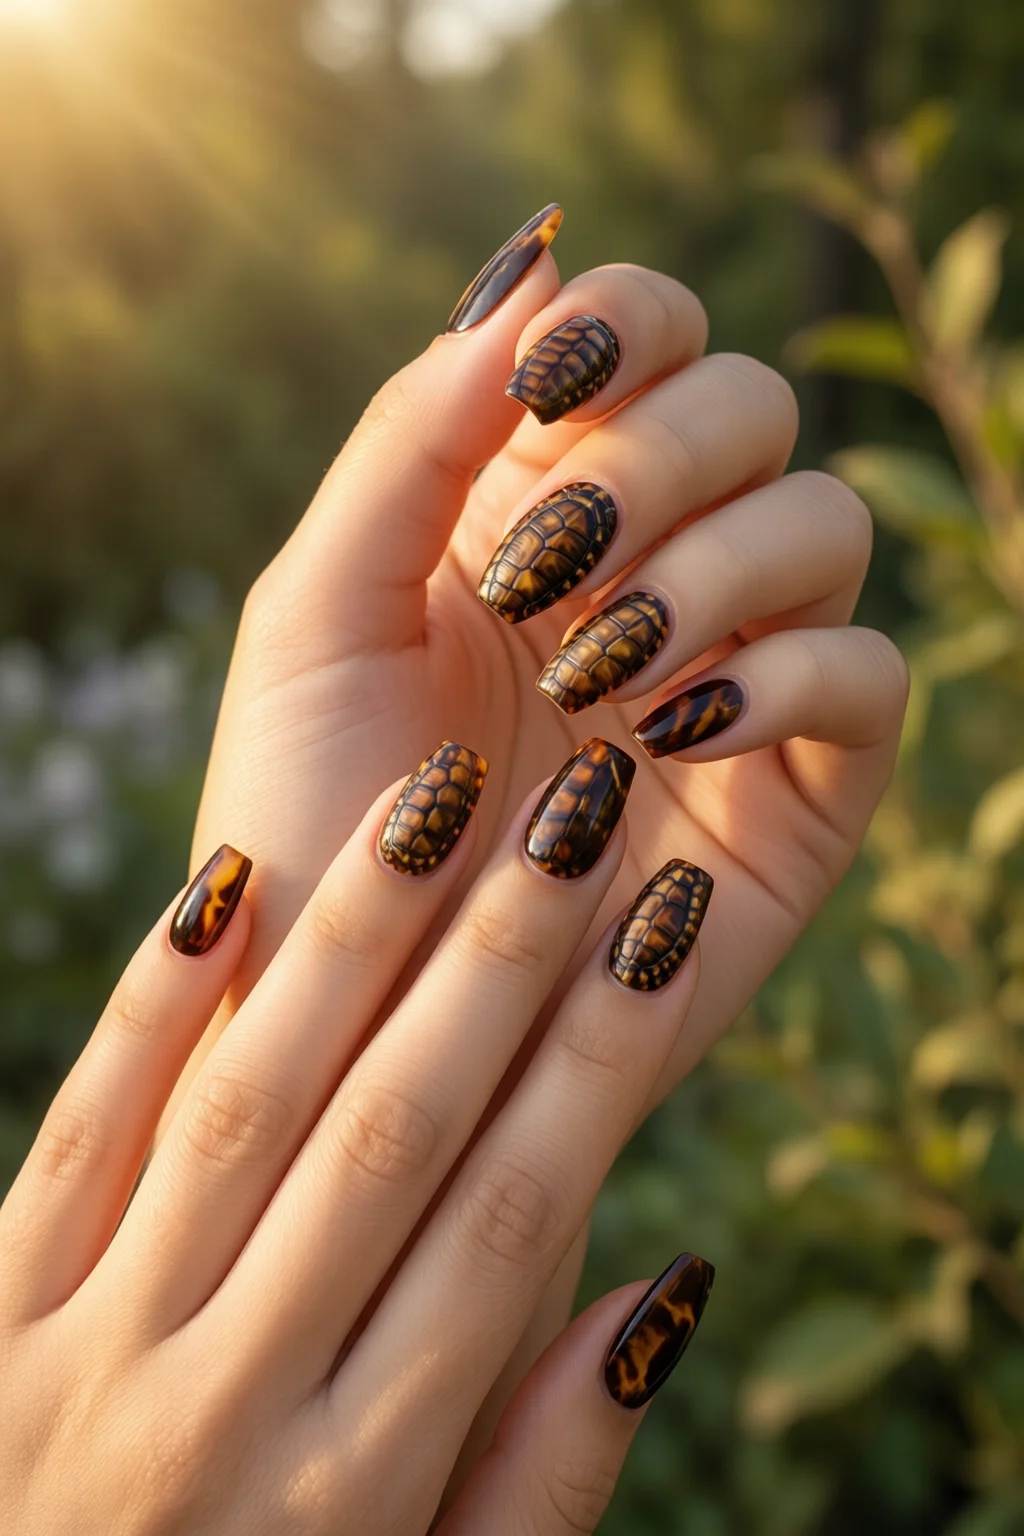
Method C: Sponge‑Dab Method (For Salon‑Level Depth)
- Lay a small piece of a makeup sponge on a flat surface.
- Dip one corner of the sponge into the amber polish, another corner into brown, and a third corner into ivory.
- Lightly dab the sponge onto the nail, rotating slightly after each tap to blend the colors. Build up layers until you achieve the desired intensity.
- Finish with a clean brush to soften any harsh edges.
3. Seal the Design with Top Coat
Regardless of the method, a high‑gloss top coat is essential. For gel, cure for 60 seconds; for lacquer, allow 2‑3 minutes to air dry. This locks in the pattern and adds shine, mimicking the natural luster of a real tortoise shell.
4. Finishing Touches
After curing, wipe the nails with a lint‑free pad soaked in isopropyl alcohol to remove any tacky residue. Apply cuticle oil (e.g., CND Solar Oil, $12.99 for 15 ml) to keep the surrounding skin moisturized.
Maintaining the Look: Care, Touch‑Ups, and Removal
Daily Care Routine
To extend the lifespan of your tortoise shell nails, follow these simple steps:
- Wear gloves when washing dishes or using harsh chemicals.
- Apply a thin layer of clear nail polish every 5‑7 days to refresh the shine.
- Re‑apply cuticle oil nightly to prevent dryness.
Touch‑Up Schedule
Even the best gel can begin to chip after 10‑14 days. Schedule a quick touch‑up session by filing the tips, applying a fresh coat of the base colors, and sealing with top coat. The process takes under 15 minutes and costs roughly $2‑$3 in product usage.
Safe Removal Without Damage
If you need to remove the design, avoid harsh acetone scrubs that can strip natural nails. Instead:
- Soak a cotton ball in non‑acetone remover (e.g., Zoya Remove, $9.99 for 15 ml).
- Place the soaked ball on each nail, wrap with foil, and wait 10 minutes.
- Gently push off the polish with a wooden cuticle pusher. Finish with a nail buffer and a strengthening base coat (e.g., OPI Nail Envy, $13.99).
Common Mistakes and How to Avoid Them
One mistake I see often is overloading the brush with pigment, which creates clumpy blobs. Use a light hand and build color gradually. Another pitfall is skipping the base coat; without it, the tortoise shell colors can bleed into the nail bed, causing uneven tones.
Comparison of Popular Products for Tortoise Shell Nails
| Product | Price (USD) | Finish | Durability (Weeks) | Best For |
|---|---|---|---|---|
| OPI “Tortuguese” + “Biscotti” + “Ivory Lace” Set | $30.97 (3 × 15 ml) | Glossy, high‑pigment | 2‑3 (lacquer) | Beginners & DIY |
| Sally Hansen “Hard as Nails” Gel Kit | $25.99 (includes 3 colors) | Gel, ultra‑shiny | 3‑4 | Professional salons |
| KISS Nail Art Stamping Plate – Marble | $3.49 (single plate) | Textured imprint | NA (used with polish) | Precise patterns |
| China Glaze “Tortoise Shell” Gel Polish | $9.99 (15 ml) | Gel, buttery consistency | 4‑5 | Long‑wear enthusiasts |
| Essie “Biscotti” (single bottle) | $9.95 (15 ml) | Classic lacquer | 2‑3 | Budget‑friendly |
Pro Tips from Our Experience
- Layer the colors from light to dark. Starting with ivory, then amber, and finishing with brown creates depth that mimics natural shell.
- Use a matte top coat for a rustic look. If you want a more understated finish, a matte seal (e.g., Seche Vite Matte Top Coat, $13.99) softens the shine while preserving the pattern.
- Temperature matters. Warm rooms help the polish stay fluid, allowing smoother blending. If it’s too cold, the colors can set before you have a chance to swirl.
- Seal the edges. Run the top coat along the free edge of each nail to prevent chipping at the tip—a small step that adds up to an extra week of wear.
- Mix in a tiny drop of glitter. For special occasions, add a pinch of fine iridescent glitter to the amber shade before applying; it catches the light like a real shell.
For inspiration, check out our blooming botanical nails gallery, or explore the delicate japanese nail art trends that pair beautifully with tortoise shell bases.
Frequently Asked Questions
Can I achieve tortoise shell nails without gel?
Absolutely. Using high‑pigment lacquer and a fine brush or sponge will give you a beautiful matte or glossy finish. The main trade‑off is shorter wear time—usually 2‑3 weeks versus up to 4 weeks with gel.
What’s the best base coat for this design?
A clear, non‑yellowing base like OPI Natural Nail Base (USD $8.99) works best. It prevents the warm tones from staining the nail and creates a smooth canvas for the marbling.
How long does it take to do a full set?
For a DIY at home, budget 45‑60 minutes total—including prep, two‑step marbling, and curing. With practice, you can cut that down to 30 minutes.
Is the pattern suitable for short nails?
Yes. The key is to keep the swirls compact and avoid overly large patches, which can look lost on a short canvas. Use a fine brush and focus on subtle blending.
Where can I find the best nail glue for tortoise shell designs?
Check out our best nail glue roundup. I recommend KISS Power Glue (USD $5.99) for its strong hold without yellowing the polish.
Conclusion: Your Next Steps to Perfect Tortoise Shell Nails
Now that you have the history, the product list, a proven step‑by‑step method, and maintenance tips, it’s time to put the knowledge into practice. Start with a simple brush‑swirl on a single nail, evaluate the effect, and then expand to a full set. Remember to prep properly, use high‑pigment colors, and seal the edges for maximum durability.
With the right tools and a little patience, you’ll be able to wear the classic elegance of tortoise shell nails every day—or reserve them for special occasions like prom, where a subtle yet luxurious look can truly stand out. Happy painting!