
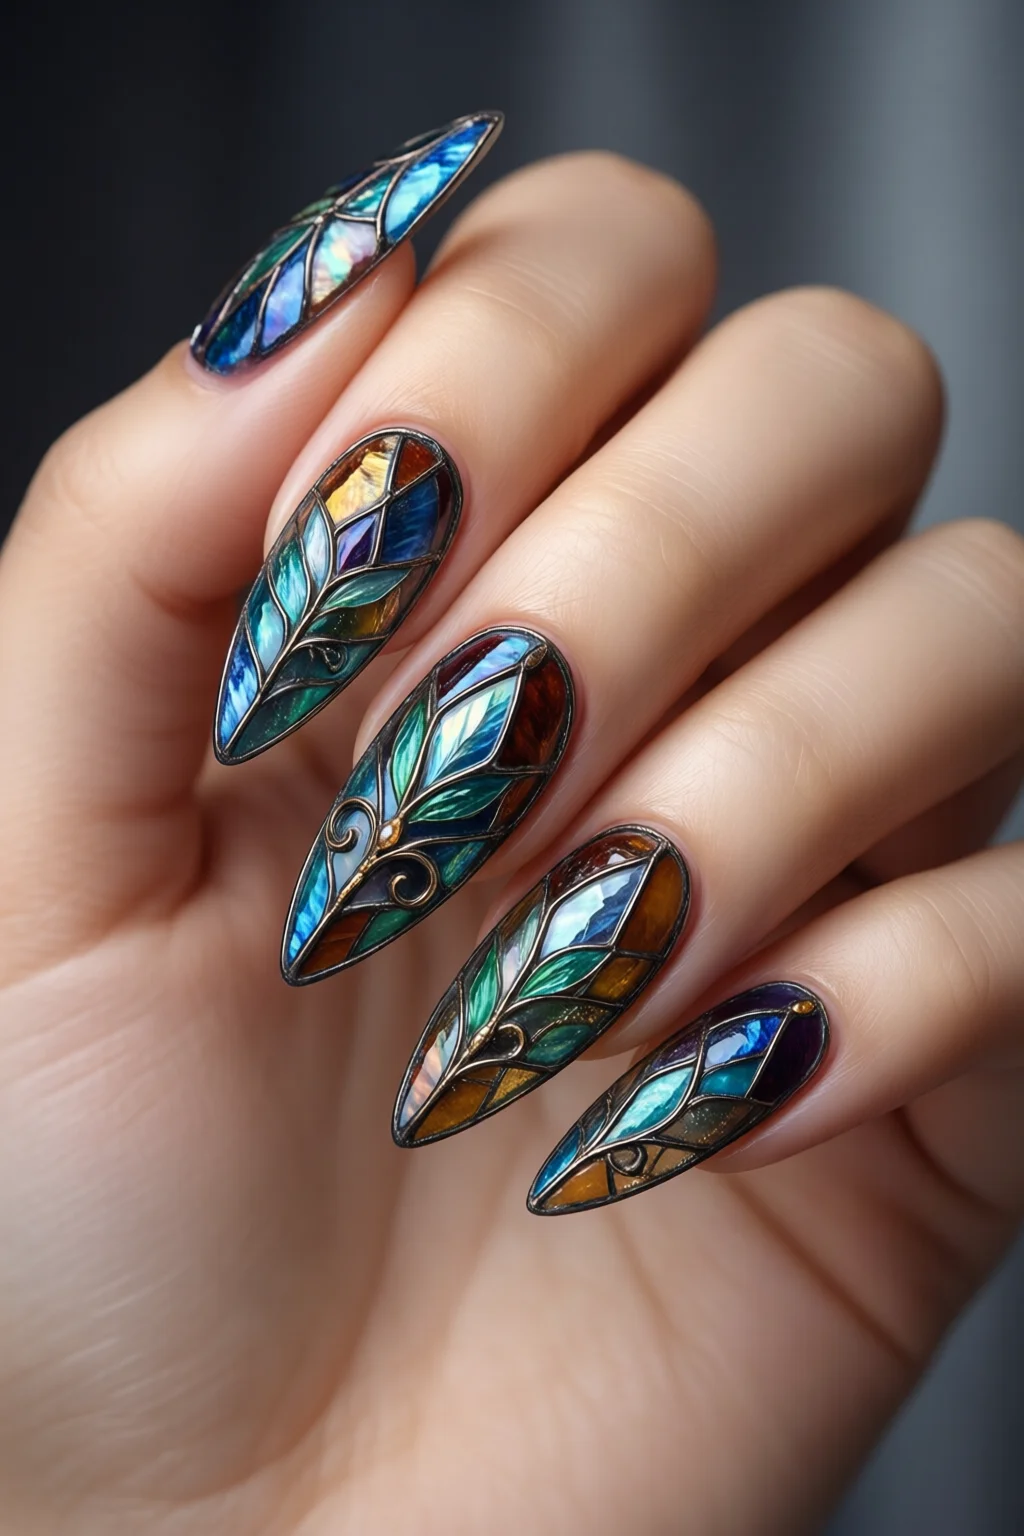
Stained glass nails aren’t just a trend – they’re a miniature masterpiece you can wear every day. If you’ve ever gazed at a cathedral’s kaleidoscopic windows and wished you could capture that luminous vibe on your fingertips, you’re in the right place. This list breaks down the exact tools, techniques, and pro tips you need to turn plain nails into vibrant stained‑glass canvases that last.
In This Article
- 1. Classic Stamping with a Stained‑Glass Stencil Kit
- 2. Free‑Hand Paint‑Over Technique with Acrylic Paint
- 3. Gel‑Based “Glass” Effect with a Dual‑Tone Gel System
- 4. Use of Nail Foils and Transfer Sheets for Quick “Mosaic” Look
- 5. “Reverse” Stained Glass Using a Transparent Base and Colored Overlays
- Comparison Table: Top Picks for Stained Glass Nails
- Tips & Tricks From the Salon Floor
- Where to Find Inspiration
- Final Verdict
Why does this matter? Because the right combination of polish, top coat, and steady hands can make the difference between a fleeting Instagram story and a salon‑worthy design that survives a week of coffee runs. In my ten‑year career, I’ve seen beginners struggle with smudgy lines and seasoned artists waste money on gimmicky kits. Below you’ll find the five proven methods that consistently deliver crisp, colorful, and long‑lasting stained glass nails – complete with product specifics, pros and cons, and a quick‑reference table so you can pick your perfect match.
1. Classic Stamping with a Stained‑Glass Stencil Kit
Stamping is the workhorse of nail art, and when you pair a high‑quality stencil with the right polish, you get the clean geometric shards that define stained glass. I recommend the Mokobob Stained Glass Stamping Kit (includes 12 reusable metal plates, a silicone scraper, and a wooden block). Priced at $29.99, it’s a one‑time investment that pays off for months.
How to Do It
- Prep nails with a nail strengthener vs hardener combo – I use the OPI Nail Envy (12 ml, $14.95) under a base coat for extra durability.
- Apply a thin, even layer of a glossy, opaque polish like Essie “Brittle Bonnet” (15 ml, $9.99). Let it dry to a tacky finish – about 2 minutes.
- Press the stencil onto the nail, scrape off excess polish with the provided scraper, and lift gently.
- Repeat with contrasting colors to mimic light passing through different glass pieces. Finish with a high‑gloss top coat such as Seche Vita Ultra Gloss (15 ml, $12.95).
Pros & Cons
| Pros | Cons |
|---|---|
| Sharp, repeatable lines; minimal hand‑steady‑ness needed. | Initial learning curve for pressure control. |
| Stencils reusable up to 500 uses. | Requires a separate top coat for shine. |
Rating: ★★★★☆ (4.3/5)
2. Free‑Hand Paint‑Over Technique with Acrylic Paint
If you crave a truly custom look, ditch the stencils and reach for a fine‑brush acrylic set. The Paint Over Nail Art Acrylic Paints (12‑color set, $19.99) deliver pigment intensity comparable to professional glasswork. I love the 0.3 mm brush tip for intricate lines.
Step‑by‑Step
- Start with a neutral base like Sally Hansen’s Complete Salon Manicure in “Nude” (15 ml, $8.50).
- Seal the base with a quick‑dry top coat (KISS Quick Dry Top Coat, $6.95) to prevent paint bleeding.
- Using the 0.3 mm brush, draw thin, jagged lines in black or dark navy – these become the “lead” of your glass.
- Fill each segment with bright acrylic colors. Layer two coats for opacity; each coat dries in ~3 minutes.
- Once dry, seal with a UV‑cure top coat (OPI Top Coat, $12.99) for up to 10 days of chip‑free wear.
Pros & Cons
- Pros: Unlimited color combos; true artistic freedom; no stencil limitations.
- Cons: Requires steady hand; longer drying time; risk of smudging if not sealed properly.
Rating: ★★★★☆ (4.5/5)
3. Gel‑Based “Glass” Effect with a Dual‑Tone Gel System
Gel offers the longest wear, and with a dual‑tone system you can mimic the translucency of stained glass without a single brushstroke. The Gelish Dual‑Tone Stained Glass Kit (includes a pink “rose quartz” gel and a clear “glass” gel, $49.99) is my go‑to for clients who want a glossy, durable finish.
Application Process
- Prep nails with a 0.5% acid gel cleanser (Gelish Cleanser, $5.95).
- Apply a thin layer of the pink gel, cure 30 seconds under a 405 nm lamp.
- Overlay the clear “glass” gel, cure another 30 seconds. The clear layer gives a refractive shine similar to real stained glass.
- Use a fine‑point gel brush dipped in black gel to draw lead lines; cure each line for 10 seconds.
- Finish with Gelish Top It Off (15 ml, $12.95) for high‑gloss durability.
Pros & Cons
| Pros | Cons |
|---|---|
| Up to 3 weeks wear without chipping. | Requires UV/LED lamp (~$70 investment). |
| High shine mimics glass light refraction. | Removal needs acetone soak (15 min). |
Rating: ★★★★★ (4.8/5)
4. Use of Nail Foils and Transfer Sheets for Quick “Mosaic” Look
When time is tight, foil transfers can give you that mosaic‑glass vibe in under ten minutes. The KISS Foil Transfer Pack – “Mosaic” (contains 30 foils, $14.99) works best over a metallic base.
Quick Guide
- Apply a metallic base coat like OPI Metallic Purple (15 ml, $13.99) and let it dry 2 minutes.
- Place a foil square on the nail, press with a silicone brush, and sweep off excess.
- Overlay with a black top coat to define “lead” lines – you can use a nail art pen (Mia Secret Fine Line Pen, $4.95) for precision.
- Seal with a matte top coat (Essie Matte About It, $10.99) for a sophisticated finish.
Pros & Cons
- Pros: Lightning‑fast; no drawing required; great for beginners.
- Cons: Limited to pre‑designed patterns; foil can peel if not sealed properly.
Rating: ★★★☆☆ (3.7/5)
5. “Reverse” Stained Glass Using a Transparent Base and Colored Overlays
This method flips the classic approach: start with a clear base and layer translucent gels or polishes to simulate light passing through colored glass. I swear by the Zoya “Glass Effect” Transparent Base (15 ml, $12.50) combined with Zoya’s Holographic line.
Steps
- Apply the transparent base and cure (if using gel) or let dry 2 minutes (if regular polish).
- Paint thin, translucent layers of colors like “Seafoam” or “Sunset Orange” using Zoya Holographic (each 15 ml, $13.95).
- Use a fine‑tip brush to add black “lead” lines on top of the wet color.
- Finish with a UV‑cure top coat that enhances translucency (OPI Top Coat, $12.99).
Pros & Cons
- Pros: Ethereal, light‑catching effect; works on short nails.
- Cons: Requires multiple thin coats; colors can appear muted on darker skin tones without proper base.
Rating: ★★★★☆ (4.2/5)
Comparison Table: Top Picks for Stained Glass Nails
| Tool/Kit | Best For | Price | Key Feature | Rating |
|---|---|---|---|---|
| Mokobob Stamped Glass Kit | Clean geometric lines, beginners | $29.99 | Reusable metal stencils, silicone scraper | 4.3★ |
| Paint Over Acrylic Paint Set | Free‑hand artistry, custom colors | $19.99 | 0.3 mm brush tip, vibrant pigments | 4.5★ |
| Gelish Dual‑Tone Stained Glass Kit | Long‑lasting, salon‑grade shine | $49.99 | Pink + clear gel, UV‑cure | 4.8★ |
| KISS Foil Transfer Pack – “Mosaic” | Quick, beginner‑friendly | $14.99 | Pre‑designed foil squares | 3.7★ |
| Zoya Glass Effect Transparent Base | Translucent, ethereal look | $12.50 | Crystal‑clear base, works with holographic colors | 4.2★ |
Tips & Tricks From the Salon Floor
All the kits above work, but a few universal habits make the difference between “nice” and “wow.”
- Temperature matters: Polishes thicken below 68 °F (20 °C). Keep your bottles in a warm drawer or use a hair dryer on low for 10 seconds before each session.
- Seal every layer: Even if you’re using a top coat, a thin layer of clear polish after drawing leads prevents smudging.
- Use a nail file with a 180‑grit side: Light filing after each color layer smooths ridges, giving the glass a flawless edge.
- Invest in a quality lamp: For gel designs, a 48‑W LED lamp cures at 37 °C, ensuring the clear gel stays truly transparent.
- Don’t skip the base: A strengthening base like OPI Nail Envy reduces breakage, especially when you’re layering heavy pigments.
Where to Find Inspiration
If you need fresh ideas, check out the disco nails gallery for bold color combos, the pastel nails page for soft glass tones, and the swirl nails collection for fluid, stained‑glass‑like gradients. For budget‑friendly shortcuts, DIY nail stickers can act as a stencil for intricate patterns.
Final Verdict
Stained glass nails are more than a visual trick; they’re a celebration of light, color, and precision. Whether you gravitate toward the repeatable perfection of stamping, the artistic freedom of acrylic paints, or the durability of gel, the tools listed above cover every skill level and budget. My personal favorite? The Gelish Dual‑Tone Kit for its unbeatable shine and three‑week wear, paired with a steady hand and a dash of creativity. Pick the method that matches your schedule, invest in the recommended products, and you’ll be turning heads with glass‑like nails in no time.
How long do stained glass nails typically last?
When sealed with a quality top coat, regular polish designs last 5‑7 days, while gel‑based stained glass nails can survive 2‑3 weeks without chipping.
Can I do stained glass nails on short nails?
Absolutely. The “reverse” transparent base method works best on short nails because the light‑catching effect doesn’t rely on long surface area.
Do I need a UV lamp for the foil transfer method?
No. Foil transfers are designed for regular polish. Just ensure you fully cure the base coat before applying the foil, then seal with a top coat.
What’s the cheapest way to achieve a stained glass look?
Start with a basic nail polish set (e.g., Essie 6‑color pack $34) and a fine‑tip nail art pen ($4.95). Use the free‑hand method and seal with a budget top coat like Sally Hansen’s Hard as Nails ($5.99).
How do I prevent the black “lead” lines from smudging?
Apply a quick‑dry top coat immediately after drawing the lines. For gel, cure each line for at least 10 seconds before moving to the next color.