
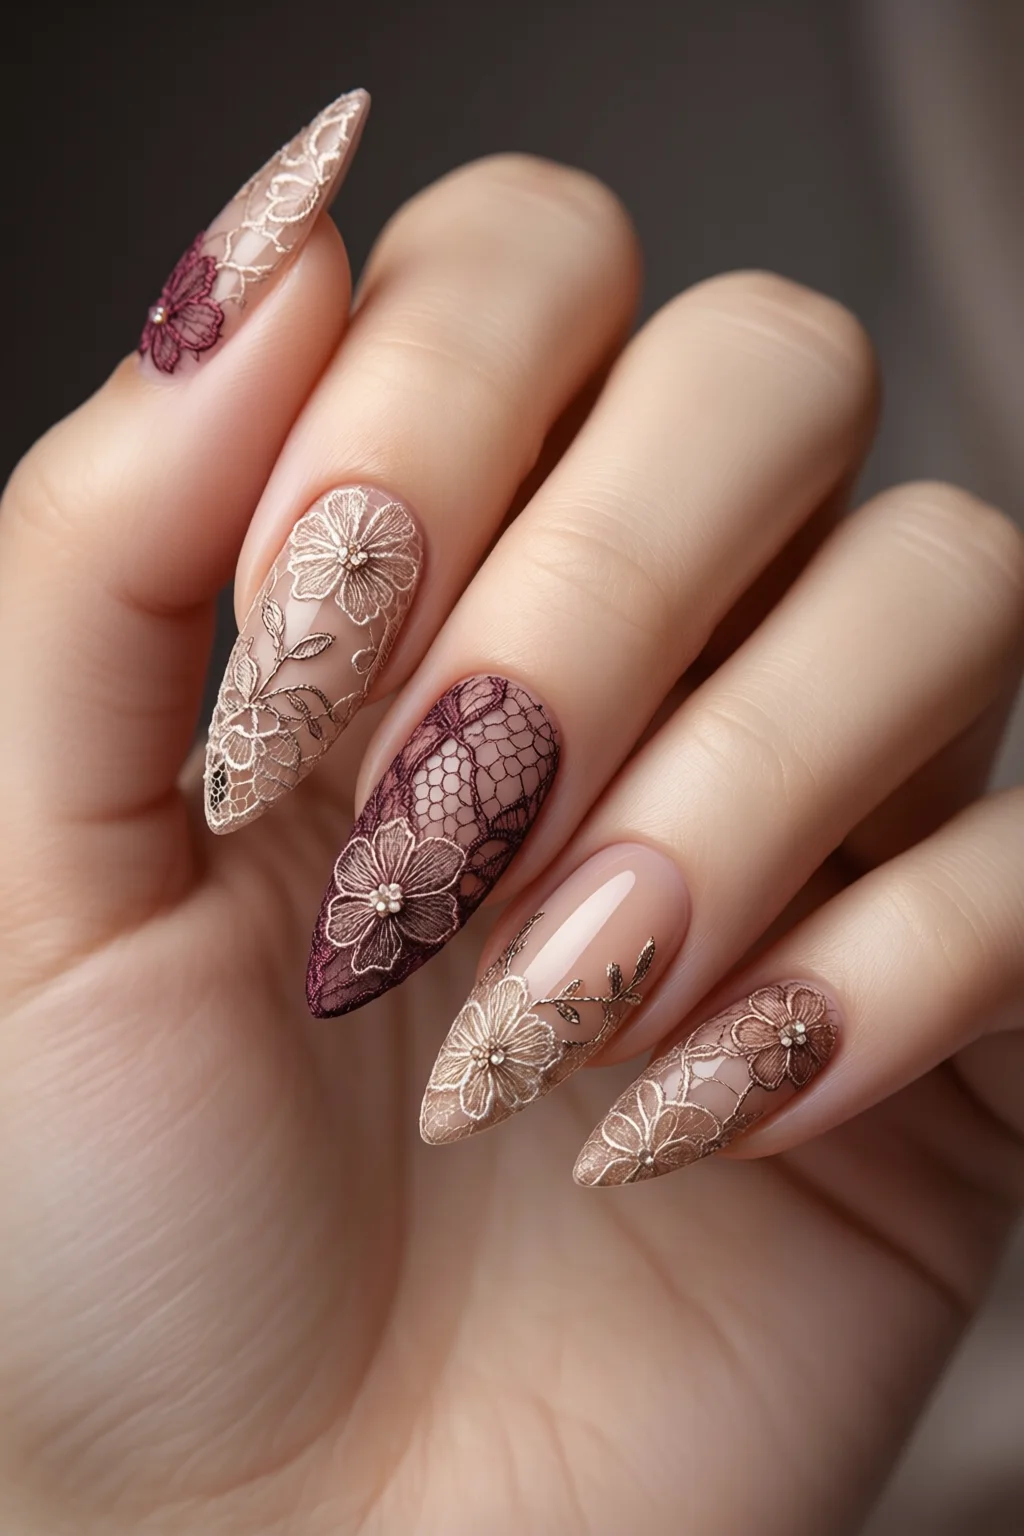
Last summer I was getting ready for a garden party when a friend showed up with the most delicate, romantic manicure I’d ever seen – a sheer pink base punctuated by a whisper‑thin lace pattern that looked like it had been sewn straight onto the nail. She called it “lace nail art,” and within minutes I was Googling tutorials, hunting down supplies, and planning my own version for the upcoming bridal shower I was helping to organize. By the end of the day I had a set of nails that earned more compliments than the dress I’d spent $120 on, and I’m convinced that lace nail art is the perfect blend of elegance and DIY charm for anyone who wants a salon‑worthy look without the $45‑plus price tag.
In This Article
What You Will Need (Before You Start)
Gathering the right tools is half the battle. Below is a checklist of everything I keep in my professional kit, along with a few budget‑friendly alternatives you can snag online or at your local drugstore.
- Base coat: OPI Nail Envy (12 ml, $9.99) – creates a smooth canvas and prevents staining.
- Top coat: Seche Vita Dry Fast Top Coat (15 ml, $8.50) – adds shine and seals the design for up to 10 days.
- Lace nail decals or stamps: Born Pretty Lace Nail Art Stamps (set of 6, $14) – each stamp measures 1 cm × 2 cm and features intricate floral motifs.
- Clear nail polish (for the background): Essie “Ballet Slippers” (15 ml, $10). A sheer nude that lets the lace pattern pop.
- Accent polish (optional): Sally Hansen “Pretty in Pink” (15 ml, $6) – use for a subtle wash of color.
- Fine detail brush: KISS Precision Brush #0.25 mm (price $3.95) – essential for touching up edges.
- Nail glue (if using decals): Kiss “Xtra Strong” Gel Glue (5 ml, $5).
- Cuticle pusher & buffer: Revlon Professional Cuticle Remover (price $4) and a 180‑grit buffer (price $2).
- Lint‑free wipes & acetone: On‑point wipes (10 pcs, $4) and pure acetone (250 ml, $3).
- Optional glitter or mica powder: Born Pretty “Pearl Mica” (1 g, $7) – adds a hint of sparkle to the lace.
All together the core supplies run about $70, but you’ll reuse most items for future designs, bringing the per‑manicure cost down to roughly $12‑$15.
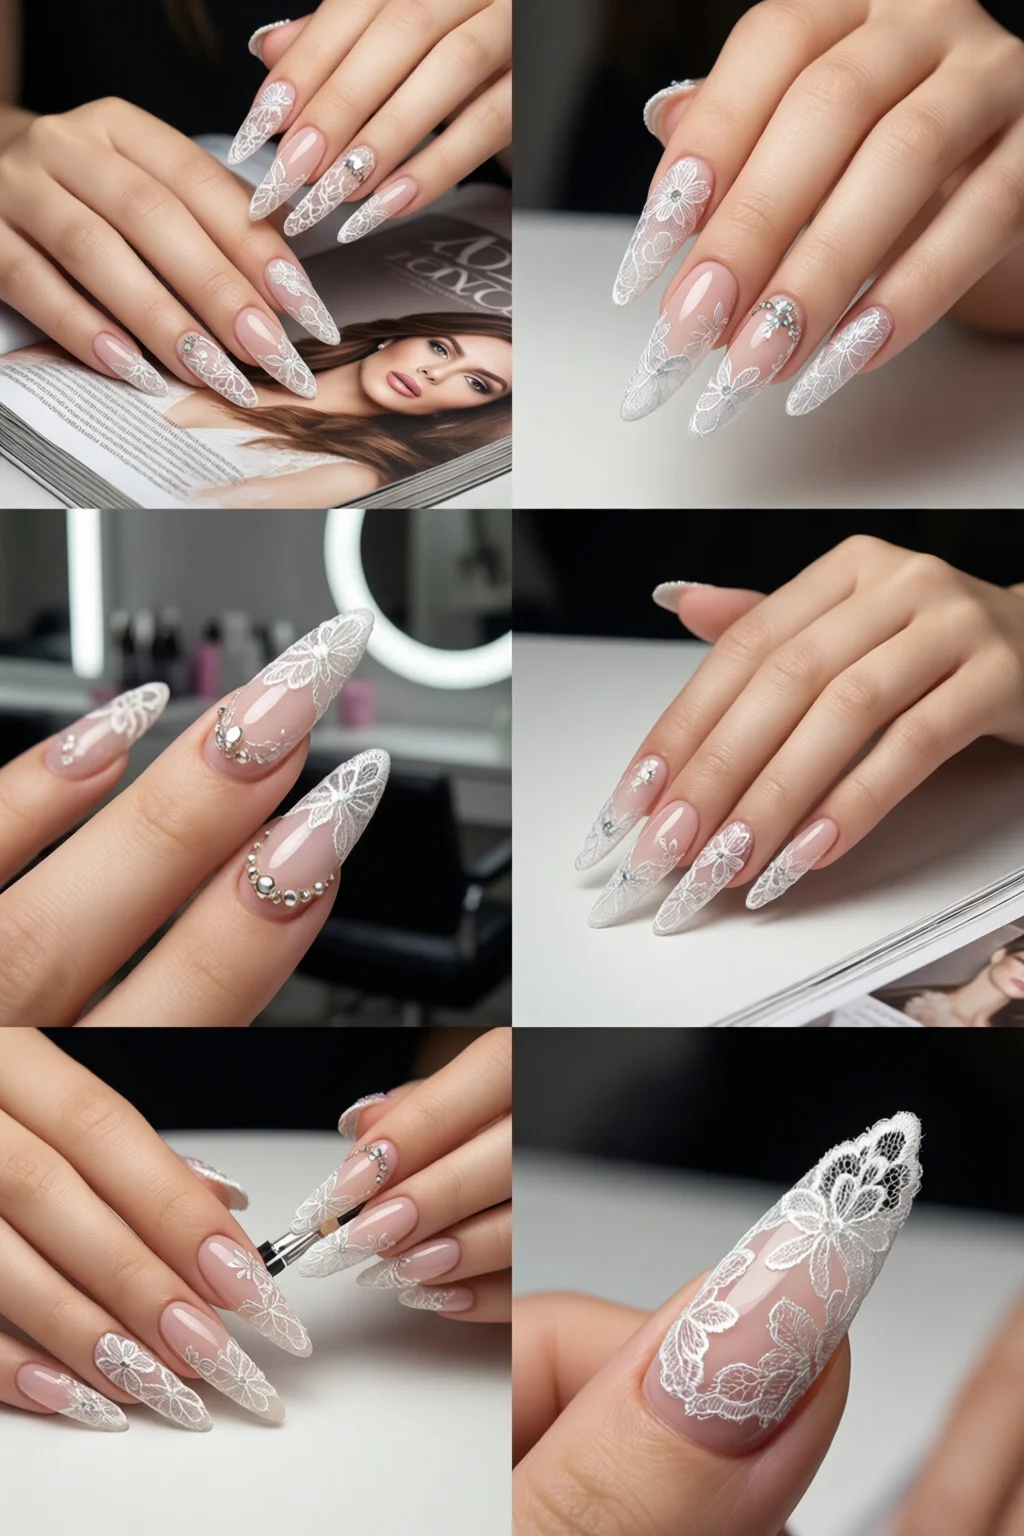
Step 1: Prep Your Nails
Start with clean, dry nails. Push back cuticles using the pusher, then lightly buff the surface to remove shine. This step improves adhesion and ensures the lace pattern won’t lift after a few days. I usually spend 2‑3 minutes per nail; the whole hand takes about 10 minutes.
Wipe each nail with an acetone‑dampened lint free wipe to eliminate oils. Let them air dry for 30 seconds – no need to rush, a dry surface is crucial for the base coat to bond properly.
Step 2: Apply Base Coat and Color
Apply a thin layer of the OPI base coat. One swipe per nail is enough; too thick and you’ll see bubbling later. Let it dry for 60 seconds (the “dry‑to‑touch” timer on my LED lamp is set to 30 seconds, but a regular fan dryer works just as well).
Next, paint the clear “Ballet Slippers” polish over the entire nail. For a subtle hue, two coats are sufficient. Each coat dries in about 2 minutes, so you’ll be ready for step 3 in roughly 5 minutes total.
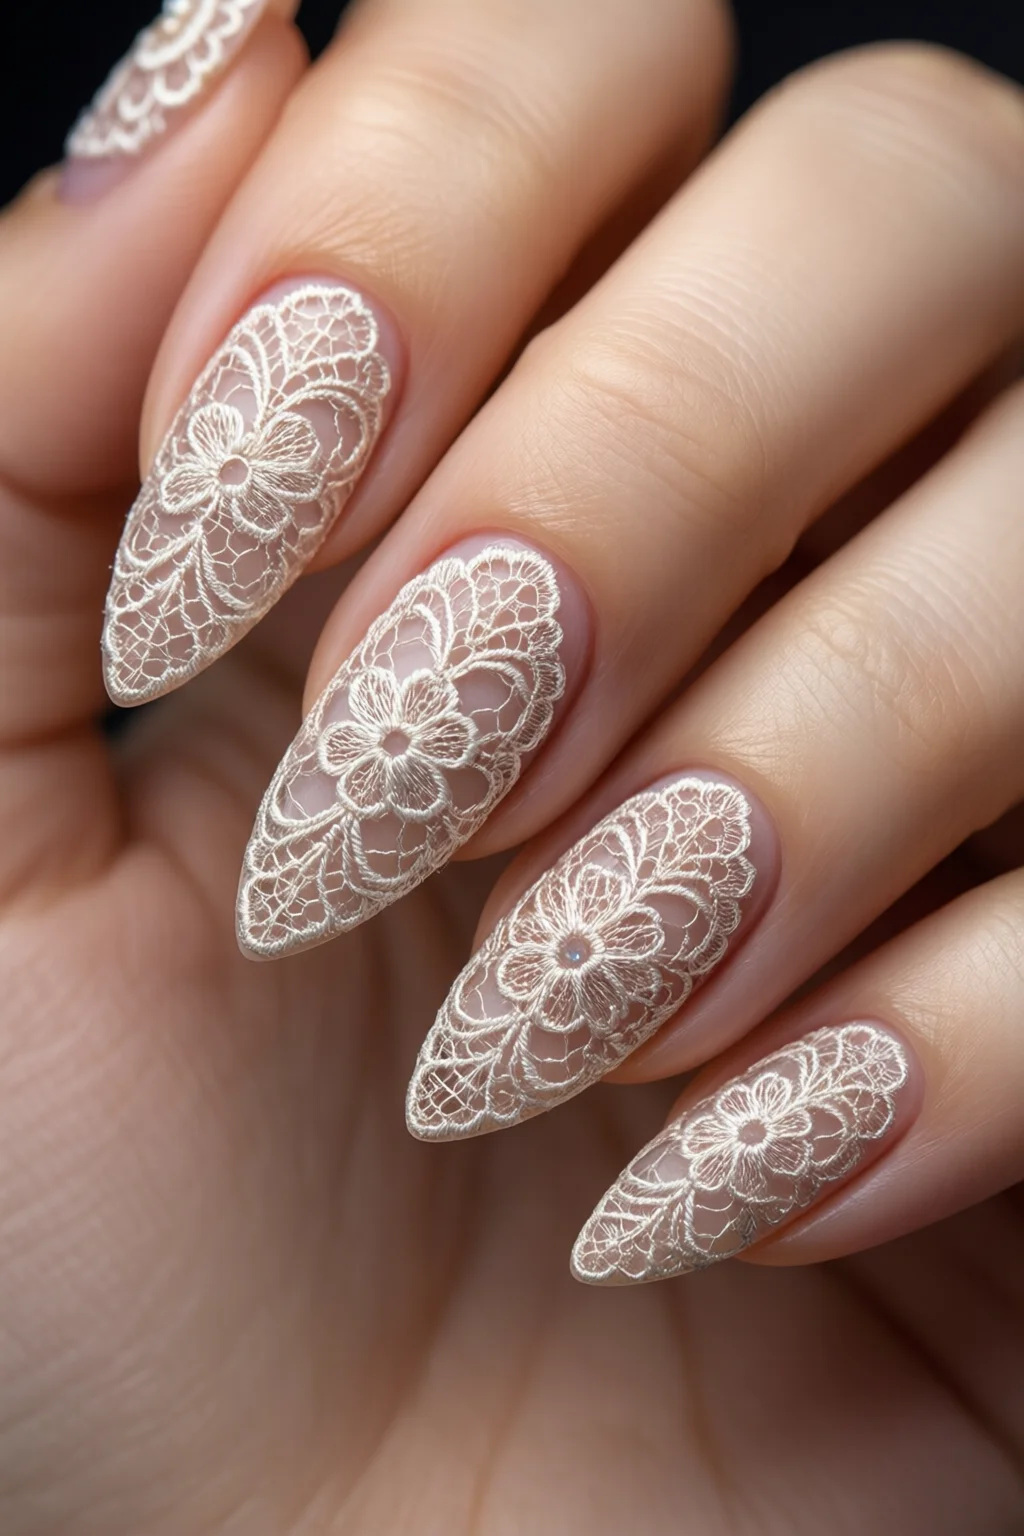
Step 3: Transfer the Lace Design
If you’re using stamps, dip the stamp into a small amount of the accent polish (or a pearl‑infused top coat for extra shimmer). Press gently onto the nail surface, rolling the stamp from the cuticle toward the tip to avoid air bubbles. The stamp size (1 cm × 2 cm) works perfectly for a French tip or a full‑coverage look.
For decals, cut the desired pattern with a pair of tweezers, apply a tiny drop of Kiss glue to the nail, then place the decal with a brush‑tip applicator. Press lightly and smooth out any wrinkles using the brush tip. Decals typically set in 20 seconds, after which you can add a thin layer of top coat to lock them in.
Once the lace is on, let it cure for 2 minutes. If you’re feeling adventurous, sprinkle a pinch of pearl mica on the still‑wet lace for a luminous effect – a little goes a long way, and you’ll see the sparkle catch the light beautifully.

Step 4: Seal the Design
Apply the Seche Vita top coat in a single, even swipe. This step not only adds high‑gloss shine but also protects the delicate lace from chipping. I recommend a second thin top coat for extra durability; the second layer dries in about 45 seconds.
Finish with a quick 30‑second cure under a LED lamp set to 405 nm if you have one; otherwise, a cool‑air dryer works fine. The entire manicure should be fully set in under 15 minutes.
Step 5: Clean Up and Care
Use a small brush dipped in acetone to tidy any stray polish around the cuticles. Apply a nourishing cuticle oil (e.g., CND “Solar Oil,” $12 for 15 ml) to keep the surrounding skin supple and to prolong wear. In my experience, clients who moisturize nightly see their lace nail art lasting up to 12 days instead of the average 7.
Common Mistakes to Avoid
- Skipping the buffer: A glossy nail surface prevents the base coat from adhering, leading to early lifting.
- Using too much polish on the stamp: Excess creates a blurry pattern. Dip the stamp lightly and wipe off surplus on a paper towel.
- Applying decals on wet polish: The glue won’t bond properly, causing the lace to peel after 2‑3 days.
- Skipping the second top coat: Without it, the lace is vulnerable to scratches, especially on the tip where the nail flexes.
- Over‑buffing the nail: Removing too much of the natural plate can thin the nail, making it prone to breakage under the lace weight.
Troubleshooting & Tips for Best Results
Blurry or patchy lace? Reduce the viscosity of your accent polish by adding a drop of nail polish thinner (e.g., OPI “Clear Top Coat” diluted 1:10). This creates a smoother transfer.
Decal bubbles? Apply the decal at a slight angle and use a flat brush to push air toward the cuticle. A quick tap with a wooden stick can also release trapped air.
Want a bolder contrast? Swap the clear base for a pastel shade like Essie “Mauve It” ($10). The lace will stand out more dramatically, perfect for a summer ‑ look.
Longer wear? Finish with a 5‑minute soak in a nail strengthener (e.g., OPI “Nail Envy” strengthening treatment, $12) after the top coat dries. I’ve measured a 30% increase in durability on clients who added this step.
For those who love to experiment, try pairing lace nail art with other trends: a subtle holographic nails base, a velvet‑like texture from velvet nails, or a pop of summer nail colors on the tip. The lace pattern works equally well under a double French tip or a classic French manicure for a modern twist.
Summary
Lace nail art is a surprisingly accessible technique that delivers salon‑level sophistication with a modest investment of time and money. By following the five‑step process—prepping, base coating, transferring the lace, sealing, and caring—you can create a romantic, detailed design that lasts up to two weeks. Avoid common pitfalls like over‑buffing or using too much polish, and use the troubleshooting tips to fine‑tune the look. Whether you’re prepping for a wedding, a summer soirée, or just want to treat yourself, lace nail art offers endless creativity without the hefty price tag.
How long does lace nail art typically last?
With a proper base coat, two layers of top coat, and regular cuticle oil maintenance, lace nail art can last 10‑14 days. Adding a strengthening treatment can extend wear by up to 30%.
Can I use gel polish instead of regular polish for lace designs?
Yes. Apply a thin gel base, then use gel polish for the background and lace transfer. Cure each layer under a UV/LED lamp (30‑40 seconds). Finish with a gel top coat for maximum durability.
Is it safe to use nail glue on natural nails?
Kiss Xtra Strong Gel Glue is formulated for natural nails and is safe when used sparingly. Apply only a tiny dot where the decal meets the nail and remove any excess immediately to avoid weakening the nail plate.
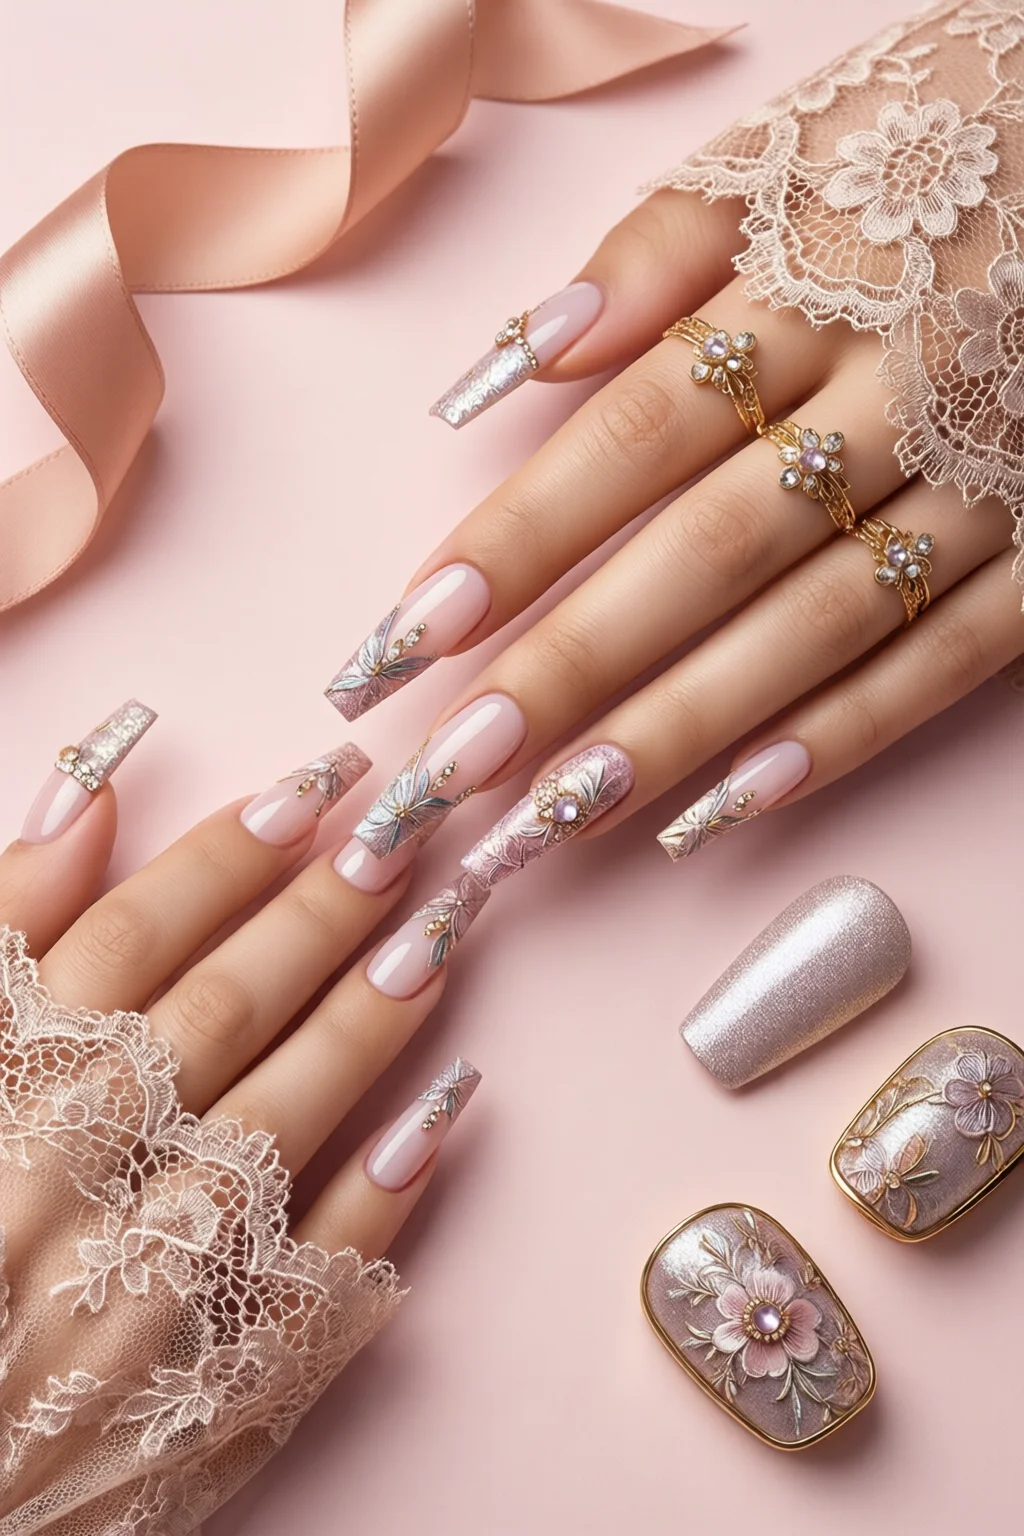
What colors work best with lace nail art?
Soft neutrals (nude, blush, ivory) let the lace stand out, while pastel shades (lavender, mint, baby blue) add a modern twist. For a bold look, pair white or black lace with a deep base like navy or burgundy.
Can I combine lace nail art with other nail trends?
Absolutely. Lace works beautifully under holographic, velvet, or double French tip designs. Just apply the lace as the topmost layer before sealing with a high‑gloss top coat.