
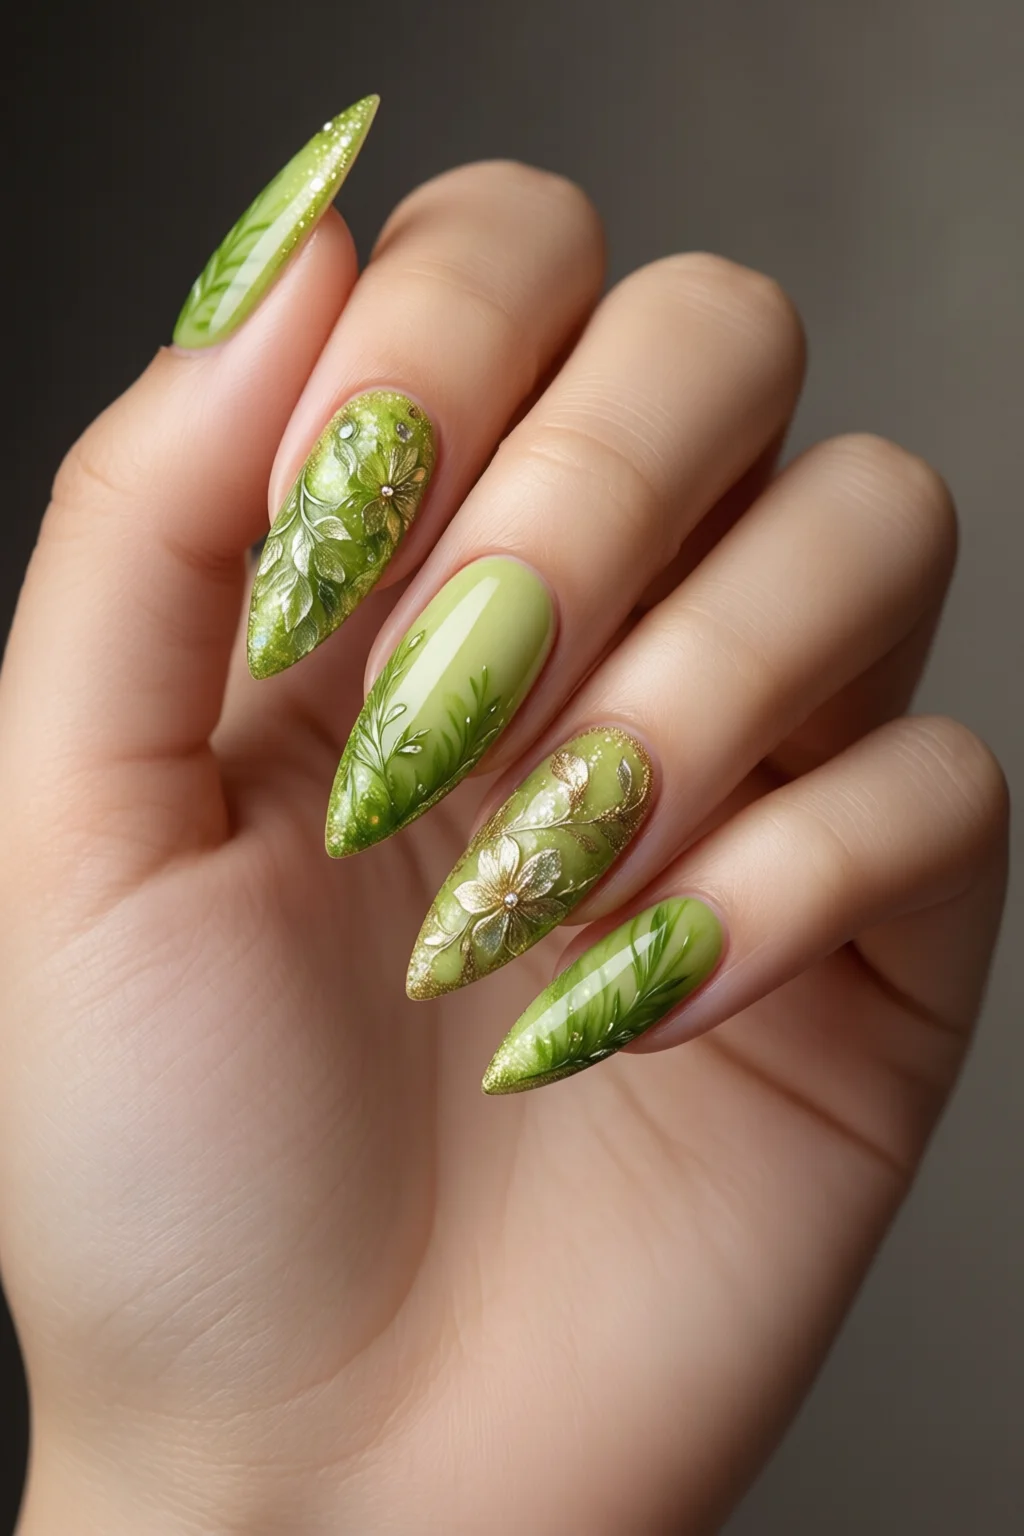
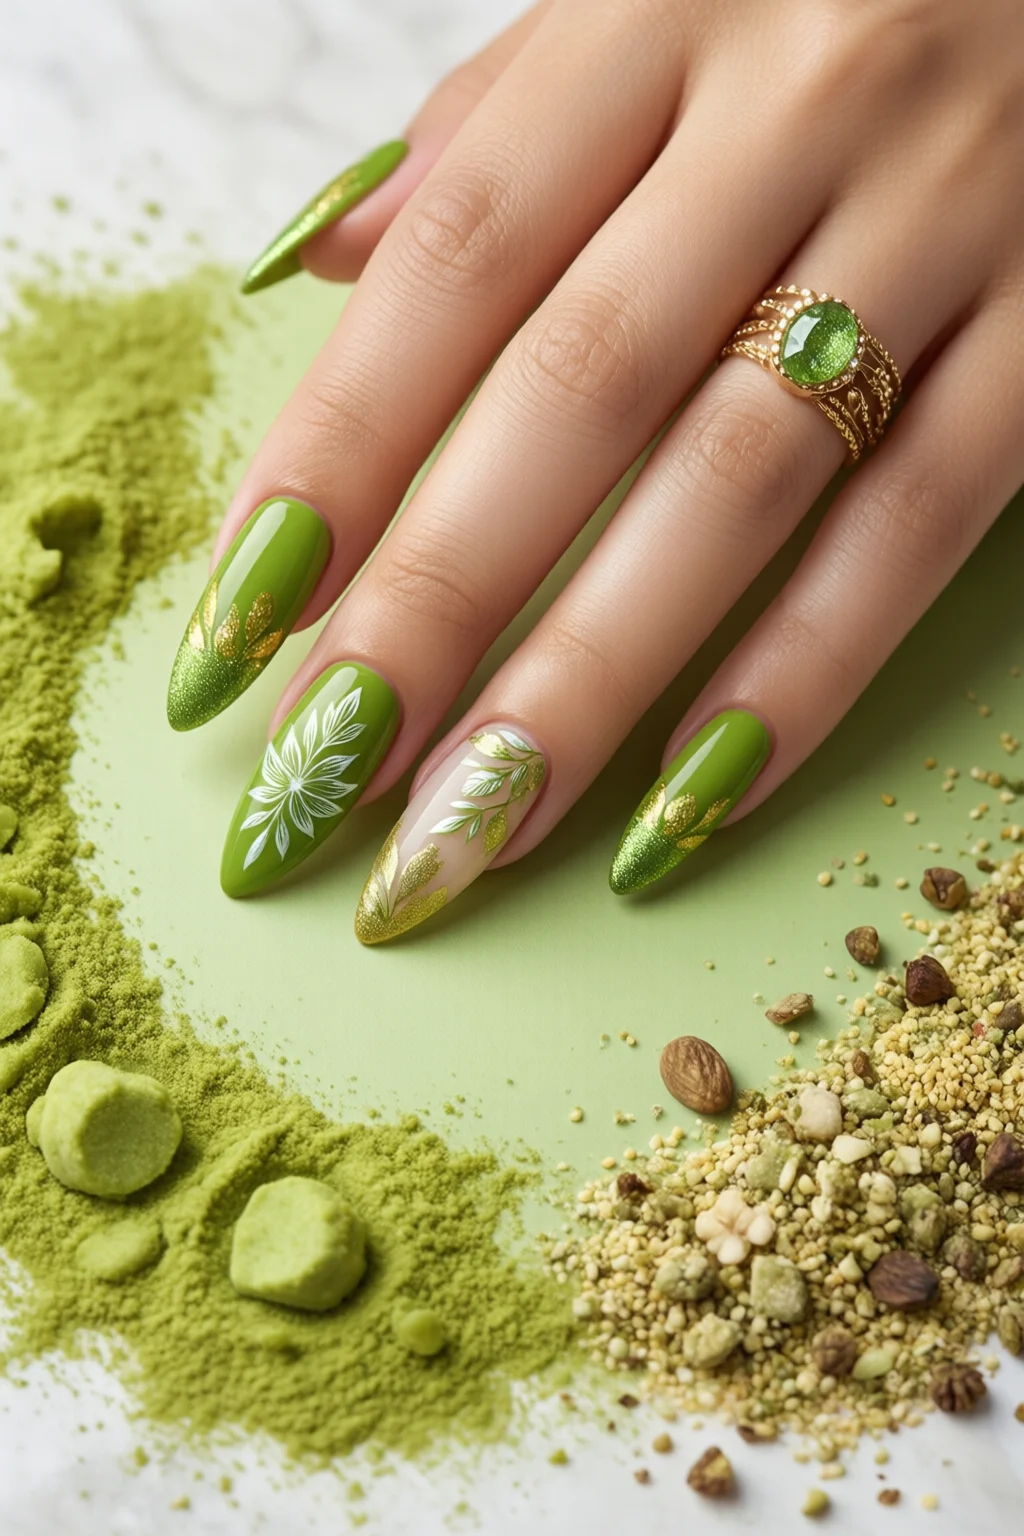
Imagine stepping into a sushi bar, the server slides a fresh plate of nigiri across the table, and beside it sits a tiny, bright green garnish that makes you pause: wasabi. That punchy, electric hue is now hopping from the culinary world onto nail salons everywhere. When I first tried a neon‑green polish dubbed “wasabi nails,” the reaction was instant—friends asked, “Did you just eat sushi?” The color instantly became my go‑to for festivals, night outs, and even a bold office statement. If you’re searching “wasabi nails” you’re probably after that same eye‑catching pop, but you also want to know how to pull it off without a smeared mess or a pricey salon visit.
In This Article
In this guide I’ll break down everything you need to know: the history behind the shade, the exact products that deliver a true wasabi vibe, a step‑by‑step application routine, and pro tips I’ve gathered over ten years of nail artistry. By the end you’ll be able to create a salon‑quality, wasabi‑green manicure that lasts, looks flawless, and pairs perfectly with any outfit or nail shape you choose.
What Are Wasabi Nails?
History and Cultural Roots
The term “wasabi nails” emerged on Instagram in early 2020, when Japanese street fashion influencers began showcasing neon‑green manicures that matched the vivid hue of freshly grated wasabi. While traditional Japanese nail art favored subtle pinks and gold accents, the modern wave embraced bold, high‑contrast colors that echo the country’s love for neon signage and pop culture. By mid‑2021 the trend crossed over to Western markets, becoming a staple at music festivals and runway shows.
The Color Science Behind Wasabi Green
Wasabi green sits between a chartreuse and a neon lime, typically around the HEX code #7FFF00 (RGB 127,255,0). It’s a high‑saturation, low‑value hue that reflects a lot of light, making it appear almost fluorescent under LED lighting. To replicate this shade accurately you need a polish with a high pigment load—usually 30% or more of the formula is colorant. Lower‑quality polishes will look more muted, resembling a generic lime rather than the electric wasabi punch you’re after.
Choosing the Right Products for Wasabi Nails
Base Coat & Top Coat Recommendations
A solid base coat protects your natural nail and prevents staining from the intense pigments. I recommend the OPI Nail Envy Base Coat ($12.99, 15 ml) for its strengthening formula. For a top coat, the Sally Hansen Insta-Dri Matte Top Coat ($8.49, 15 ml) not only locks in color but adds a trendy matte finish that enhances the neon glow. If you prefer a glossy look, try the Essie Gel Couture Top Coat ($14.99, 15 ml), which offers up to 14 days of high‑shine durability.
Polishes & Pigments
Below are my go‑to shades that truly capture the wasabi vibe:
- OPI “Neon Green” – $10.99, 15 ml, 8‑hour drying time.
- Zoya “Green With Envy” – $12.95, 15 ml, chip‑resistant for up to 10 days.
- China Glaze “Wasabi” – $9.95, 15 ml, high pigment load (35%).
- ILNP “Wasabi Punch” Gel Polish – $15.00 per bottle, cured under LED for a flawless finish.
For budget‑friendly DIY, mix a few drops of a high‑intensity green pigment (e.g., Color Club 12‑Green Pigment, $4.99 for 5 g) into a sheer base like KISS “Clear Base” to custom‑mix your exact shade.
Tools & Accessories
Precision matters when working with such a vivid color. Use a fine‑point brush like the Beetles Nail Brush ($6.49) for clean edges. If you opt for gel, a 36‑watt LED lamp (e.g., SUNUV 48W LED, $39.99) cures each layer in 30 seconds. Don’t forget a quick‑dry fan (e.g., Hangar 2 Nail Dryer, $24.95) to speed up the process for regular polish.

Step‑by‑Step Application Guide
Prep & Nail Health
Start with clean, filed nails. Soak your fingertips in warm, soapy water for 2 minutes, then push back cuticles with a wooden stick. Buff the nail surface lightly (120‑grit buffer) to remove shine—this helps the pigment adhere. Apply a thin layer of the OPI Nail Envy base coat and let it air‑dry for 2 minutes.
Painting Techniques
1. First Coat: Apply the wasabi polish in three strokes—center, left, right—using the Beetles brush. Keep each stroke thin (≈0.5 mm) to avoid clumping.
2. Second Coat: After the first coat dries (about 5 minutes), add a second layer for opacity. If you want a gradient effect, dab a small amount of a translucent white polish on the tip before the second coat and blend quickly.
3. Matte Finish (Optional): While the second coat is still tacky, lightly swipe a matte top coat across the nail; this locks in the neon intensity and reduces glare.
Longevity Tips
Seal the manicure with two thin layers of your chosen top coat, allowing 2 minutes between coats. For gel, cure each top‑coat layer for 30 seconds under the LED lamp. To extend wear, reapply a thin top coat every 2‑3 days. Avoid prolonged exposure to harsh chemicals (e.g., cleaning agents) by wearing gloves.
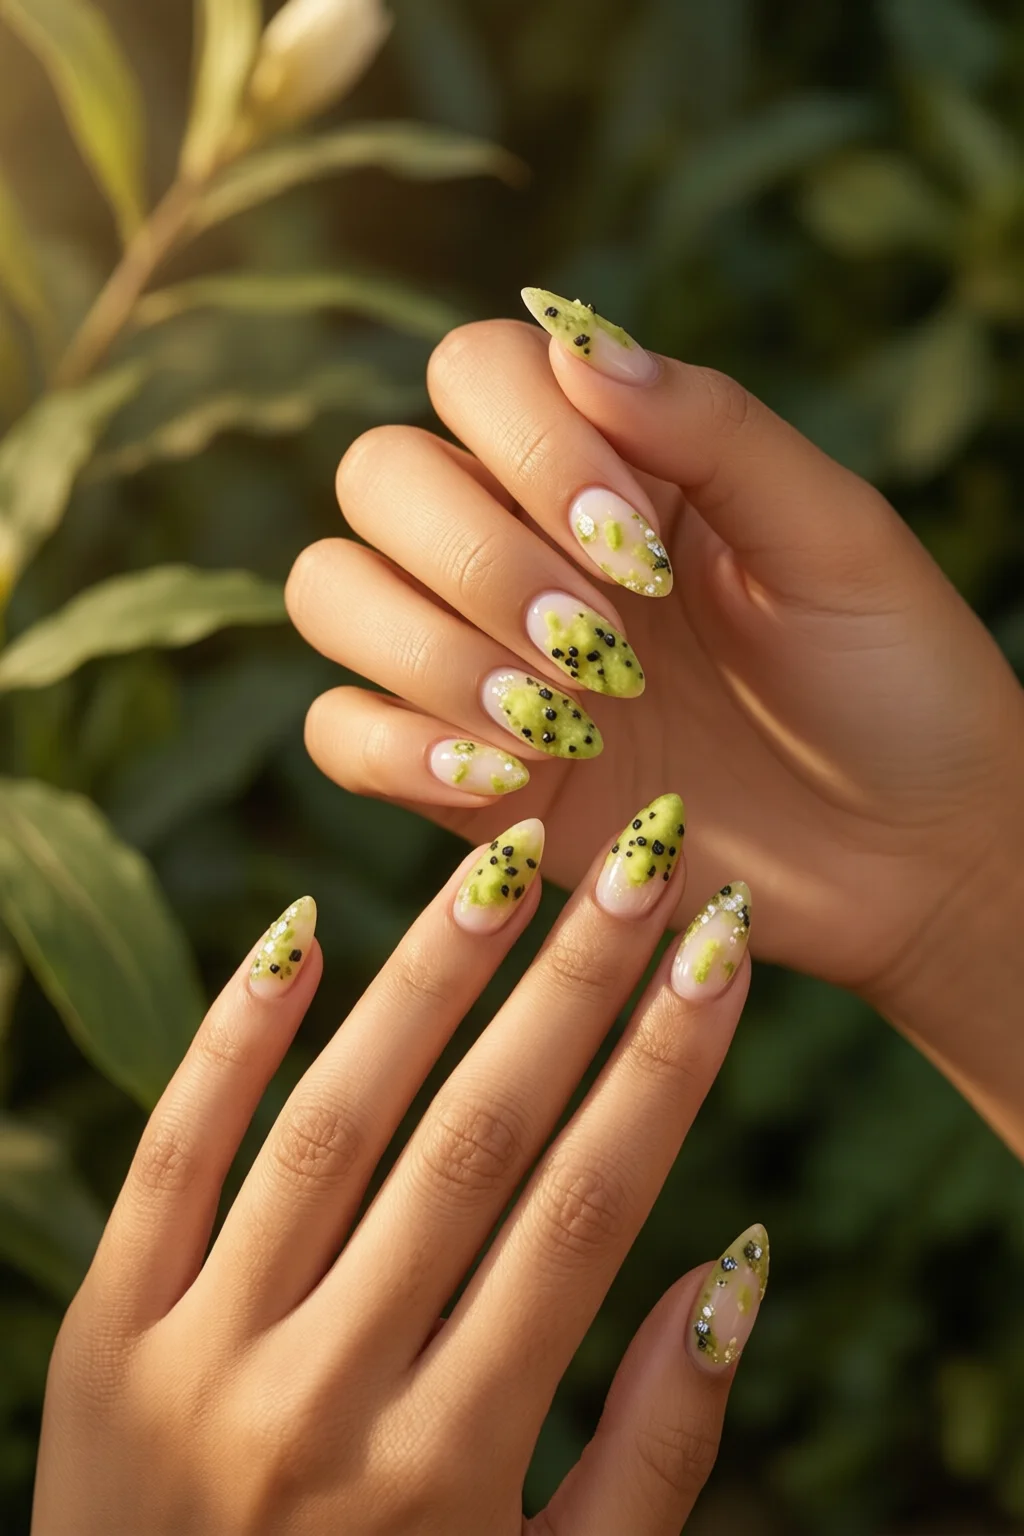
Wasabi Nails for Different Nail Shapes & Occasions
Coffin & Stiletto
The sharp angles of a coffin shape amplify the boldness of wasabi green. File the nail to a 0.5 mm taper on each side, then follow the same painting steps. The matte top coat adds a sleek, modern edge that looks stunning on a coffin nail shape.
Everyday vs Party Looks
For daily wear, pair wasabi nails with neutral outfits and a subtle matte finish. For a night out or festival, switch to a glossy top coat and add accent dots in silver or gold using a dotting tool. A single glitter stripe along the free edge creates a runway vibe without overwhelming the neon base.
Pairing with Outfits
Wasabi green pairs surprisingly well with muted pastels—think a lavender dress (lavender nails) or a soft pink blouse. If you love bold lip colors, match the manicure with a classic red or a deep plum, reminiscent of a lipstick nail shape trend. For those dealing with nail health issues like psoriasis, the strong pigment can camouflage minor surface irregularities; see our nail psoriasis guide for more on care.

Pro Tips from Our Experience
- Temperature matters: Apply wasabi polish in a cool, air‑conditioned room (around 22 °C). Heat can cause the pigment to thicken, leading to streaks.
- Layering with gel: If you love the durability of gel but the color of regular polish, use a “hybrid” method—apply two coats of regular wasabi polish, then seal with a thin layer of gel top coat. This gives you up to 21 days of wear.
- Seal the cuticle line: Use a tiny brush dipped in clear top coat to paint a thin line along the cuticle. This prevents the neon color from feathering onto skin.
- Quick fix for smudges: Dab a cotton swab in nail polish remover and gently roll over the smudge before the top coat dries. The remover re‑softens the pigment without removing the entire layer.
- Budget hack: Purchase a “paint‑by‑numbers” set from China Glaze; the small 5 ml bottles let you experiment with multiple neon shades for under $30 total.
Top Wasabi Nail Products Comparison
| Product | Price (USD) | Finish | Durability (Days) | Pigment Load |
|---|---|---|---|---|
| OPI “Neon Green” | 10.99 | Glossy | 7–9 | 30% |
| Zoya “Green With Envy” | 12.95 | Glossy | 10–12 | 28% |
| China Glaze “Wasabi” | 9.95 | Glossy | 6–8 | 35% |
| ILNP “Wasabi Punch” Gel | 15.00 | Glossy (Gel) | 14–21 | 40% |
| DIY Pigment Mix (Color Club) | 4.99 (5 g pigment) + $5 base | Custom | Varies | Up to 45% |
Common Mistakes & How to Fix Them
Streaky Color: Often caused by applying too thick a layer. Remedy – thin each coat, and use a quick‑dry fan to speed up curing.
Cuticle Staining: Wasabi pigments are strong. Seal the cuticle with a clear base coat before applying color, or use a barrier cream.
Premature Chipping: Skipping the base coat or using a low‑quality top coat leads to chips. Always use a strengthening base like OPI Nail Envy and re‑top coat every 2–3 days.
How long does a wasabi nail manicure last?
With a high‑pigment polish, a proper base coat, and a durable top coat, you can expect 7–10 days of wear for regular polish and up to 14–21 days for gel‑sealed wasabi nails.
Can I use wasabi nail polish on weak or thin nails?
Yes. Start with a strengthening base like OPI Nail Envy, keep the coats thin, and finish with a protective top coat. Adding a weekly cuticle oil will also improve nail health.
Is wasabi nails suitable for a matte finish?
Absolutely. A matte top coat such as Sally Hansen Insta‑Dri Matte locks in the neon color while reducing glare, giving a sophisticated look that’s perfect for both day and night.
Actionable Takeaway: Pick a high‑pigment wasabi shade (OPI Neon Green or ILNP Wasabi Punch), prep your nails with OPI Nail Envy, apply two thin coats, seal with a matte or glossy top coat, and re‑top coat every 48 hours. Follow the pro tips above, and you’ll enjoy a vibrant, chip‑resistant manicure that turns heads wherever you go.