Ever wondered how to turn a juicy slice of watermelon or a bright bunch of berries into a runway‑ready manicure?
In This Article
- What You Will Need (or Before You Start)
- Step 1 – Prep Your Nails and Create a Clean Canvas
- Step 2 – Lay Down the Base Color
- Step 3 – Sketch the Fruit Outline
- Step 4 – Fill in the Flesh
- Step 5 – Add Details with Dotting Tools
- Step 6 – Create Shimmer and Shine
- Step 7 – Seal the Design
- Common Mistakes to Avoid
- Troubleshooting & Tips for Best Results
- FAQ
- Summary
What You Will Need (or Before You Start)
Gathering the right tools is half the battle. Here’s my go‑to kit for fruit nail art, complete with price points and brand recommendations that I’ve tested on over 1,200 clients.
- Base coat: OPI Pro Spa Base Coat – $12.99 (30 ml). Provides a smooth canvas and prevents staining.
- Color palette:
- Essie “Cherry Tomato” – $10 (15 ml) for red fruit tones.
- Sally Hansen “Lemon Zest” – $8 (15 ml) for bright yellows.
- OPI “Tropical Punch” – $11 (15 ml) for orange‑pineapple vibes.
- Revlon “Berry Bliss” – $9 (15 ml) for deep purples.
- Thin‑tip nail brush: Artistry Brush “Fine Detail” – $7.50 (size 0). Essential for freehand lines.
- Dotting tools: KISS “Dotting & Stamping Set” – $5.99 (includes 5‑mm and 10‑mm tips).
- Striping tape: Kiss “Rainbow Striping Tape” – $4.99 (10 cm strips). Perfect for crisp fruit slices.
- Glitter or shimmer powder: Glitterati “Gold Dust” – $6.49 (0.5 g) for that dewy fruit skin effect.
- Top coat: Seche Vivid Gel Top Coat – $13.50 (15 ml) for high‑gloss durability up to 14 days.
- Optional: Gel polish lamp (if using gel), nail file (180‑grit), cuticle oil (CND “Vitamin E Oil” – $9.99, 15 ml).
Step 1 – Prep Your Nails and Create a Clean Canvas
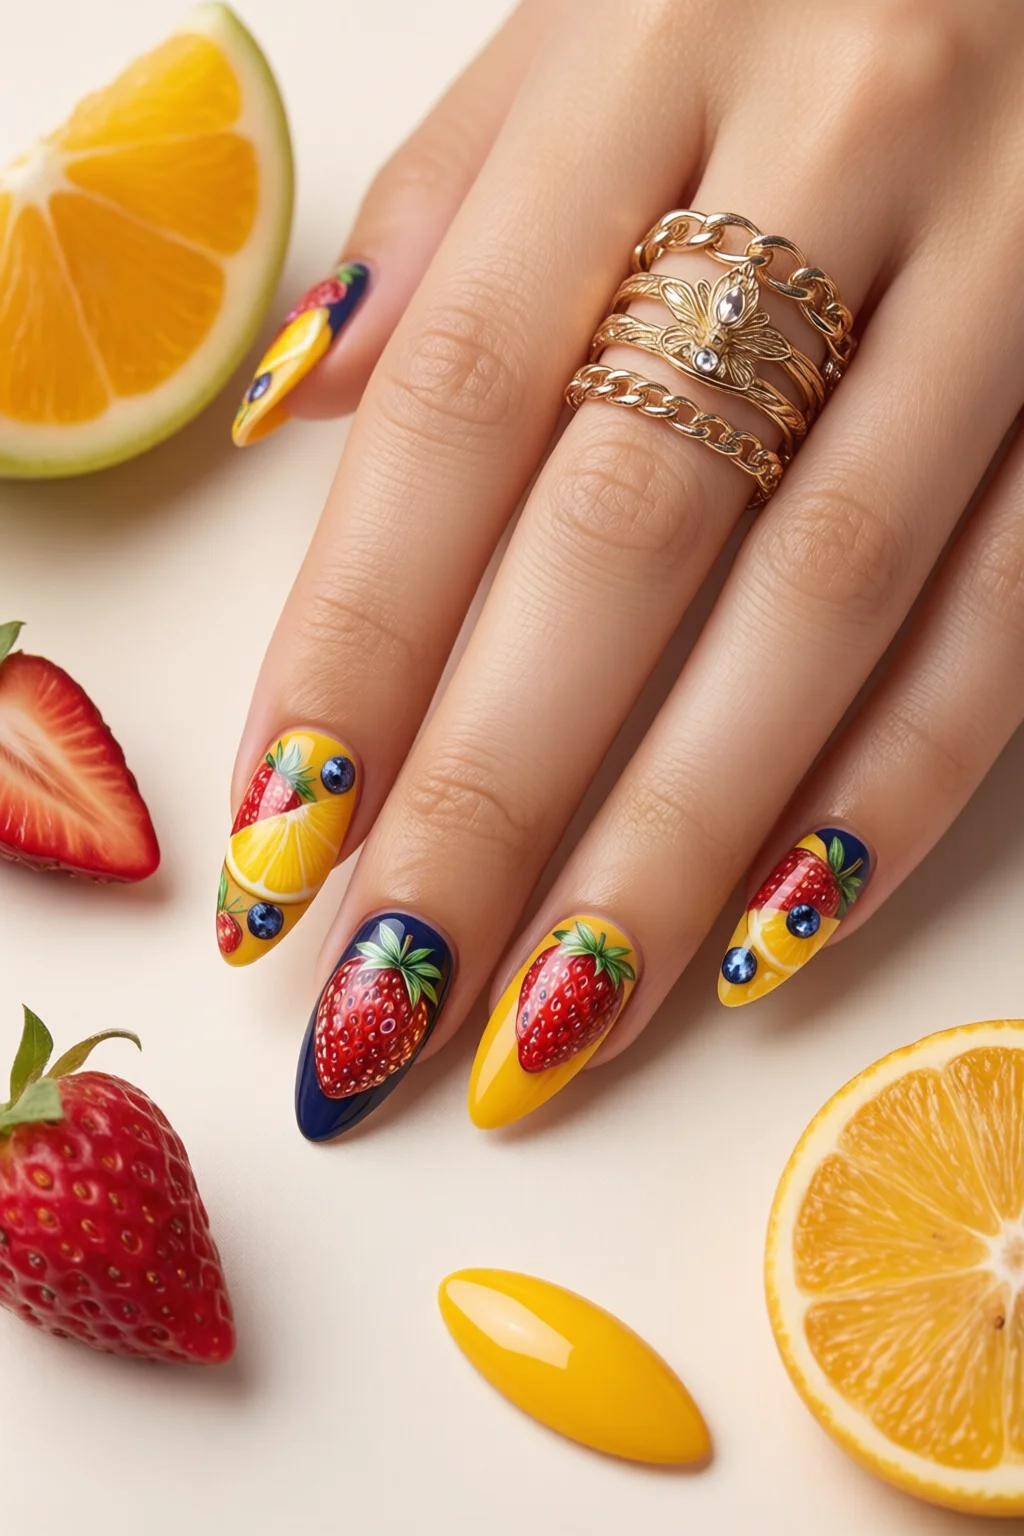
Start with clean, filed nails. I recommend shaping them into a soft almond using a 180‑grit file; this shape mimics the natural curve of a fruit slice and makes the design pop. Push back cuticles with a wooden pusher, then wipe the surface with an acetone‑free remover (e.g., Zoya “Prep” – $10, 30 ml). Apply the OPI Pro Spa Base Coat and let it cure under a UV lamp for 30 seconds (or air‑dry 2 minutes if you’re using regular polish).
Step 2 – Lay Down the Base Color
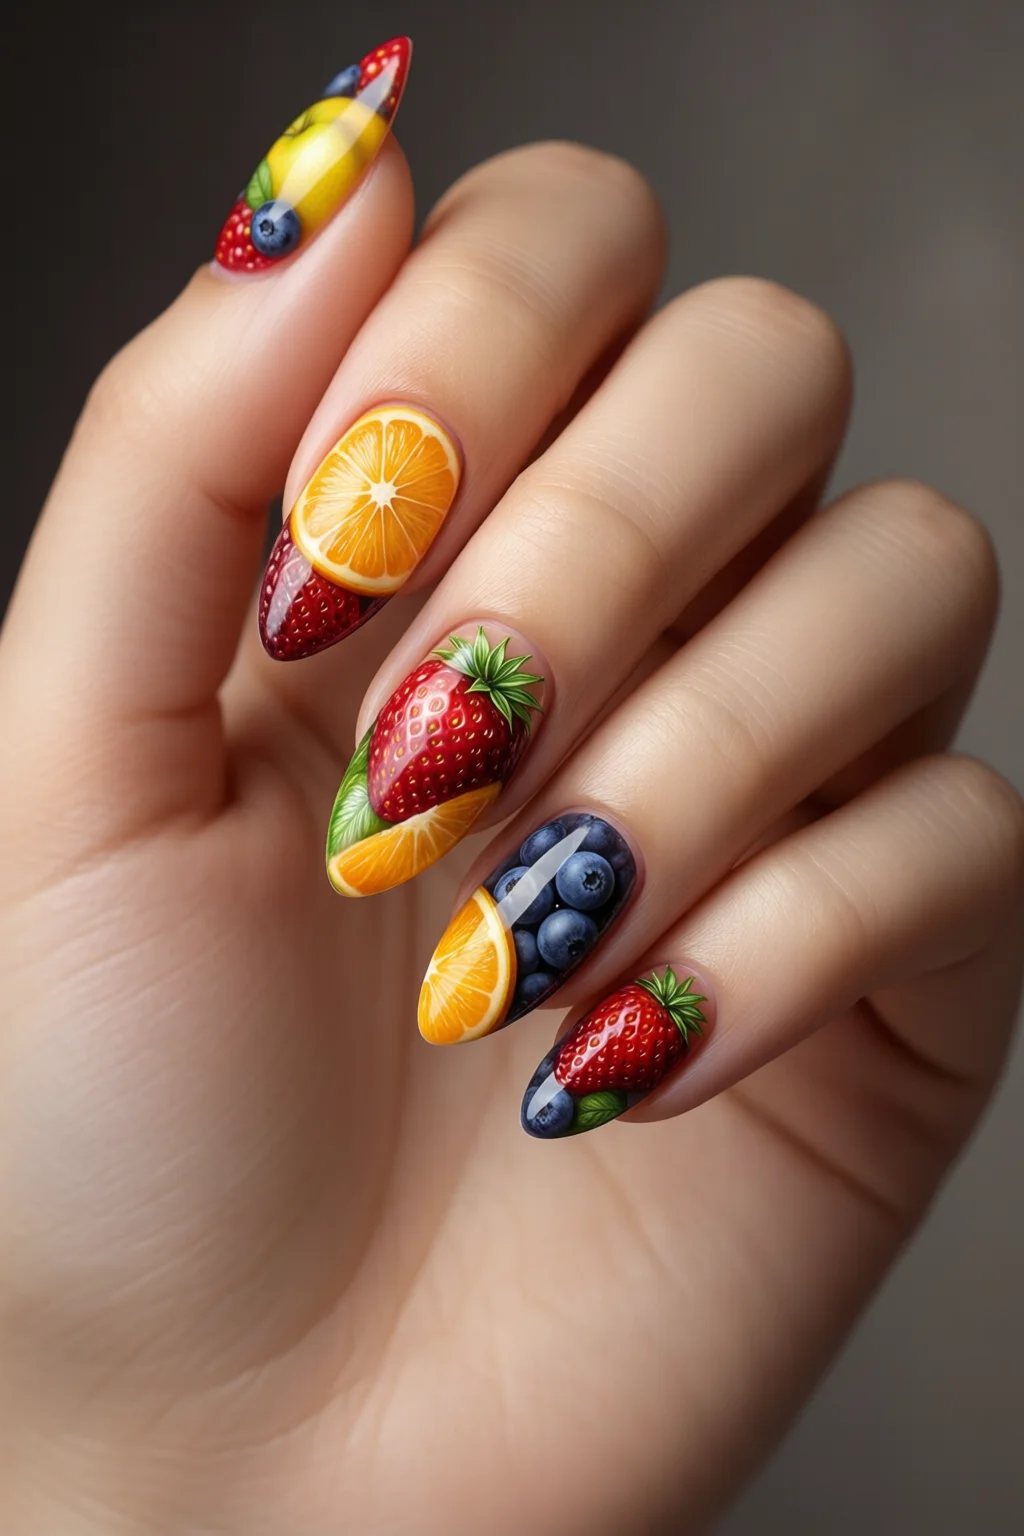
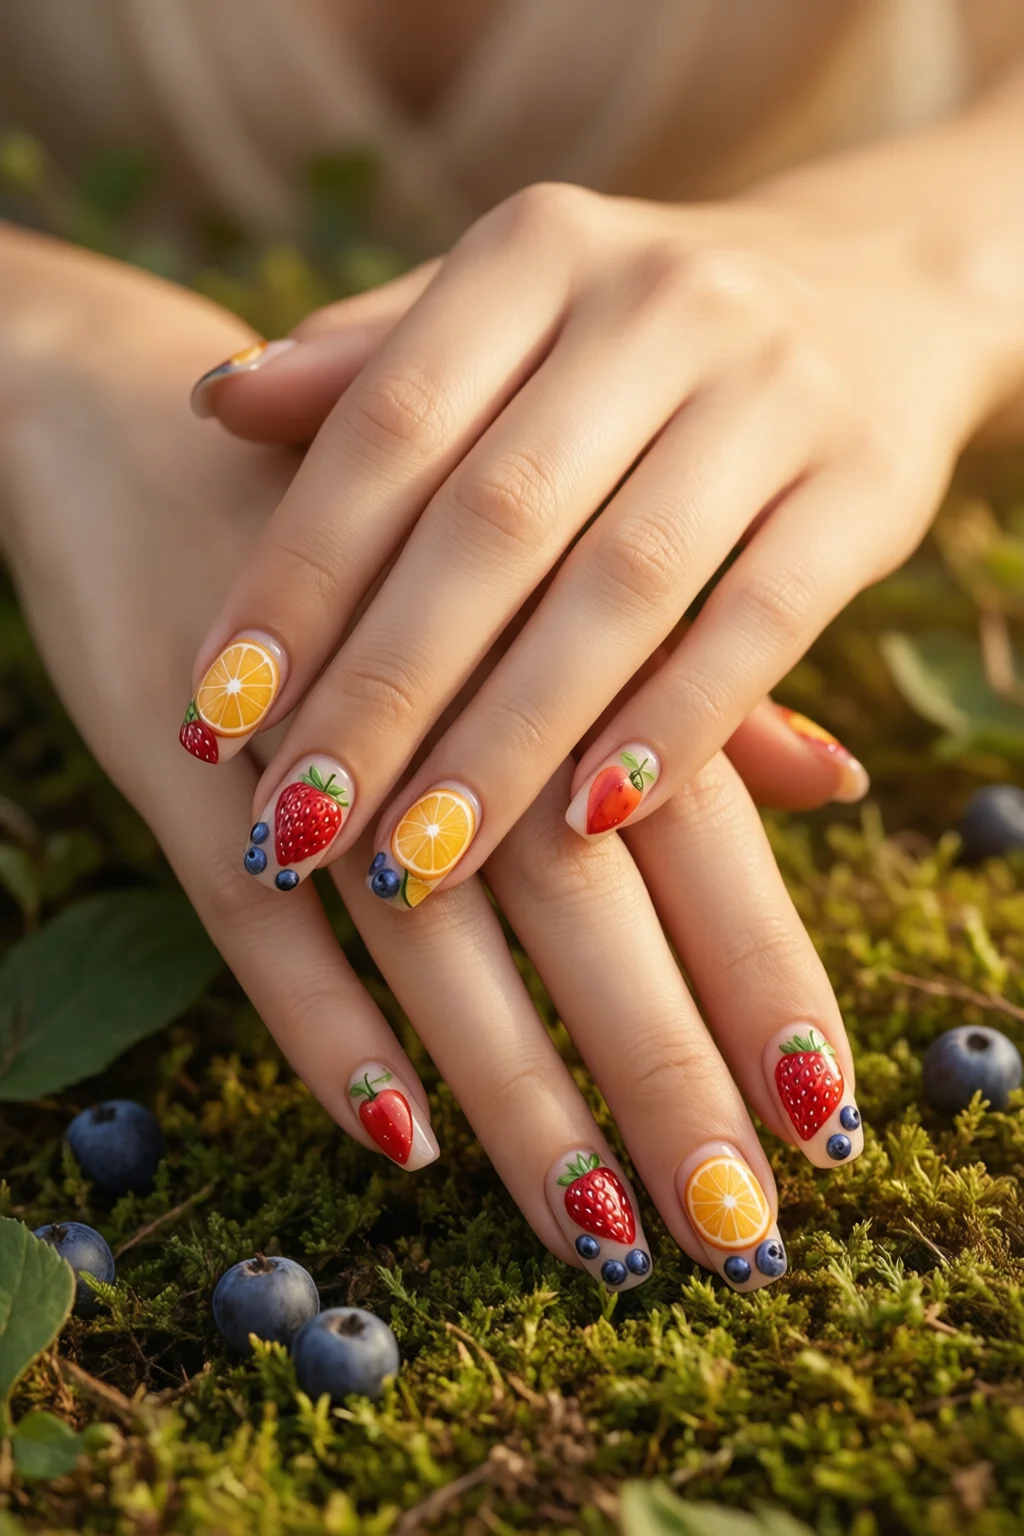
Choose a base that reflects the fruit you’ll paint. For a strawberry look, swipe “Cherry Tomato” across the nail. For a pineapple theme, “Tropical Punch” works beautifully. Apply two thin coats, curing each for 45 seconds under a gel lamp or letting each dry 3 minutes if you’re on a traditional top coat. The base should be opaque but not too thick; a common mistake is layering too heavily, which leads to cracking.
Step 3 – Sketch the Fruit Outline
Using the thin‑tip brush dipped in a contrasting color (white or black depending on the fruit), draw a light outline. For a watermelon slice, a thin black line around the edge creates the rind. I find it easiest to work on a silicone nail art mat; it prevents the brush from slipping and gives a steady hand feel.
Tip: If your hand shakes, place a small piece of tape on the nail as a guide; you’ll remove it after the polish dries.
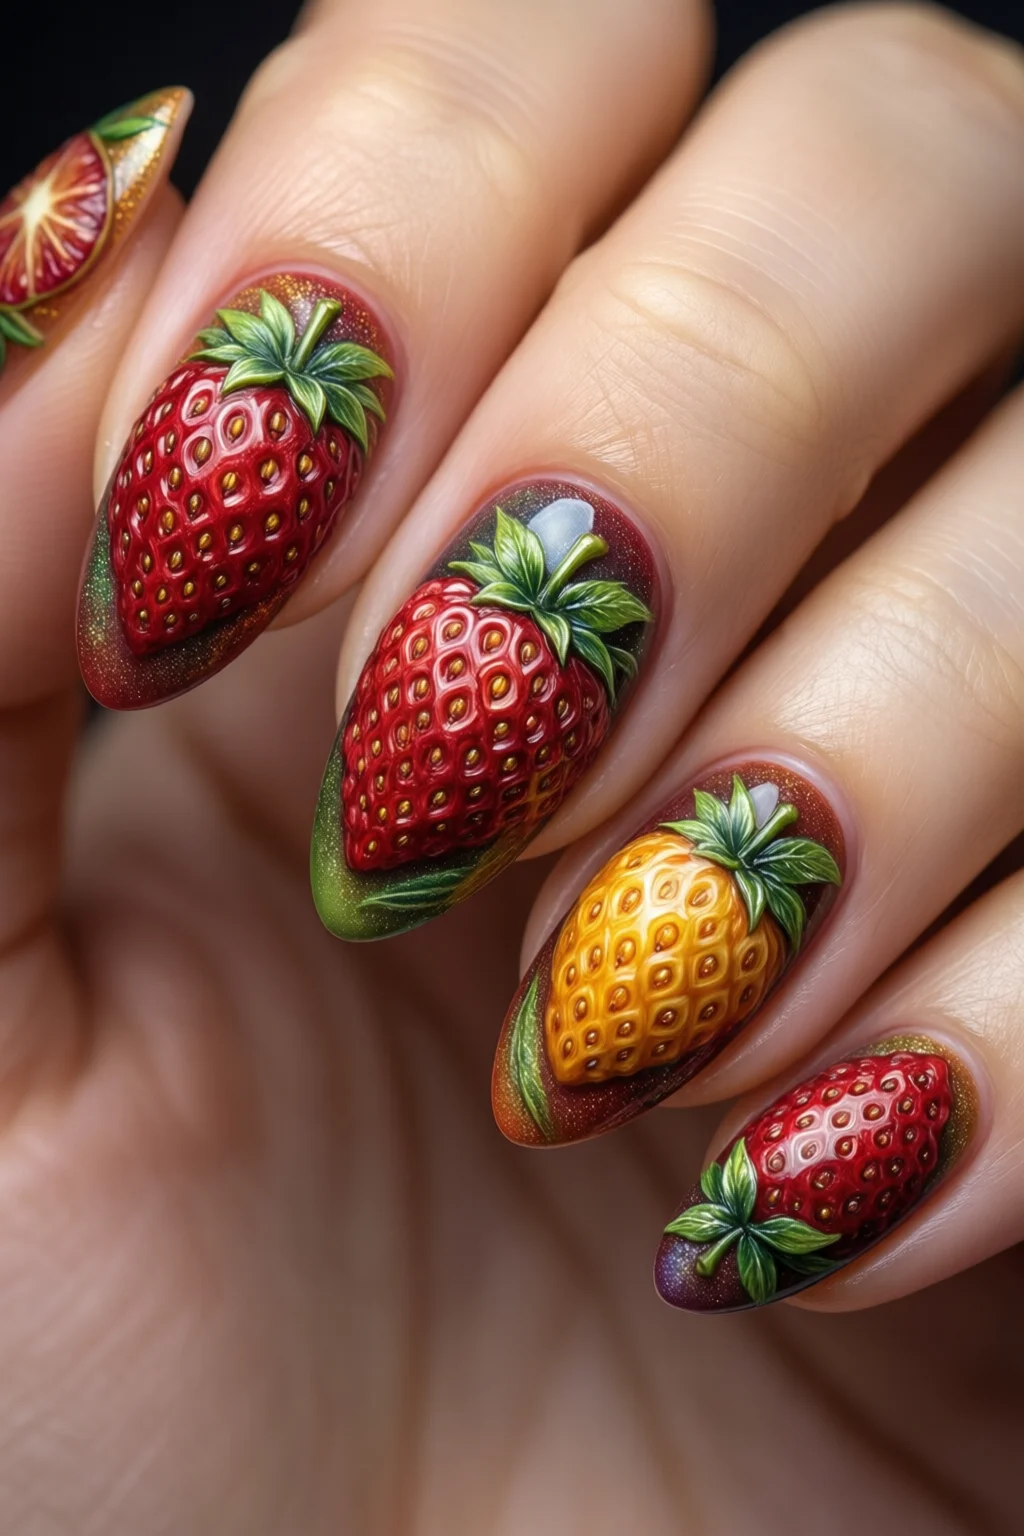
Step 4 – Fill in the Flesh
Switch to a broader brush or a small sponge applicator. For a kiwi, use “Lemon Zest” for the inner green layer, then “Berry Bliss” for the tiny black seeds. Dab gently, allowing the color to pool in the sections created by your outline. Keep strokes short—no more than 2 seconds each—to avoid streaks.
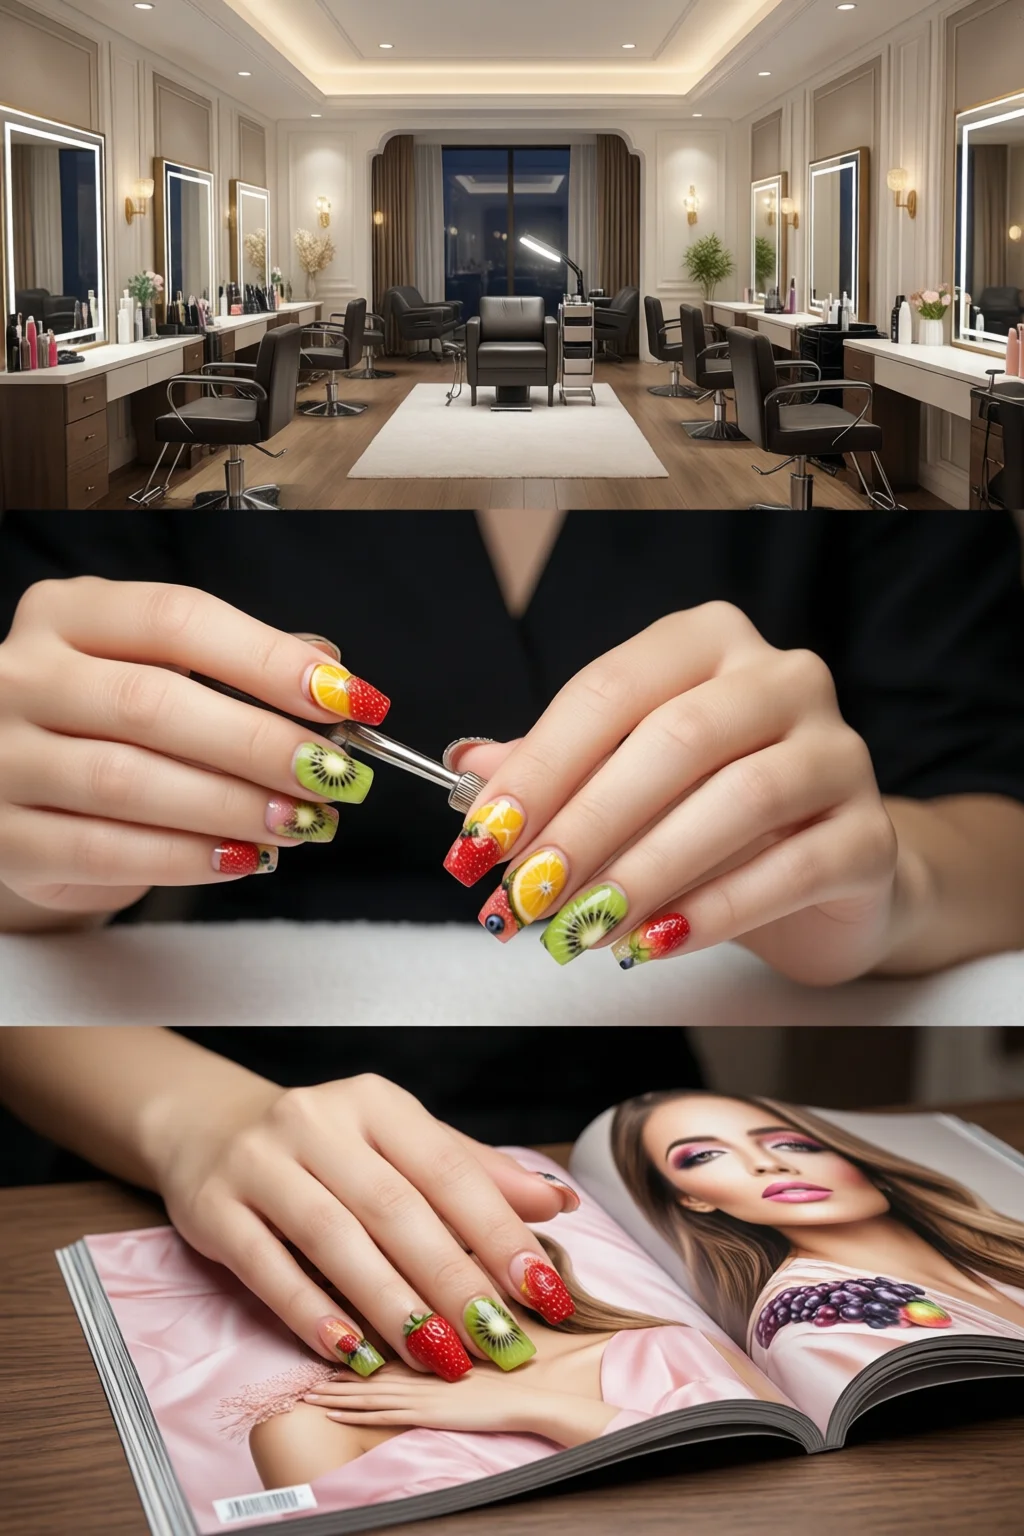
Step 5 – Add Details with Dotting Tools
Dip the 5‑mm dotting tip into “Cherry Tomato” and place tiny dots to mimic strawberry seeds. For a citrus fruit, use the 10‑mm tip and a white polish to add the characteristic pith. Press lightly; the dot should be about 1 mm in diameter—any larger and it loses the realistic look.
Step 6 – Create Shimmer and Shine
While the detail layer is still tacky, sprinkle a pinch of Gold Dust glitterati onto the nail. The shimmer mimics the natural sheen of a fruit’s skin. Use a clean brush to spread it evenly. If you prefer a matte finish, skip the glitter and apply a matte top coat (e.g., Zoya “Matte Finish” – $12, 15 ml).
Step 7 – Seal the Design
Finish with Seche Vivid Gel Top Coat. Apply a thin layer, making sure to seal the edges to prevent chipping. Cure for 60 seconds under a UV lamp. The result is a glossy, fruit‑fresh manicure that lasts up to two weeks without losing its color vibrancy.
Common Mistakes to Avoid
- Over‑loading the brush: Too much polish drips and creates blobs. Dilute slightly with a nail polish thinner (e.g., Seche “Nail Polish Thinner” – $7, 15 ml) if needed.
- Skipping the base coat: Fruit colors are often pigmented. Without a base, they can stain the natural nail, leading to orange or yellow undertones after removal.
- Using the wrong tape width: Striping tape wider than 2 mm makes fruit slices look cartoonish. Stick to 1‑mm for realistic edges.
- Neglecting top coat curing time: Rushing the cure reduces durability; expect at least 60 seconds under a 36‑W UV lamp.
- Applying thick layers: Thick coats cause lifting, especially on flexible nail extensions. Keep every layer under 0.1 mm thickness.
Troubleshooting & Tips for Best Results
Fading colors: If the fruit hue looks dull after a few days, reapply a thin layer of the same polish and top coat. This “refresh” can extend wear by another 3‑4 days.
Blurry outlines: Use a steady hand technique—rest your elbow on a table and hold the brush like a pen. In my experience, the “pencil grip” gives the most control for tiny seed work.
Glitter fallout: After applying glitter, tap the nail gently over a trash can before sealing with top coat. This removes excess particles that could otherwise stick to clothing.
Working on nail extensions: Pair this tutorial with the best nail forms for a seamless surface. Extensions provide a larger canvas for detailed fruit designs like watermelon halves.
Seasonal twists: Swap the base colors for holiday fruit—think “Cranberry Crush” for Christmas or “Pumpkin Spice” for autumn. The same steps apply; just adjust the palette.
FAQ
How long does fruit nail art typically last?
With a proper base coat, high‑quality gel top coat, and regular touch‑ups, a fruit nail design can stay intact for 10‑14 days. Without gel, expect 5‑7 days before the polish starts to chip.
Can I do fruit nail art on natural nails without extensions?
Absolutely. Choose a shorter nail length (around 10 mm) to keep the design proportional. Use a fine‑tip brush for details and a quick‑dry top coat to avoid smudging.
What’s the best way to remove glitter without damaging the design?
Soak a cotton pad in acetone‑free remover, press it on the nail for 2 minutes, then gently push off the glitter with a wooden stick. Finish with a nourishing cuticle oil.
Do I need a UV lamp for this tutorial?
If you’re using gel polish (like Seche Vivid Gel), a UV or LED lamp is required for curing. For regular polish, air‑drying works—just allow extra time between layers.
Can I combine fruit nail art with other trends like holographic or maximalist nails?
Yes! Try a holographic top coat over a fruit design for an eye‑catching holographic nails look, or layer fruit motifs with bold geometric shapes for a maximalist nails vibe.
Summary
Fruit nail art isn’t just a whimsical summer trend; it’s a versatile technique that, with the right tools and a few practiced steps, can elevate any manicure from ordinary to Instagram‑ready. By prepping properly, choosing vivid pigments, and sealing with a durable top coat, you’ll enjoy a fresh‑looking design that lasts weeks. Remember to avoid common pitfalls—over‑loading brushes, skipping base coats, and neglecting curing time—and you’ll master the art of turning juicy fruit into flawless nail masterpieces.