
Did you know that 68% of nail‑salon clients say they choose a design because it’s “quick, chic, and won’t clash with their outfit”? That’s the power of minimalist nail art – a clean, understated look that adds polish without stealing the spotlight.
In This Article
What You’ll Achieve and What You Need
By the end of this tutorial you’ll have a set of nails that look salon‑finished, stay chip‑free for at least a week, and complement any wardrobe from a casual brunch to a boardroom meeting. All you need are a few staple products and a dash of patience.
What You Will Need (Before You Start)
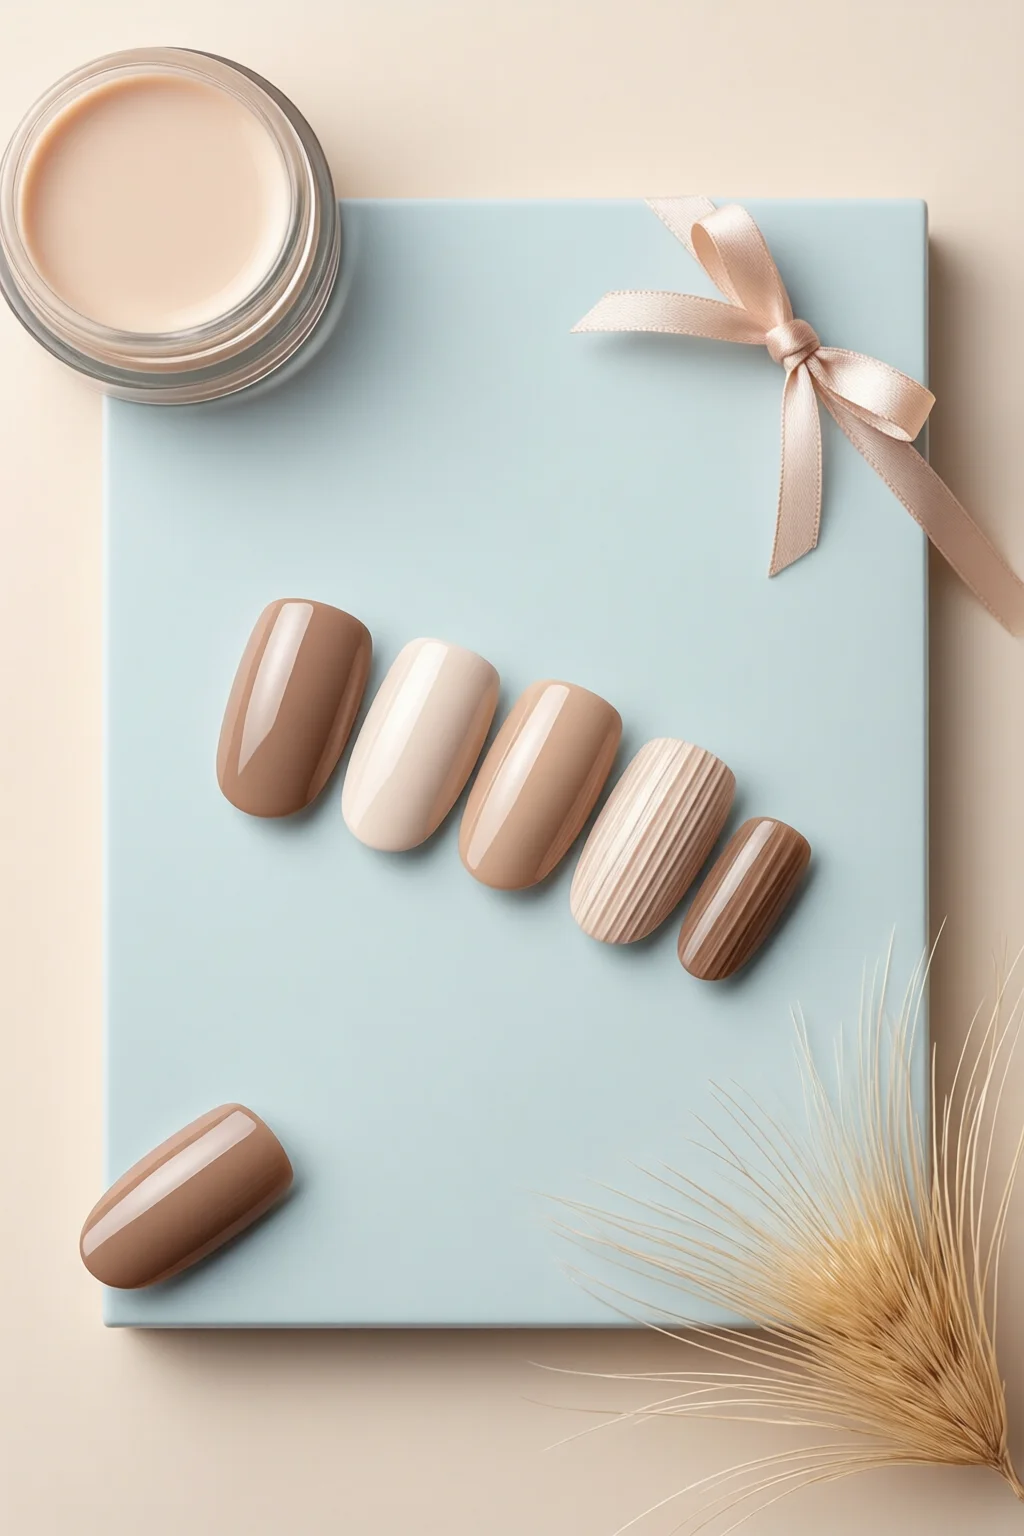
- Base coat: Best peel‑off base coat – OPI Nail Envy $12 (15 ml).
- Top coat: Seche V Vivid Vinyl Top Coat – $14 (15 ml) for a glossy, high‑shine finish.
- Polish: Choose two shades – a nude (Essie “Ballet Slippers” $10, 15 ml) and a subtle accent (OPI “Satin Sisters” – a muted mauve, $12).
- Tools: 180‑grit nail file, buffer block, 0.5 mm fine‑tip brush, dotting tool, and a pair of cuticle pushers.
- Optional: Thin‑film nail tape (10 mm width, $8 per roll) for crisp negative‑space lines.
Step‑by‑Step Guide to Minimalist Nail Art
Step 1 – Prep Your Canvas
Start with clean, trimmed nails. Push back cuticles with a wooden pusher, then shape each nail using the 180‑grit file. Gently buff the surface for a smooth base; this reduces polish snagging by up to 30%.
Apply a thin layer of the peel‑off base coat. Let it dry for 2 minutes – you’ll feel a slight tackiness, which helps the color adhere better.
Step 2 – Lay Down the Base Color
Using the nude polish, apply two thin coats. Hold the brush at a 45° angle and swipe from cuticle to tip in one smooth motion. Each coat should dry for 3 minutes under a cool air dryer (if you have one) or a fan.
Why two coats? One coat leaves the pigment thin, while the second builds opacity without thickening, keeping the finish lightweight.
Step 3 – Create the Minimalist Accent
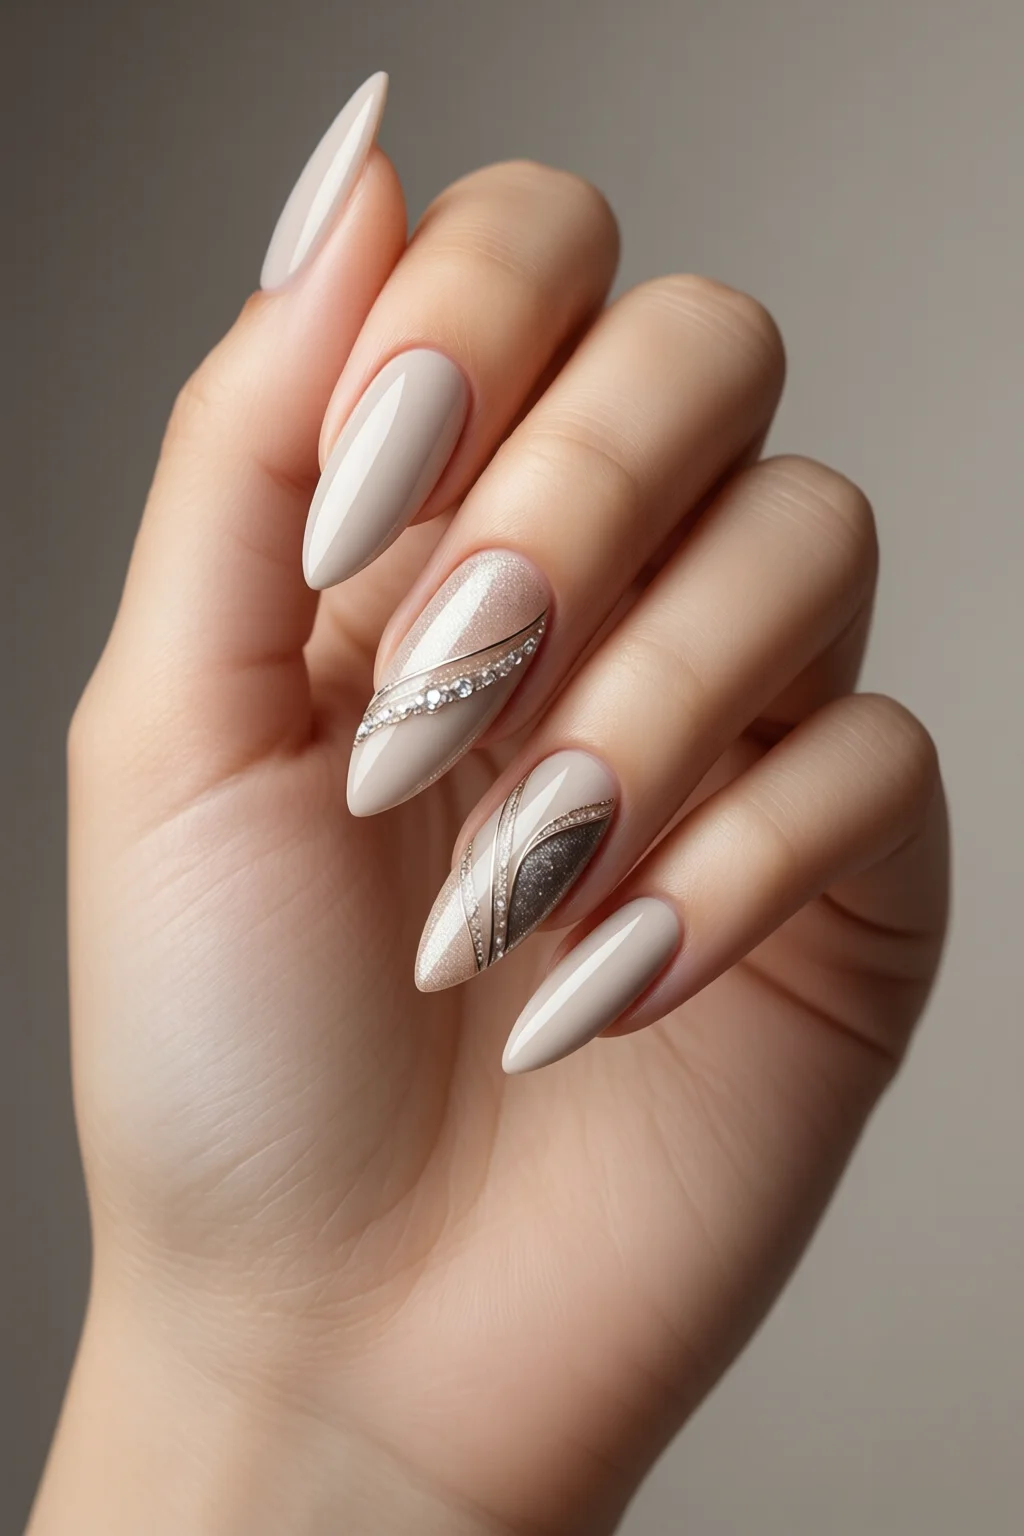
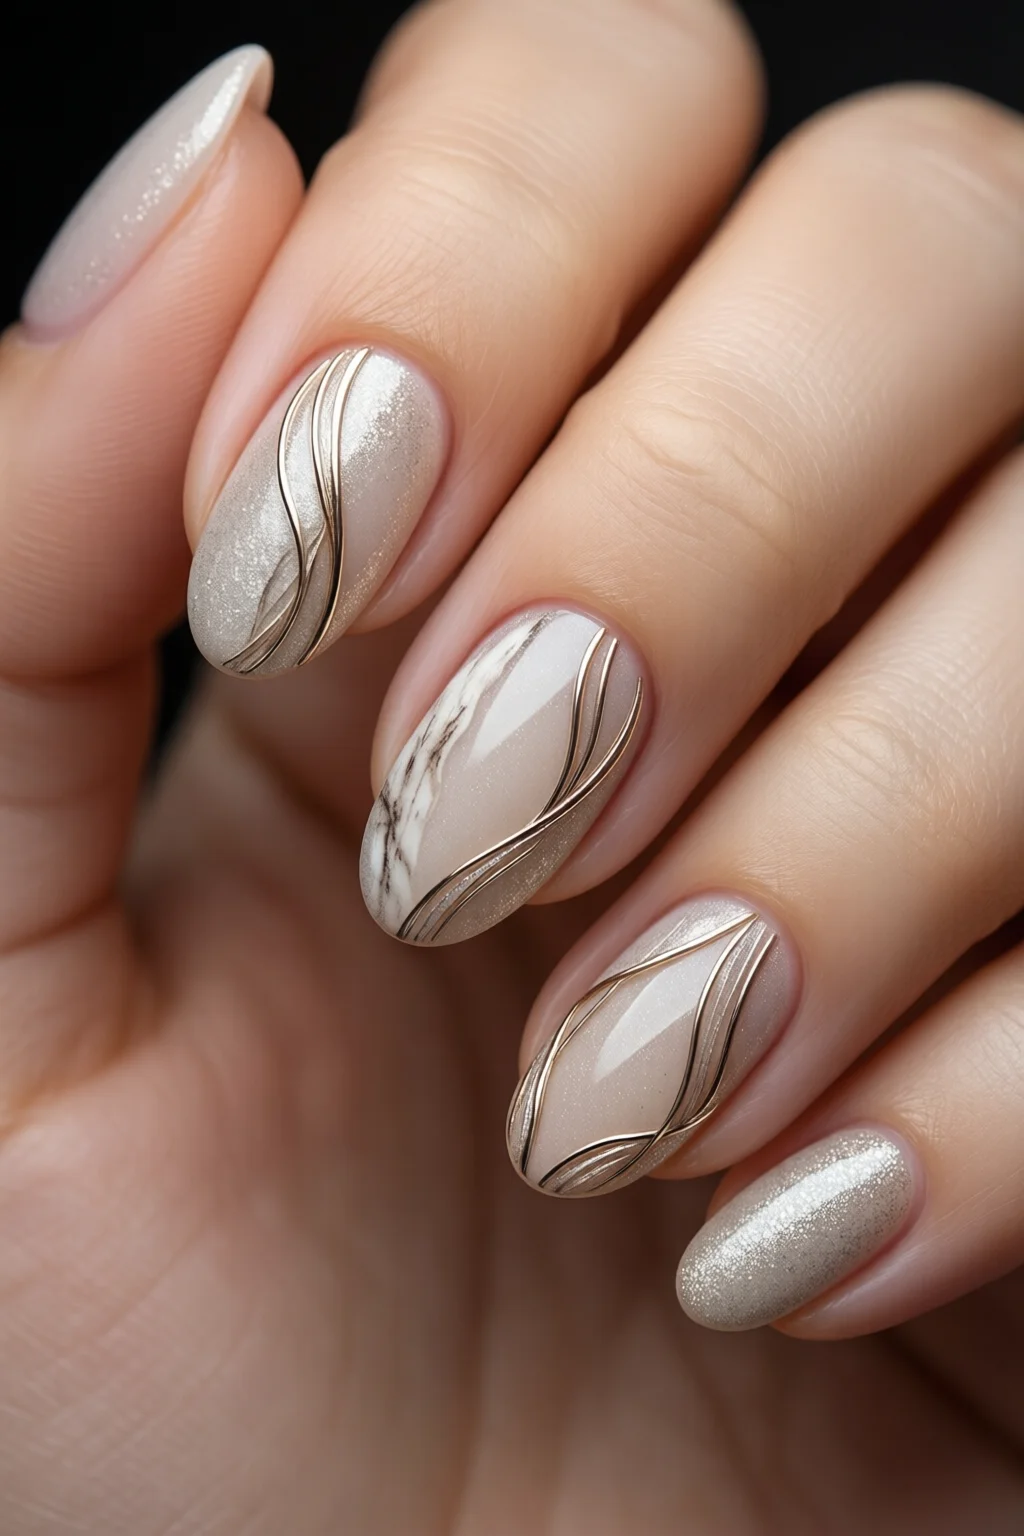
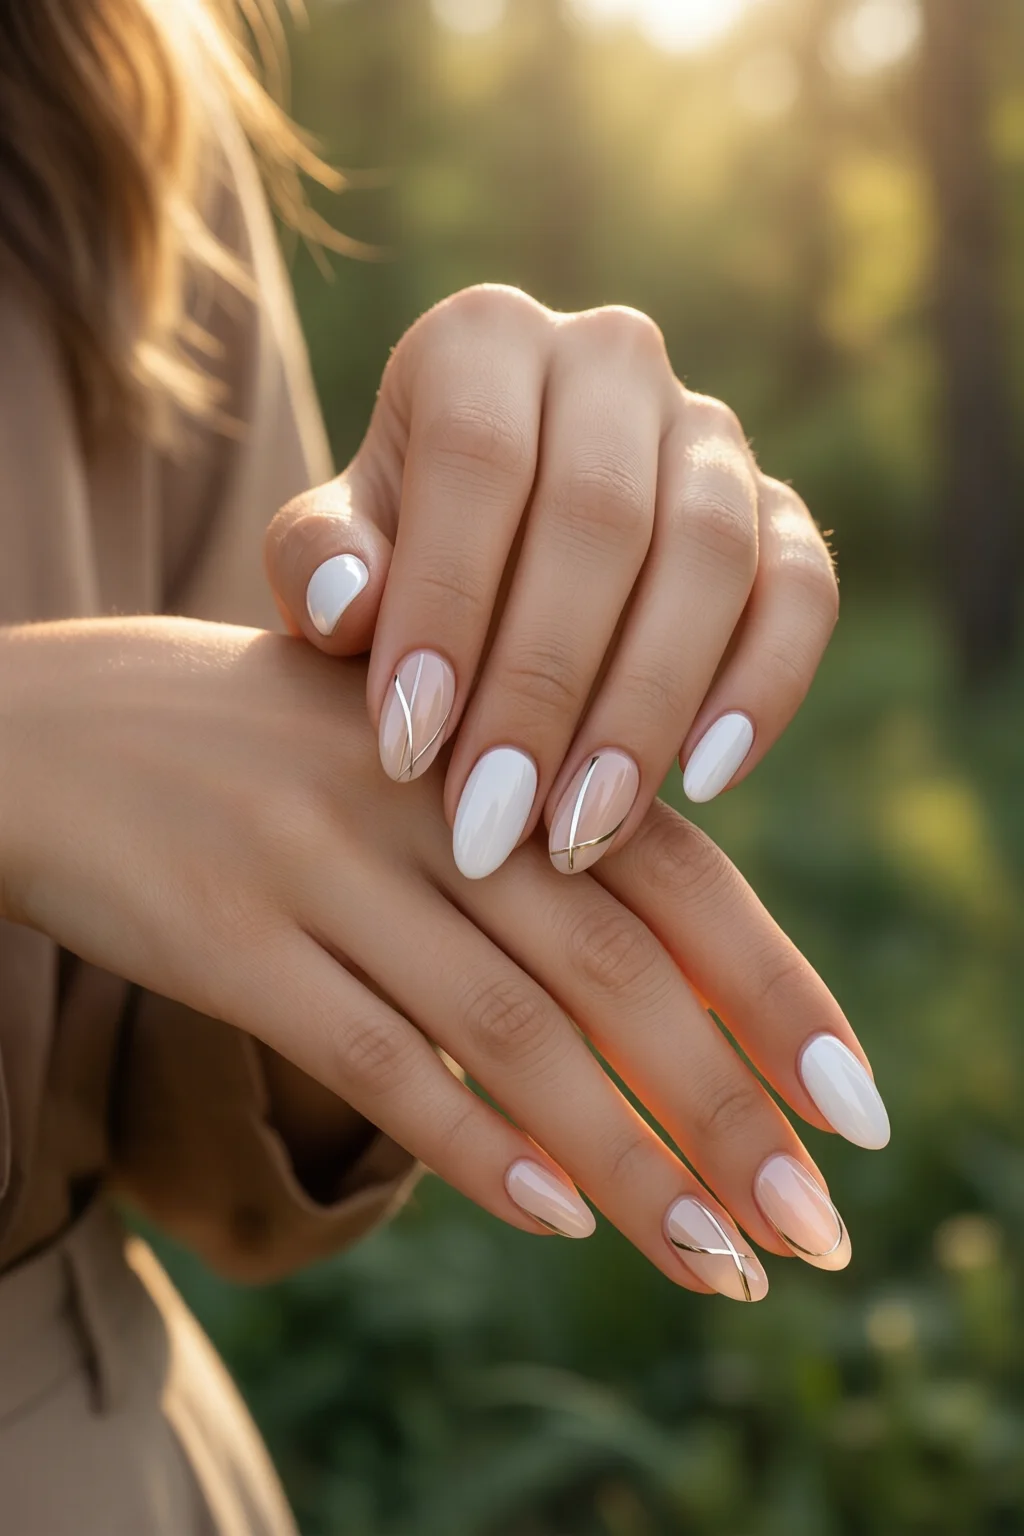
Here’s where the art begins. Pick the muted mauve shade for a subtle contrast. There are three easy minimalist techniques:
- Negative‑space line: Place a 10 mm strip of nail tape at the base of the nail, leaving a clean white gap. Paint over the entire nail with the mauve polish, then peel off the tape while the polish is still tacky. You’ll get a crisp line that looks intentional.
- Single dot: Dip the dotting tool into the mauve polish and press a tiny dot at the nail’s center or near the cuticle. Keep it under 1 mm for that “just‑right” feel.
- Thin stripe: Using the fine‑tip brush, draw a 2‑mm line from the cuticle edge toward the tip, stopping halfway. A steady hand is key – practice on a piece of paper first.
Choose one technique per nail or mix across the set for a cohesive yet varied look.
Step 4 – Seal the Design
Once the accent polish is dry (about 5 minutes), apply a single layer of the glossy top coat. This not only adds shine but also protects the delicate lines from chipping. The top coat cures fully in 10 minutes; avoid touching the nails during this window.
Step 5 – Clean Up and Finish
Use a small brush dipped in nail polish remover to tidy any stray polish around the cuticles. Finish with a cuticle oil (Burt’s Bees 100 % Natural Cuticle Oil, $6) to hydrate and give a professional sheen.
Common Mistakes to Avoid
- Thick coats: Applying more than 0.5 mm of polish per layer leads to uneven drying and visible brush strokes. Stick to thin layers and extend drying time.
- Skipping the base coat: Skipping this step reduces adhesion, increasing chip rates by up to 45%.
- Using the wrong brush size: A broad brush for fine lines results in blurred edges. Always use a 0.5 mm tip for minimalist details.
- Rushing the tape removal: Peel off the nail tape while the polish is fully dry; otherwise the edge may lift, ruining the crispness.
- Neglecting cuticle care: Dry cuticles crack and can snag polish, leading to premature peeling.
Troubleshooting & Tips for Best Results
Issue: Your accent lines are smudging.
Solution: Increase the dry time between the base color and accent layer to at least 4 minutes. If you’re in a humid environment, use a dehumidifier or a fan.
Issue: The top coat is bubbling.
Solution: Ensure the nail surface is completely dry; any residual moisture traps air. Lightly buff the surface with a fine‑grit buffer before the final top coat.
Tip: For a truly minimalist vibe, keep the color palette within a 10% saturation range – think nude, soft greys, muted mauves, and pale pinks. This creates a harmonious look that won’t clash with any outfit.
Tip: If you want extra longevity, dip your nails in a quick “quick‑dry spray” (Seche V Fast Dry, $13 per 30 ml) after the top coat. It reduces drying time by 60% and adds a protective polymer layer.
Tip: Experiment with vacation nails by adding a single metallic stripe – it still reads minimalist but adds durability for beach trips.
FAQ
How long does minimalist nail art typically last?
When you follow the steps above – using a peel‑off base coat, thin layers, and a high‑quality top coat – the design usually stays chip‑free for 7‑10 days. With proper cuticle care, you can push it to 12 days.
Can I do minimalist nail art at home without professional tools?
Absolutely. A basic nail file, a fine‑tip brush (often sold for detail work), and a strip of nail tape are enough. The key is patience and thin coats.
Is minimalist nail art suitable for cold weather?
Yes. In fact, a muted palette pairs beautifully with winter nail care routines. Just keep your hands moisturized and avoid extreme temperature shifts.
Summary & Final Thoughts
Minimalist nail art isn’t about stripping away creativity; it’s about letting subtle details speak louder than bold patterns. With the right prep, a couple of quality products, and a steady hand, you can achieve a salon‑worthy look in under an hour. Remember: thin layers, proper drying, and a protective top coat are your allies. Now go ahead, try the negative‑space line or the single‑dot technique, and let your nails become the quiet, confident statement they were meant to be.
Ready for the next trend? Pair your minimalist set with fall nail trends or a splash of tie dye nails for a seasonal twist.
5 thoughts on “Best Minimalist Nail Art Ideas That Actually Work”