
Ever caught yourself scrolling through Instagram and wondering how those seamless color fades are achieved without a professional salon? The secret is often a simple gradient technique called ombre nails, and you can master it at home with the right tools, a bit of patience, and a dash of creativity.
In This Article
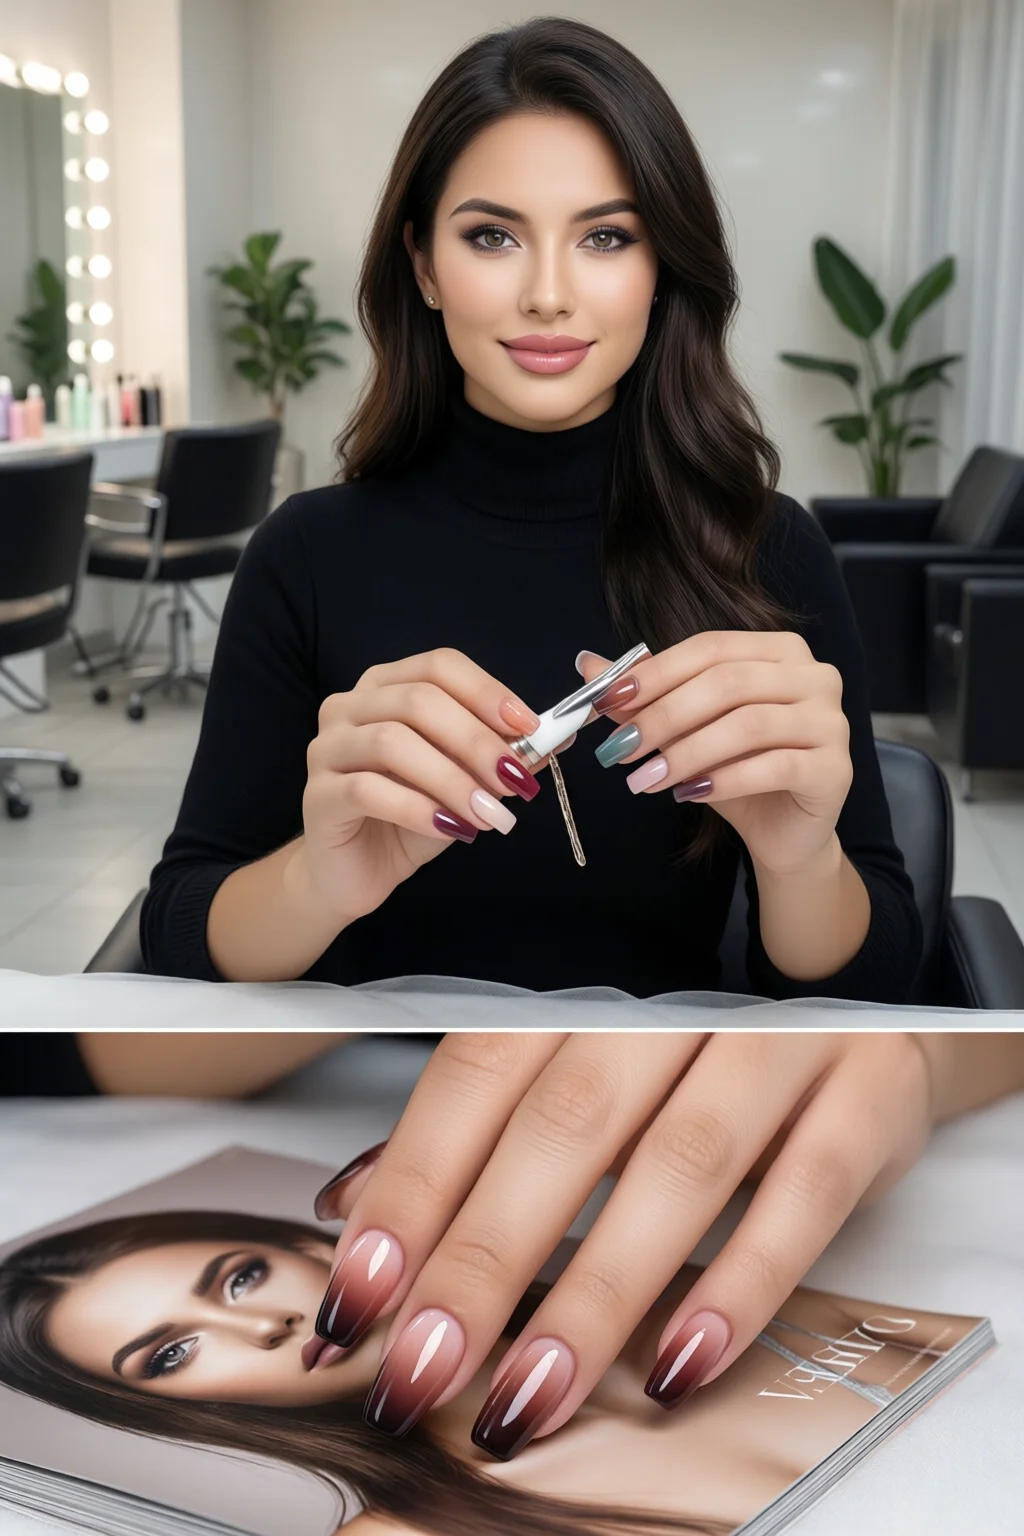
Ombre nails aren’t just a trend; they’re a versatile style that works for a wedding day, a night out, or even a casual coffee run. In my decade of working with clients—from brides to runway models—I’ve seen ombre transform a basic manicure into a statement piece that lasts. Below is the full guide you need, from prep to polish, so you can recreate salon‑worthy gradients without breaking the bank.
Understanding Ombre Nails
Definition and History
The term “ombre” comes from the French word for “shadow.” In nail art, it describes a gradual transition from one hue to another, mimicking a sunset or a watercolor wash. While the look exploded on social media around 2018, its roots trace back to 19th‑century French salons where nail technicians used hand‑mixing techniques to achieve subtle fades.
Types of Ombre Effects
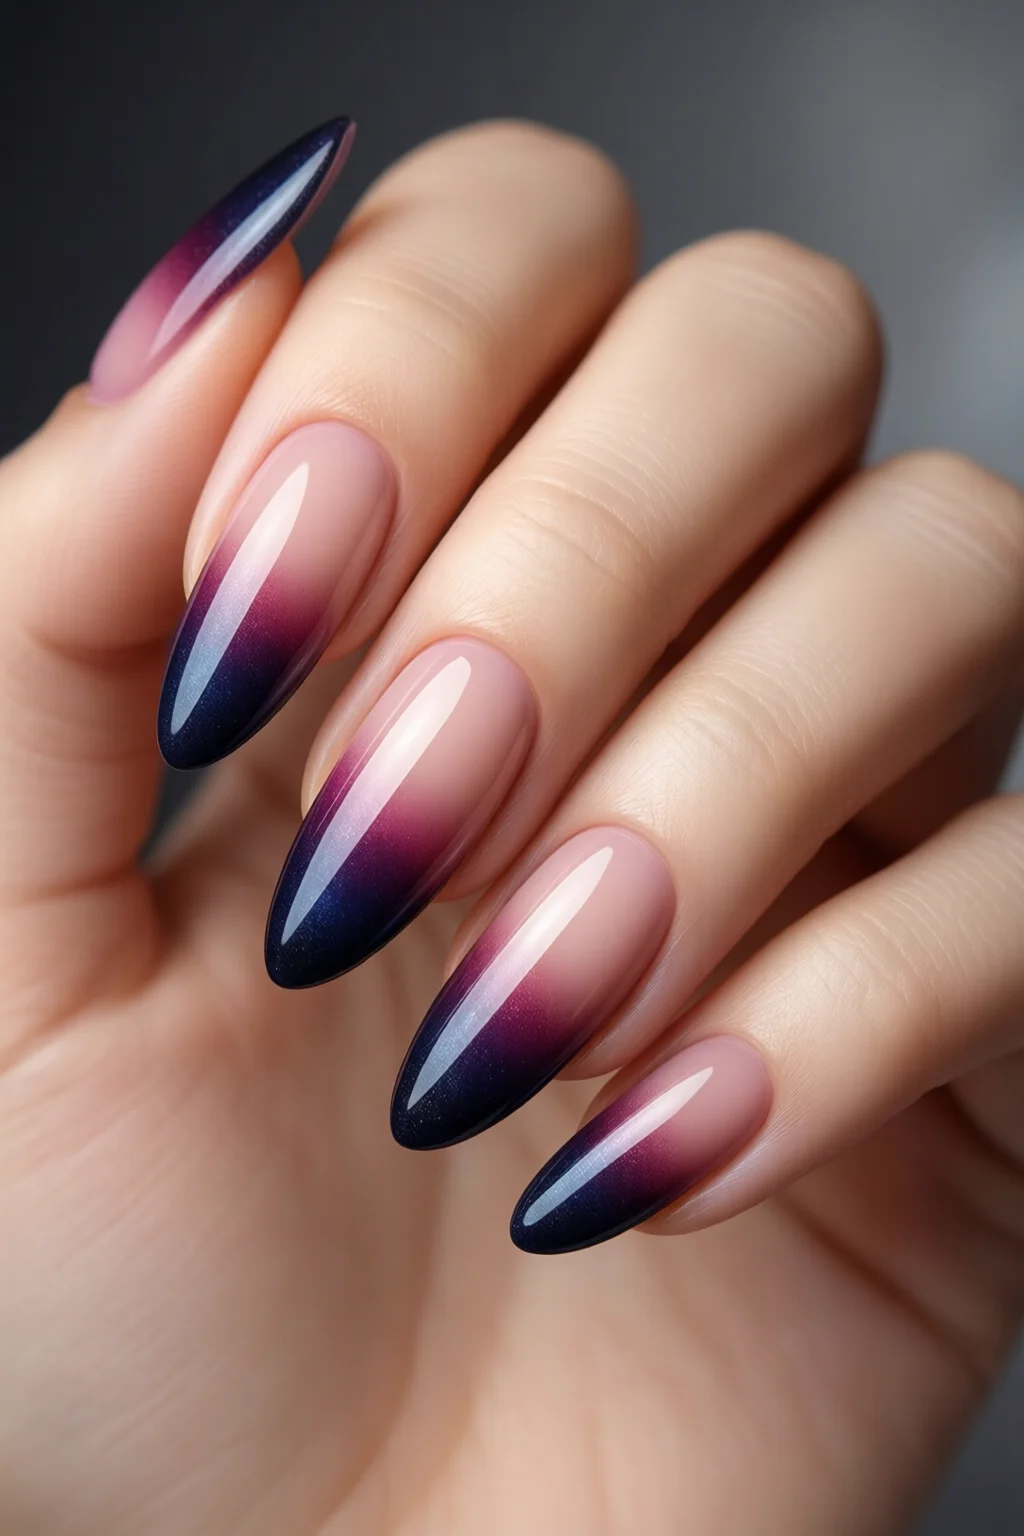
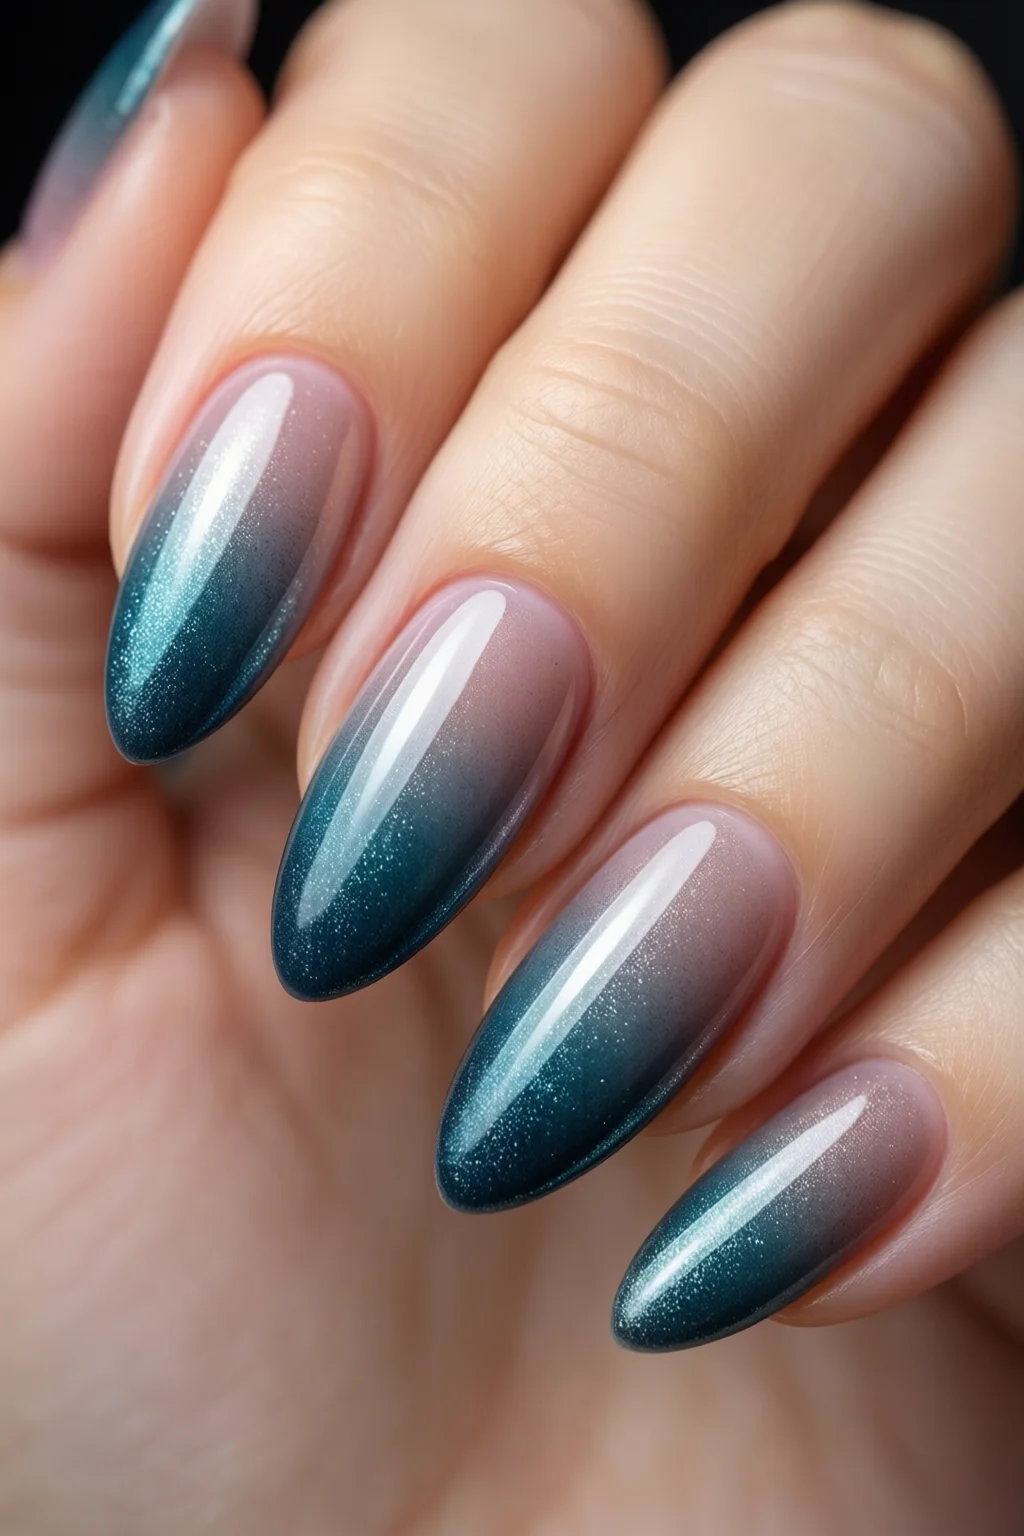
- Two‑tone fade: Classic light‑to‑dark gradient (e.g., nude to deep plum).
- Multi‑color cascade: Three or more shades blending for a rainbow‑like effect.
- Metallic shimmer: Adding a glitter or foil layer at the tip for a glamorous twist.
When to Wear Ombre
Choose ombre nails when you want a polished look that still feels effortless. They’re perfect for wedding nails, because the gradient can incorporate bridal whites and soft pinks, or for a bold night out with neon fades. Seasonal palettes also work well: pastel blues for spring, burnt oranges for fall.
Essential Tools & Products
Base & Top Coats
A sturdy base prevents staining. I recommend OPI Professional Strength Base Coat at $12.99 (30 ml) for its 80% opacity and quick‑dry formula. For a high‑gloss finish, Essie’s Gel Couture Top Coat (15 ml, $15) works beautifully under LED or UV lamps.
Color Choices
When selecting polishes, look for high‑pigment formulas. My go‑to brands are:
- Zoya – $13 per 15 ml bottle; excellent for sheer to full coverage.
- Sally Hansen – $8 for the Complete Salon Manicure line; budget‑friendly and quick‑dry.
- China Glaze – $14; offers a wide range of neon shades perfect for multi‑color ombre.
Application Tools
The gradient’s quality depends on the sponge you use. I swear by the BeautyBlender Mini Sponge (2 inches, $6) because its porous surface pulls paint evenly. Pair it with a fine‑point brush (¼ inch tip, $4) for crisp edges, and a silicone nail guard ($9) to protect the nail during curing.
Step‑by‑Step Ombre Nail Tutorial
1. Prep & Nail Care
- Remove any existing polish with acetone‑free remover.
- File nails to your desired shape—square or almond work best for a visible gradient.
- Push back cuticles and apply a thin layer of cuticle oil; let it absorb for 2 minutes.
- Wipe the surface with a lint‑free pad soaked in 70% isopropyl alcohol to eliminate oils.
2. Creating the Gradient
Here’s the classic sponge method:
- Apply a thin coat of the lightest shade to the entire nail; let it dry for 30 seconds.
- Load the sponge: dab the dark shade on the tip of the sponge, the medium shade in the middle, and the light shade at the base. Do not saturate—just enough to coat the sponge fibers.
- Press the sponge onto the nail in a single, swift motion, starting at the cuticle and rolling toward the tip. Keep the pressure consistent; a 2‑second press yields a smooth transition.
- Repeat the press‑and‑roll 2‑3 times, adding a second thin layer of each color if you need deeper intensity. Typically, three coats achieve 80% coverage without streaks.
- Allow the gradient to dry for 2 minutes before moving to the next nail.
3. Finishing Touches
For extra sparkle, dust a fine glitter (e.g., Beetles 0.02 mm, $5 per 2 g) over the tip while the top coat is still tacky. Seal everything with two layers of the Essie Gel Couture Top Coat, curing each for 30 seconds under a best nail lamp (LED, 48 W).

Alternative Techniques
Brush‑Fade Method
If you don’t have a sponge, a fine brush can create a soft fade. Load a small amount of each shade onto the brush, then drag from cuticle to tip in a sweeping motion. The brush‑fade offers a more painterly, slightly textured look—ideal for a celestial nails vibe.
Dip Powder Ombre
Dip powder provides longer wear (up to 3 weeks). Use a gradient dip box: start with a light powder at the base, then dip the tip into a darker shade. Seal with a dip top coat ($13) and cure for 60 seconds under a UV lamp.
Gel Ombre with LED Lamp
Gel polish yields a glass‑like finish. Apply a thin base gel, then use the sponge technique with gel colors (e.g., Gelish – $15 per bottle). Cure each layer for 30 seconds. The result is a high‑shine gradient that resists chips for up to 2 weeks.
Maintenance & Longevity
How Long Ombre Lasts
Traditional polish ombre typically lasts 5‑7 days with proper top coat. Gel or dip powder versions extend wear to 14‑21 days. Longevity depends on daily activities; frequent hand washing can reduce lifespan by up to 30%.
Touch‑Up Strategies
If the tip starts to chip, simply reapply a thin layer of the darker shade and seal with top coat. For a full refresh, repeat the sponge step only on the affected nails; you’ll save time and product.
Removing Ombre Safely
Soak a cotton pad in acetone (100%) and wrap each nail with foil for 10 minutes. Gently push off the polish with a wooden cuticle stick. Finish with a nourishing cuticle oil (e.g., OPI Pro Spa Nail & Cuticle Oil, $9) to restore moisture.

Pro Tips from Our Experience
- Always work in a well‑ventilated area; fumes from acetone and polish can cause headaches.
- Mix a drop of clear polish into the darkest shade to increase fluidity without compromising opacity.
- For a seamless gradient, keep the sponge on a flat surface while loading colors to avoid uneven pooling.
- Test the gradient on a piece of paper before applying to nails; this saves time and material.
- Combine ombre with stained glass nails by adding a thin line of metallic tape at the tip for a stained‑glass effect.
- When using gel, finish with a quick dip in cold water for 10 seconds to lock in the shine.
Product Comparison Table
| Product | Type | Price (USD) | Coverage | Best For |
|---|---|---|---|---|
| OPI Professional Strength Base Coat | Base Coat | 12.99 | 80% (prevents staining) | All ombre styles |
| Essie Gel Couture Top Coat | Top Coat (Gel) | 15.00 | 100% (high gloss) | Long‑lasting shine |
| Zoya Nail Polish | Polish | 13.00 | 70‑90% (high pigment) | Subtle gradients |
| Sally Hansen Complete Salon | Polish | 8.00 | 60% (quick dry) | Budget‑friendly fades |
| China Glaze Neon | Polish | 14.00 | 95% (vivid colors) | Multi‑color ombre |
Frequently Asked Questions
How many coats of polish do I need for a smooth ombre?
Generally two thin coats of each shade are enough. The first coat creates the base, and the second deepens the color without causing streaks.
Can I do ombre nails without a nail lamp?
Yes. Traditional polish ombre works fine without a lamp; just allow each layer to air‑dry for at least 2 minutes. For gel or dip powder, a lamp is essential.
What’s the best way to prevent smudging while the gradient dries?
Keep your hands still and elevated for the first 3 minutes. Using a quick‑dry top coat reduces tack time and minimizes smudges.
Can I combine ombre with other nail art, like studs or decals?
Absolutely. Apply the gradient first, let it set, then add studs, decals, or even a thin strip of foil. Seal everything with a final top coat for durability.
How often should I replace my nail sponge?
Replace the sponge every 4‑6 weeks. Over time the pores become clogged with pigment, leading to uneven gradients.
Conclusion – Your Actionable Takeaway
Mastering ombre nails is less about expensive salon appointments and more about understanding the gradient fundamentals, investing in a few quality tools, and practicing the sponge press. Start with a simple two‑tone fade using OPI base coat, a Zoya light shade, and a China Glaze dark hue. Follow the step‑by‑step tutorial, seal with Essie Gel Couture, and you’ll have a polished, Instagram‑ready look that lasts up to a week. Experiment with brush fades, dip powders, or gels once you’re comfortable, and don’t forget the pro tips—especially keeping your sponge clean and using a quick‑dry top coat. Now, grab your favorite shades, and let your nails tell a story of color, depth, and effortless style.
1 thought on “Ombre Nails: Complete Guide for 2026”