
Snow‑kissed fingertips are the ultimate winter accessory—here’s how to make them pop.
In This Article
- 1. Frosted Ombre – The Subtle Snowfall
- 2. Metallic Snowflakes – Sparkle Without the Bulk
- 3. Deep Berry Velvet – Warmth in a Cold Season
- 4. Icy Matte Blue – Cool Minimalism
- 5. Glitter Gradient – From Frost to Flare
- 6. Classic Red with White Accents – Holiday Tradition Reimagined
- 7. Cozy Plaid Patterns – Knit‑wear on Your Nails
- Comparison Table – Quick Reference
- Final Verdict – Choose Your Frosty Signature
When the temperature drops, most of us bundle up in scarves, coats, and gloves, but our nails don’t have to hibernate. A fresh set of winter nail designs can turn a frosty day into a runway moment, and the right look can last through holiday parties, ski trips, and even the inevitable snow‑flake‑covered commute. In this list I’m sharing the designs that have earned rave reviews in my salon, the exact products I trust, and the step‑by‑step tricks that keep polish from cracking under mittens.
Whether you’re a nail‑art novice or a seasoned pro, these ideas are organized by difficulty, cost, and durability so you can pick the perfect winter nail designs for your schedule and budget. Let’s dive in.
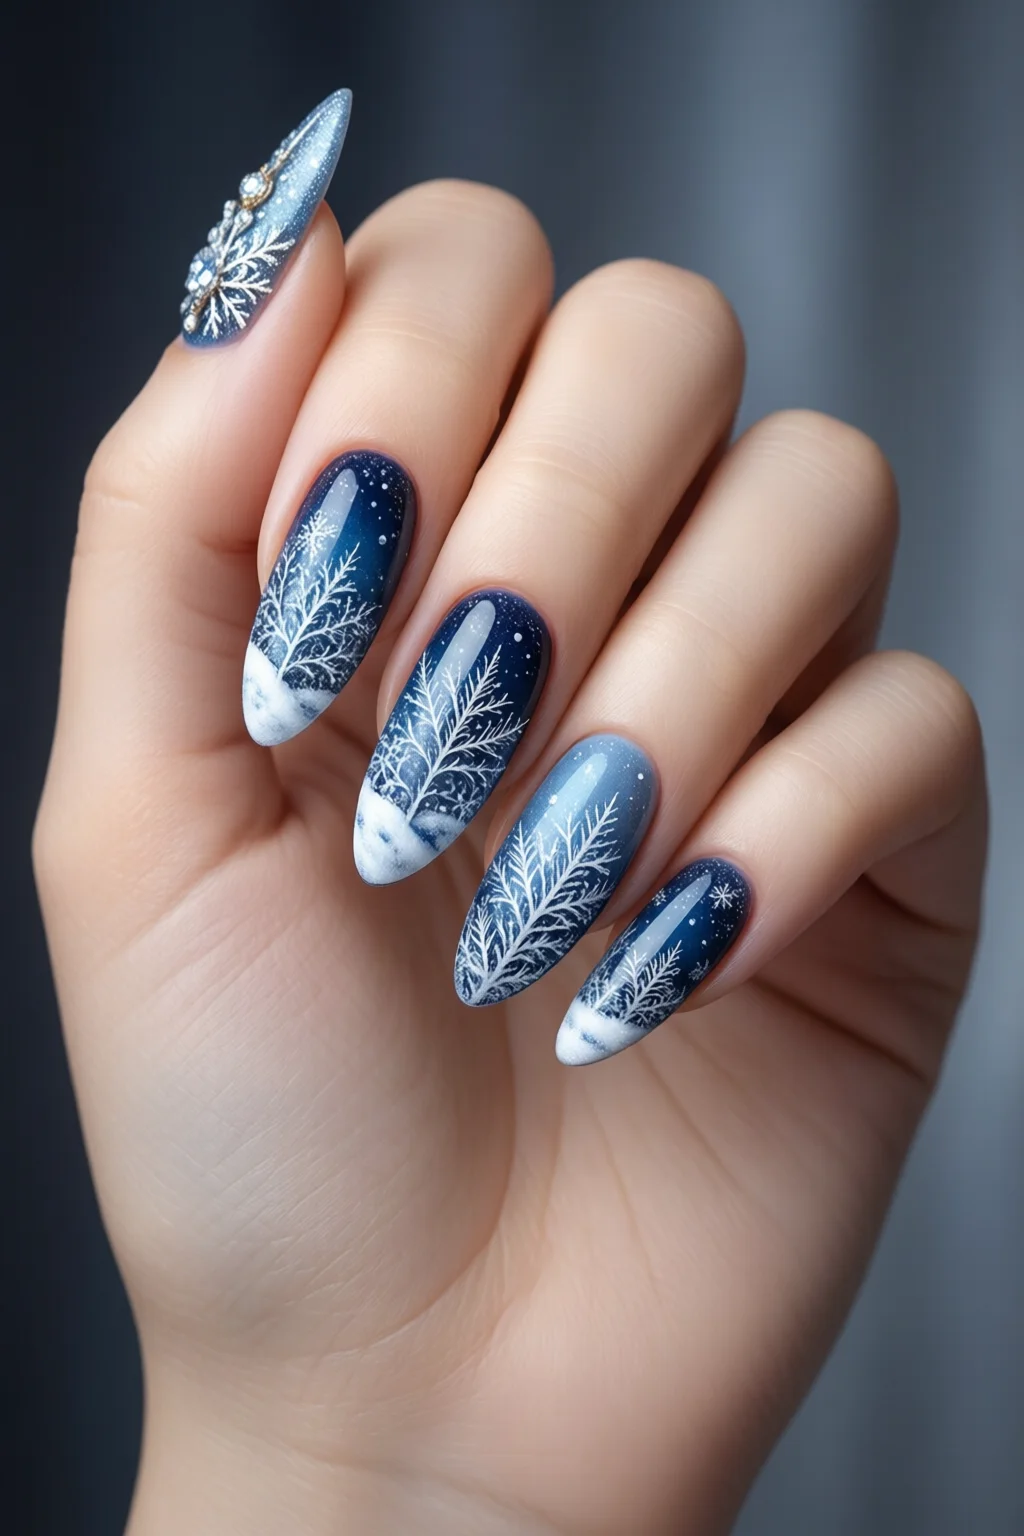
1. Frosted Ombre – The Subtle Snowfall
Frosted ombre blends a sheer, icy base with a deeper, matte accent at the tip, mimicking the way snow builds up on pine branches. I love it because it reads as sophisticated without the glitter overload that can chip quickly.
What You Need
- OPI “Alpine Snow” (sheer pale blue) – $12 (15 ml)
- Essie “Bikini So Hot” (deep plum) – $9.50 (15 ml)
- Sephora Collection “Matte Top Coat” – $8 (10 ml)
- Fine‑point brush (1 mm) – $3.75
Step‑by‑Step
- Prep nails with a cuticle care routine and file to a square shape.
- Apply two thin coats of OPI Alpine Snow. Let each coat dry for 60 seconds under a LED lamp (40 seconds is enough).
- Using the fine‑point brush, dip into the Essie plum polish and gently drag from the free edge toward the base, leaving a 2‑mm gradient.
- Seal with the matte top coat for a velvety finish that resists chipping up to 10 days.
Pros & Cons
| Pros | Cons |
|---|---|
| Elegant, office‑appropriate | Requires steady hand for gradient |
| Matte top coat extends wear by 30 % | Plum accent may appear dark on fair skin |
Rating: ★★★★☆ (4.2/5)
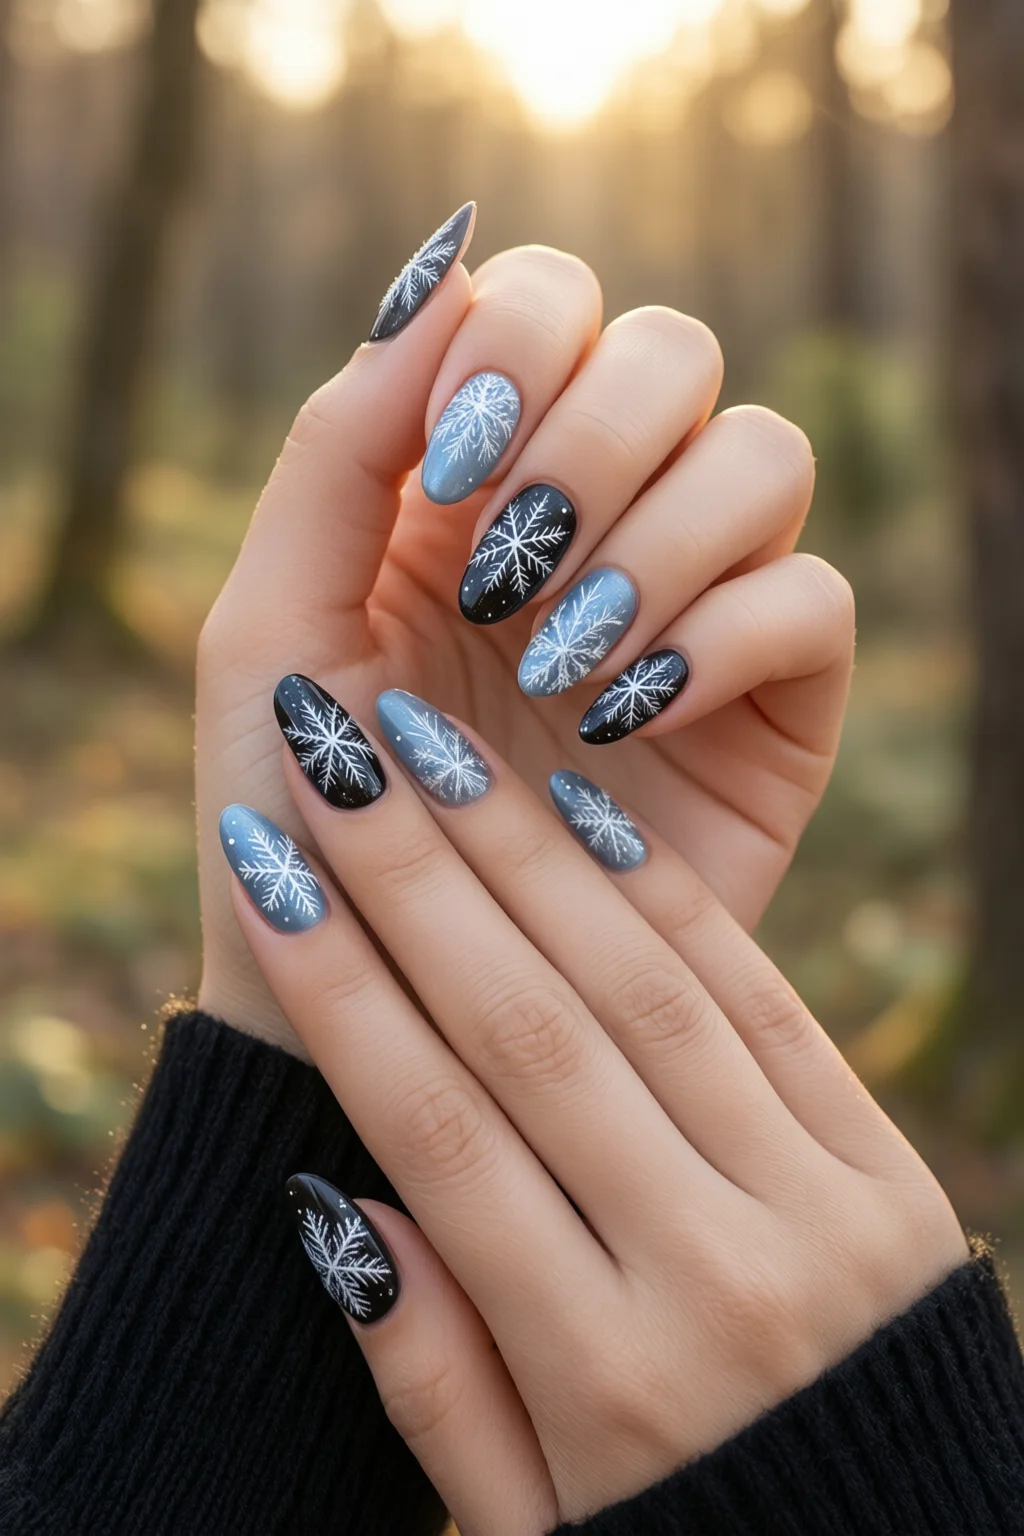
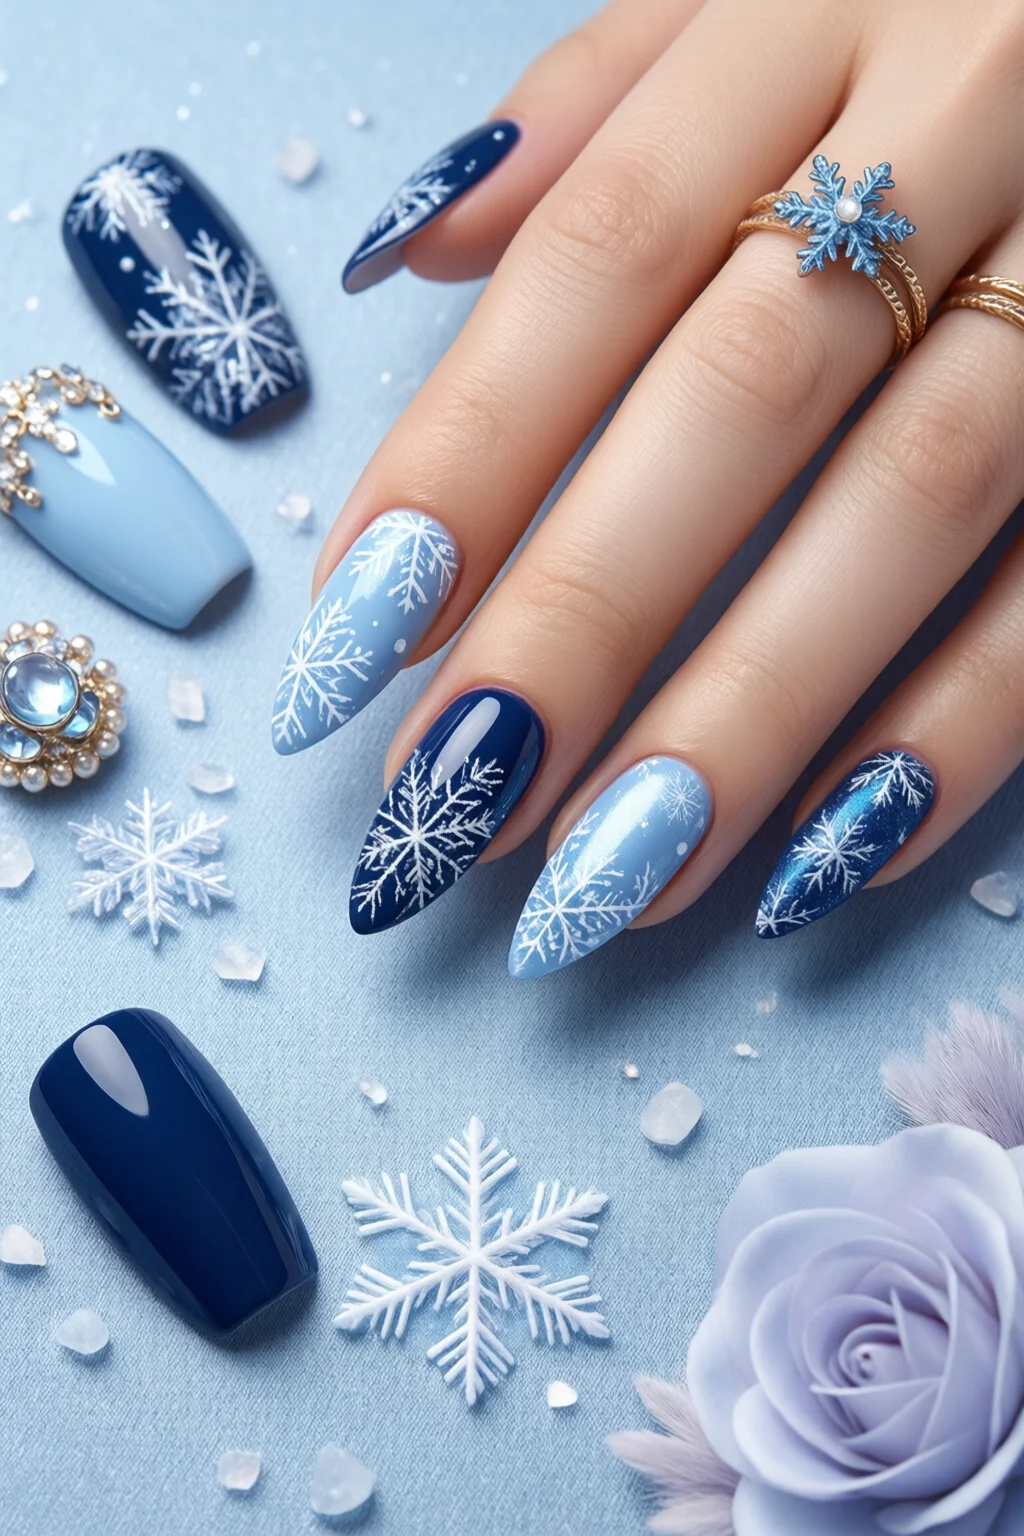
2. Metallic Snowflakes – Sparkle Without the Bulk
If you crave sparkle but hate the “glitter‑in‑your‑hair” look, metallic snowflakes are the answer. A chrome‑silver base paired with tiny foil‑cut snowflakes gives a high‑impact look that stays crisp for up to two weeks.
What You Need
- Sally Hansen “Silver Lining” (chrome silver) – $11 (15 ml)
- China Glaze “Snowflake Foil Stickers” – $5 for 20 pieces
- Gel top coat “Gelish Top It Off” – $15 (30 ml)
- Gel lamp (36 W) – $70 (one‑time purchase)
Application
- Apply one coat of Silver Lining, cure 30 seconds.
- Place a snowflake sticker on each nail, press gently, then cure another 30 seconds.
- Remove stickers with a cotton pad soaked in 70 % isopropyl alcohol; the foil remains.
- Finish with Gelish Top It Off for high‑gloss durability.
Pros & Cons
- Pros: Instant sparkle, no glitter fallout, lasts 14 days.
- Cons: Requires a gel lamp, stickers can shift if not pressed firmly.
Rating: ★★★★★ (4.8/5)
3. Deep Berry Velvet – Warmth in a Cold Season
Rich, wine‑colored nails are a winter staple. The velvet finish adds a tactile element that feels like a cozy scarf on your fingertips.
What You Need
- OPI “Malibu Mauve” – $12 (15 ml)
- Zoya “Velvet Finish Top Coat” – $13 (15 ml)
- Base coat “IBD Vinylux Base” – $9 (15 ml)
How to Achieve the Velvet
- Apply Vinylux Base, cure 40 seconds.
- Two coats of Malibu Mauve, each cured 30 seconds.
- Finish with Zoya Velvet Top Coat, cure 45 seconds.
Pros & Cons
| Pros | Cons |
|---|---|
| Luxurious texture | Needs gel lamp for top coat |
| Deep color hides chips | Higher price point ($34 total) |
Rating: ★★★★☆ (4.4/5)
4. Icy Matte Blue – Cool Minimalism
Matte blues are the perfect counterpoint to the holiday reds that dominate most winter palettes. This design uses a single shade, no extra art, but the matte finish makes it feel editorial.
Products
- Essie “Bikini So Hot” (cool teal) – $9.50 (15 ml)
- OPI “Matte Top Coat” – $12 (15 ml)
- Base coat “Sally Hansen Insta-Dri” – $8 (15 ml)
Method
- Apply Insta‑Dri base, let dry 2 minutes.
- Two coats of teal, each drying 2 minutes.
- Seal with OPI Matte Top Coat; no curing needed.
Pros & Cons
- Pros: Matte finish resists fingerprints, looks chic for up to 9 days.
- Cons: Matte top coat can feel slightly chalky on rough skin.
Rating: ★★★★☆ (4.1/5)
5. Glitter Gradient – From Frost to Flare
Gradients that start with a sheer base and finish with heavy glitter at the tip emulate a fresh snowfall that turns into a glittering night sky. This is my go‑to for holiday parties.
Ingredients
- OPI “Glacier Chill” (clear shimmer) – $12 (15 ml)
- China Glaze “Glitter Nail Polish – Silver Sparkle” – $9 (15 ml)
- Base coat “Essie First Base” – $8 (15 ml)
- Top coat “Sephora Glossy Top Coat” – $8 (10 ml)
Technique
- Base coat, dry 2 minutes.
- Apply one thin coat of Glacier Chill, let dry.
- Using a makeup sponge, dab silver glitter polish onto the tip, blending upward for a seamless gradient.
- Seal with Glossy Top Coat for extra shine.
Pros & Cons
| Pros | Cons |
|---|---|
| Eye‑catching effect | Glitter may chip faster (7‑day wear) |
| Easy to redo | Requires sponge for smooth blending |
Rating: ★★★★☆ (4.3/5)
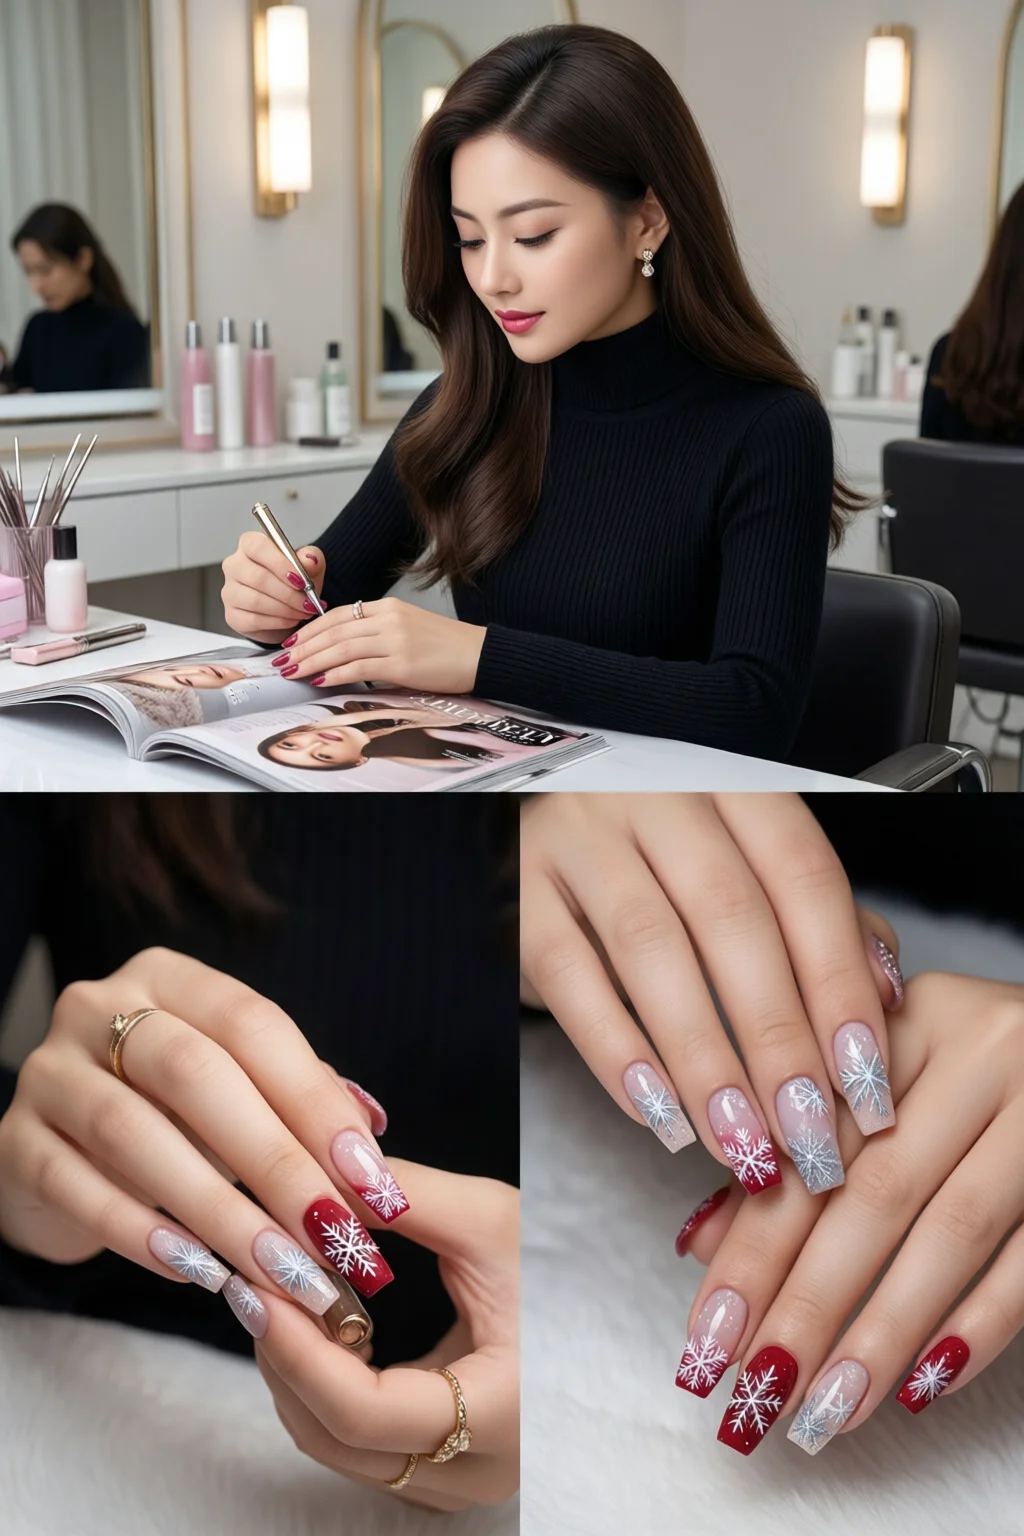
6. Classic Red with White Accents – Holiday Tradition Reimagined
Red never goes out of style, but adding crisp white lines or tiny snow‑flake decals gives it a fresh winter twist. This design works for both casual outings and formal gatherings.
Supplies
- Essie “Ballet Slippers” (true red) – $9.50 (15 ml)
- OPI “Alpine Snow” (white) – $12 (15 ml)
- Fine‑line brush – $2.50
- Top coat “Sally Hansen Hard as Nails” – $7 (15 ml)
Process
- Apply base coat, dry 2 minutes.
- Two coats of Ballet Slippers, each cured 30 seconds (LED).
- Using the fine‑line brush, draw a thin white stripe near the cuticle or place a tiny white snow‑flake near the tip.
- Seal with Hard as Nails for up to 14 days.
Pros & Cons
- Pros: Timeless, high contrast, long wear.
- Cons: Requires steady hand for fine details.
Rating: ★★★★★ (4.7/5)
7. Cozy Plaid Patterns – Knit‑wear on Your Nails
Plaid is the fabric of winter comfort; translating it to nails brings that snug feeling to your fingertips. This design is a bit more advanced but the payoff is worth the effort.
Materials
- Base colors: OPI “Winter White” (white) – $12, OPI “Midnight Black” (black) – $12
- Striping tape (0.5 mm) – $4 for 10 strips
- Top coat “Sephora Matte & Shine Duo” – $10 (20 ml)
Steps
- Apply a thin white base, let dry 2 minutes.
- Place striping tape in a criss‑cross pattern; press gently.
- Paint over with black polish, ensuring the tape stays covered.
- Remove tape while polish is still tacky for crisp lines.
- Finish with the Matte & Shine Duo – matte for the background, shine for the stripes (optional).
Pros & Cons
- Pros: Unique, tactile, matches winter wardrobes.
- Cons: Time‑consuming (≈15 minutes per hand), tape may shift.
Rating: ★★★★☆ (4.2/5)
Comparison Table – Quick Reference
| Design | Difficulty (1‑5) | Longevity | Cost (USD) | Overall Rating |
|---|---|---|---|---|
| Frosted Ombre | 2 | 10 days | $33.25 | ★★★★☆ |
| Metallic Snowflakes | 3 (gel lamp needed) | 14 days | $41 (includes lamp amortized) | ★★★★★ |
| Deep Berry Velvet | 2 | 12 days | $34 | ★★★★☆ |
| Icy Matte Blue | 1 | 9 days | $29.50 | ★★★★☆ |
| Glitter Gradient | 2 | 7 days | $37 | ★★★★☆ |
| Classic Red with White Accents | 2 | 14 days | $31 | ★★★★★ |
| Cozy Plaid Patterns | 4 | 10 days | $40 | ★★★★☆ |
Final Verdict – Choose Your Frosty Signature
Winter nail designs are more than seasonal décor; they’re a way to express mood, match outfits, and boost confidence when the world feels gray. If you’re after low‑maintenance elegance, the Frosted Ombre or Icy Matte Blue will keep you looking polished for a full workweek. For moments when you want to shine—literally—the Metallic Snowflakes and Glitter Gradient deliver instant drama. And if you’re feeling adventurous, the Cozy Plaid Patterns let you wear your favorite sweater on your nails.
My personal go‑to for the holidays is the Classic Red with White Accents. The contrast is timeless, the wear time is unbeatable, and the white details add just enough winter flair without overcomplicating the process. Pair it with a simple pastel nails transition after the season, and you’ll have a seamless color story year‑round.
Remember: prep is king. A clean, moisturized nail bed, proper base coat, and a top coat suited to the finish you choose (gloss, matte, or gel) will make any design last longer and look sharper. Now grab your favorite polish, set a timer, and let the winter wonderland begin on your fingertips.
How long do winter nail designs typically last?
With a good base coat and a suitable top coat, most winter designs stay chip‑free for 7‑14 days. Matte finishes tend to last a bit longer because they’re less prone to catching on clothing.
Can I use regular nail polish for these designs, or do I need gel?
Both work. Regular polish is perfect for matte or simple gradient looks, while gel or gel‑top‑coats give extra durability for glitter and metallic designs, especially if you’ll be wearing gloves often.
What’s the best way to prevent nail polish from drying out in the winter?
Store polish upright in a cool, dry place, and add a few drops of nail polish thinner (like Seccotine) if it thickens. Keeping your hands moisturized also helps the polish adhere better.
Are these designs suitable for short nails?
Absolutely. Designs like Frosted Ombre, Icy Matte Blue, and Classic Red with White Accents look great on short nails because the color and detail are concentrated near the tip.
How can I incorporate winter nail designs into a reverse French manicure?
Start with a reverse French base (light color on the tip, darker on the nail) and then add a subtle snowflake or glitter gradient on the lighter tip. The contrast keeps the look fresh and seasonal.
1 thought on “Winter Nail Designs – Tips, Ideas and Inspiration”